RedInk: AI Powered Answer Script Valuation Agent
RedInk: AI Powered Answer Script Valuation Agent
Say goodbye to manual valuation! RedInk is an innovative AI-powered app that revolutionizes how you correct handwritten answer sheets. Simply upload PDF documents of student answer sheets, the question paper, and the answer key. RedInk's advanced AI will then instantly analyze, correct, and provide feedback, saving you valuable time and ensuring accurate evaluations. It's perfect for teachers, educators, and tutors looking to streamline their valuation process.
Payment and delivery
Please Download the app from Google Play Store for FREE.

Features
RedInk encompasses several features, such as:
Intelligent Answer Analysis
AI analyzes handwritten answers for content accuracy, structure, and completeness
Automated Scoring Engine
Machine learning algorithms provide consistent and fair scoring based on rubrics
Handwriting Recognition
Advanced OCR technology converts handwritten text to digital format
Real-time Feedback
Instant suggestions for improvement while grading
Writing Quality Assessment
Evaluates grammar, vocabulary, and presentation
Subject-Specific Evaluation
Specialized algorithms for different subjects (Math, Science, Literature)
Cloud Sync
Access your work from any device
Student Portal
Students can view detailed feedback on their performance
Reports
Teachers can download class performance reports as well individual performance report for each student.
Featured Screens
Screenshots of RedInk AI-powered answer script evaluation app
Frequently Asked Questions
Welcome to our FAQ section! Here you will find answers to the most common questions about RedInk AI-powered answer script evaluation. If you have a question that is not answered here, please feel free to contact us.
What file formats does RedInk support for answer sheet uploads?
RedInk supports PDF format for uploading answer sheets, question papers, and answer keys. Make sure your documents are clear and legible for best AI evaluation results.
How accurate is RedInk's AI evaluation?
RedInk uses advanced AI algorithms to provide highly accurate evaluations. However, we recommend teachers review and adjust scores as needed, especially for subjective answers and complex mathematical solutions.
Can students access their results directly?
Yes! Students can log into RedInk using their credentials and view detailed feedback on their performance, including marks obtained, percentage, and specific feedback for each answer.
Is RedInk free to use?
Yes, RedInk is completely FREE to download and use. You can create classrooms, upload answer sheets, and generate AI evaluations at no cost.
How do I create a classroom and add students?
After logging in as a teacher, click "Create Classroom" on the My Classrooms screen. Enter the classroom details, then use the generated join code to invite students via WhatsApp or other messaging apps.
Can I edit the AI-generated scores and feedback?
Absolutely! Teachers can review and modify AI-generated scores, feedback, and marks for individual answers. Click the pencil icon in the student results screen to make adjustments.
What subjects does RedInk support?
RedInk supports evaluation across multiple subjects including Mathematics, Science, Literature, Social Studies, and more. The AI adapts its evaluation criteria based on the subject category you select.
How do I download student performance reports?
You can download individual student reports as PDF by clicking the PDF icon in the student results screen. Class performance reports and analytics are available in the Overall Feedback section.
In the News
RedInk AI featured in leading publication

Featured in Kerala Kaumudi daily
RedInk AI's revolutionary answer script evaluation technology covered by leading Malayalam daily
How to Use RedInk
Step-by-step guide to get started with RedInk AI-powered answer script valuation
Teacher's Guide
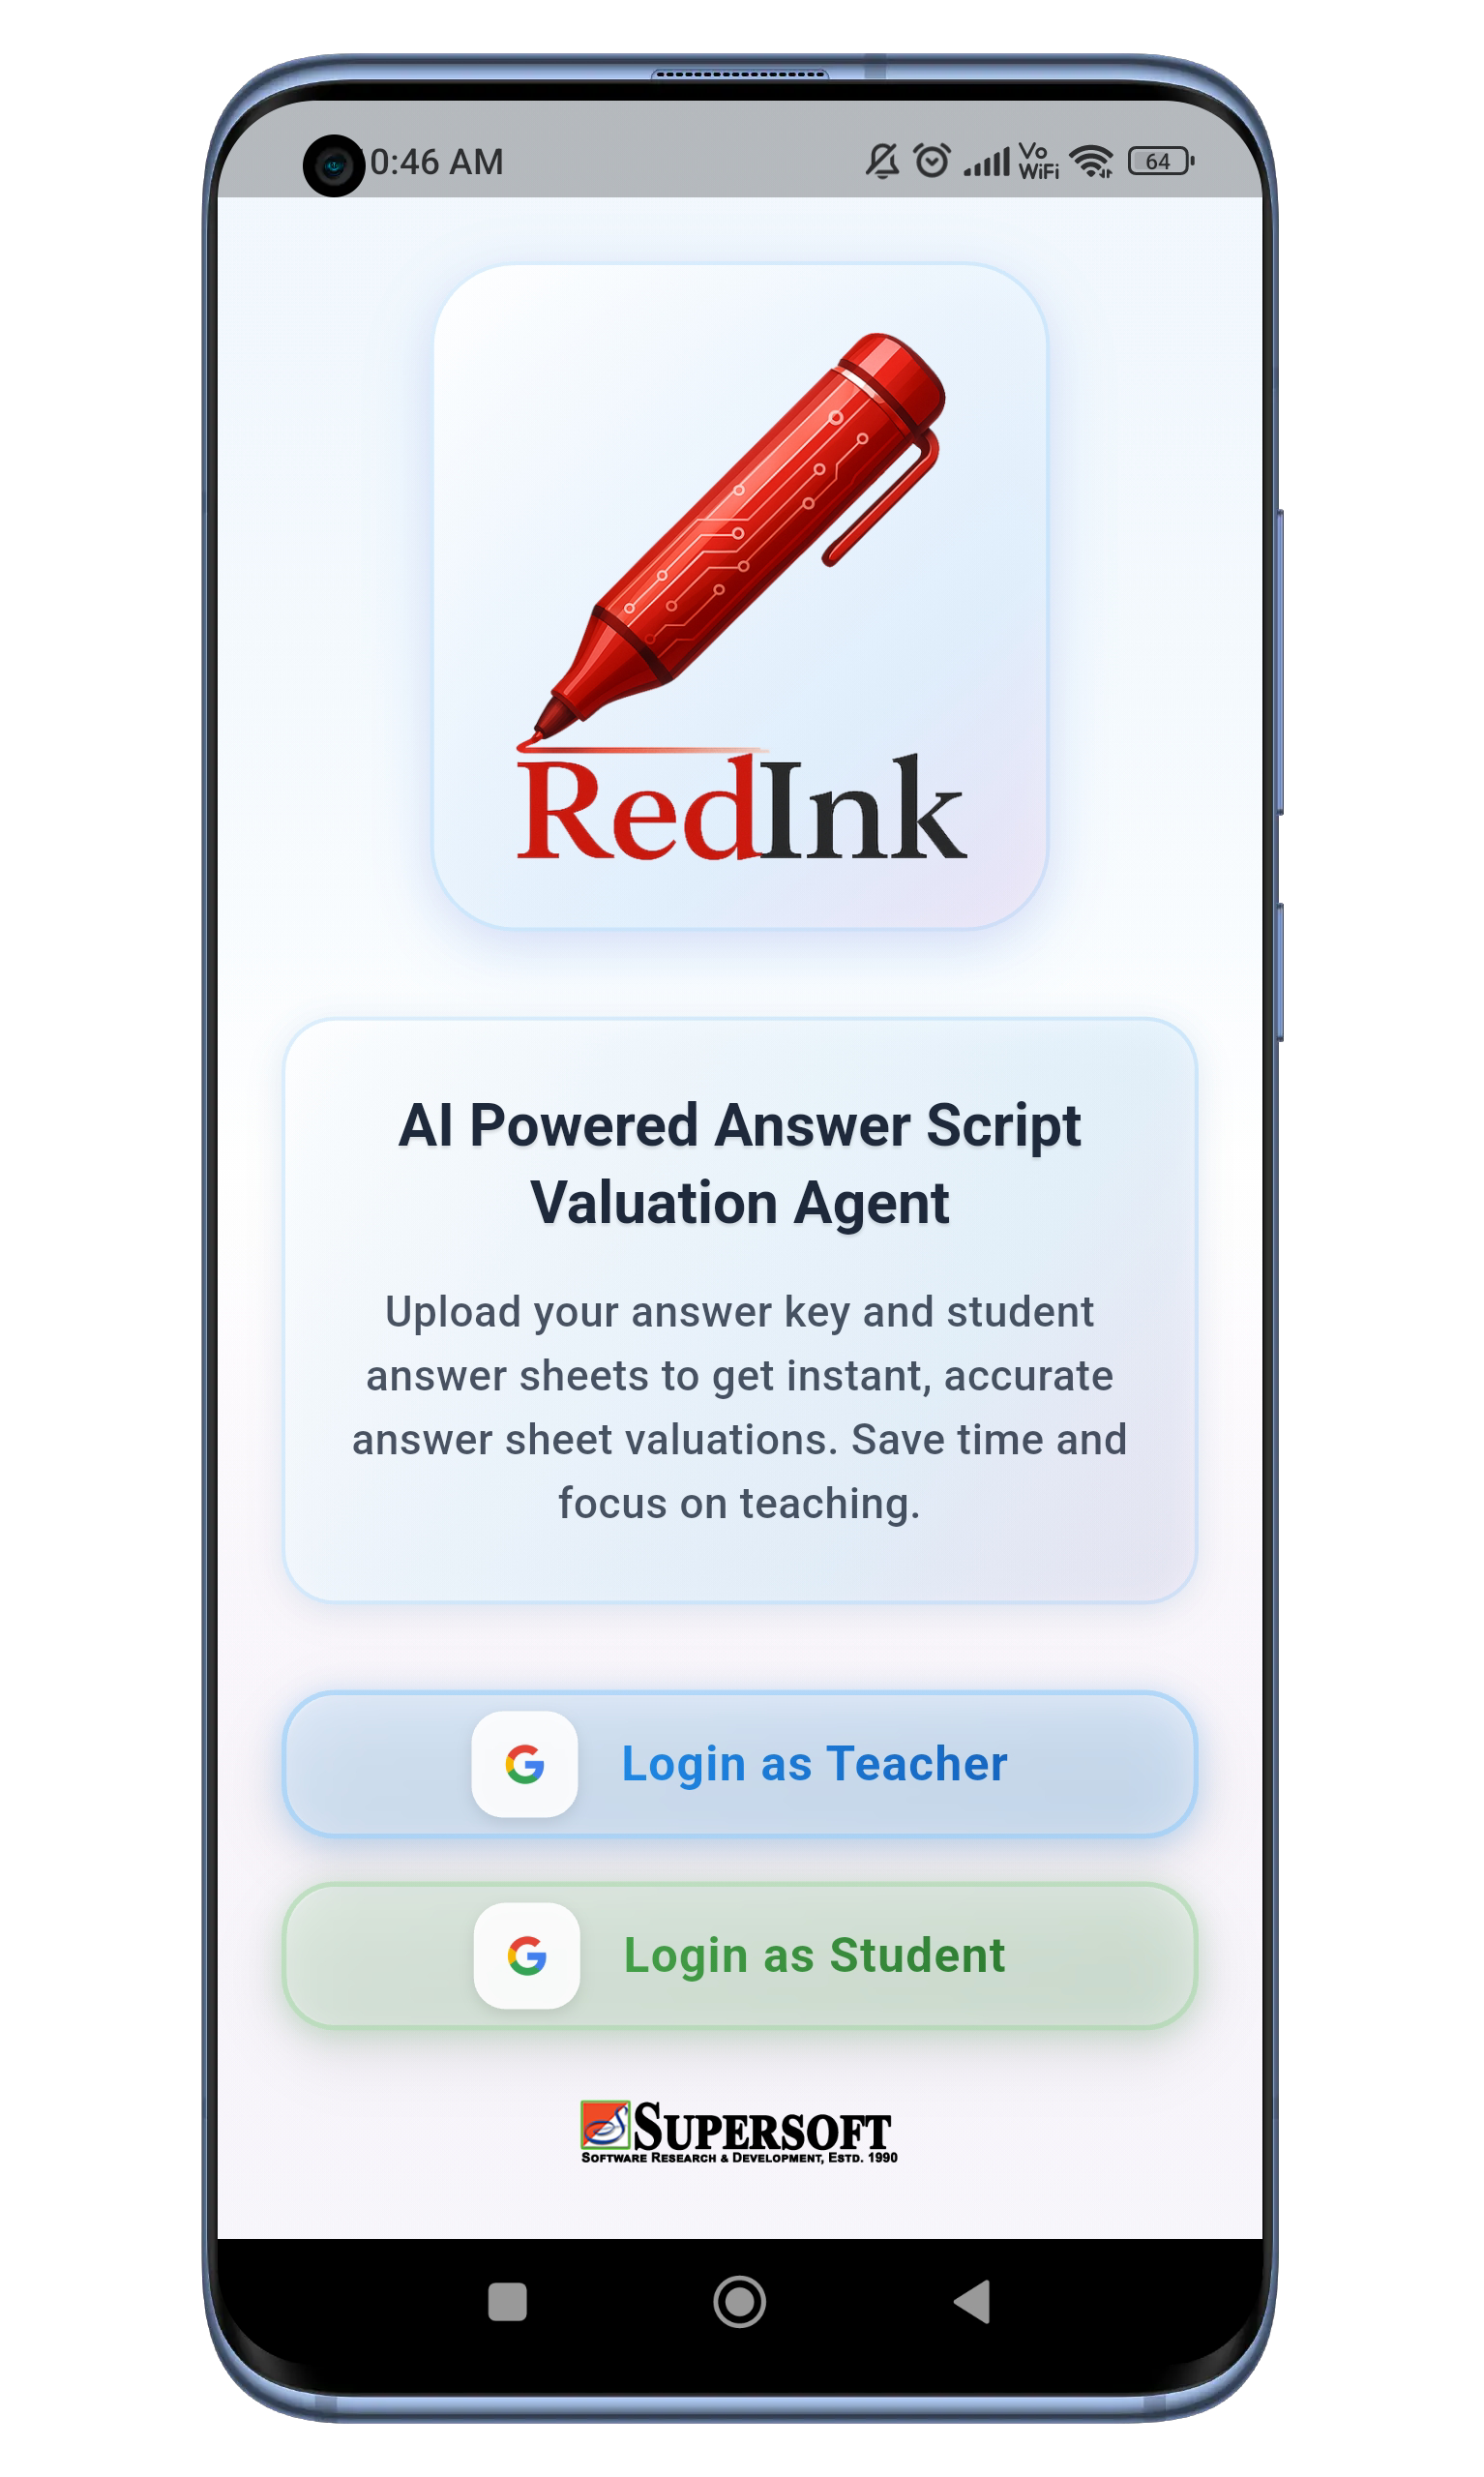
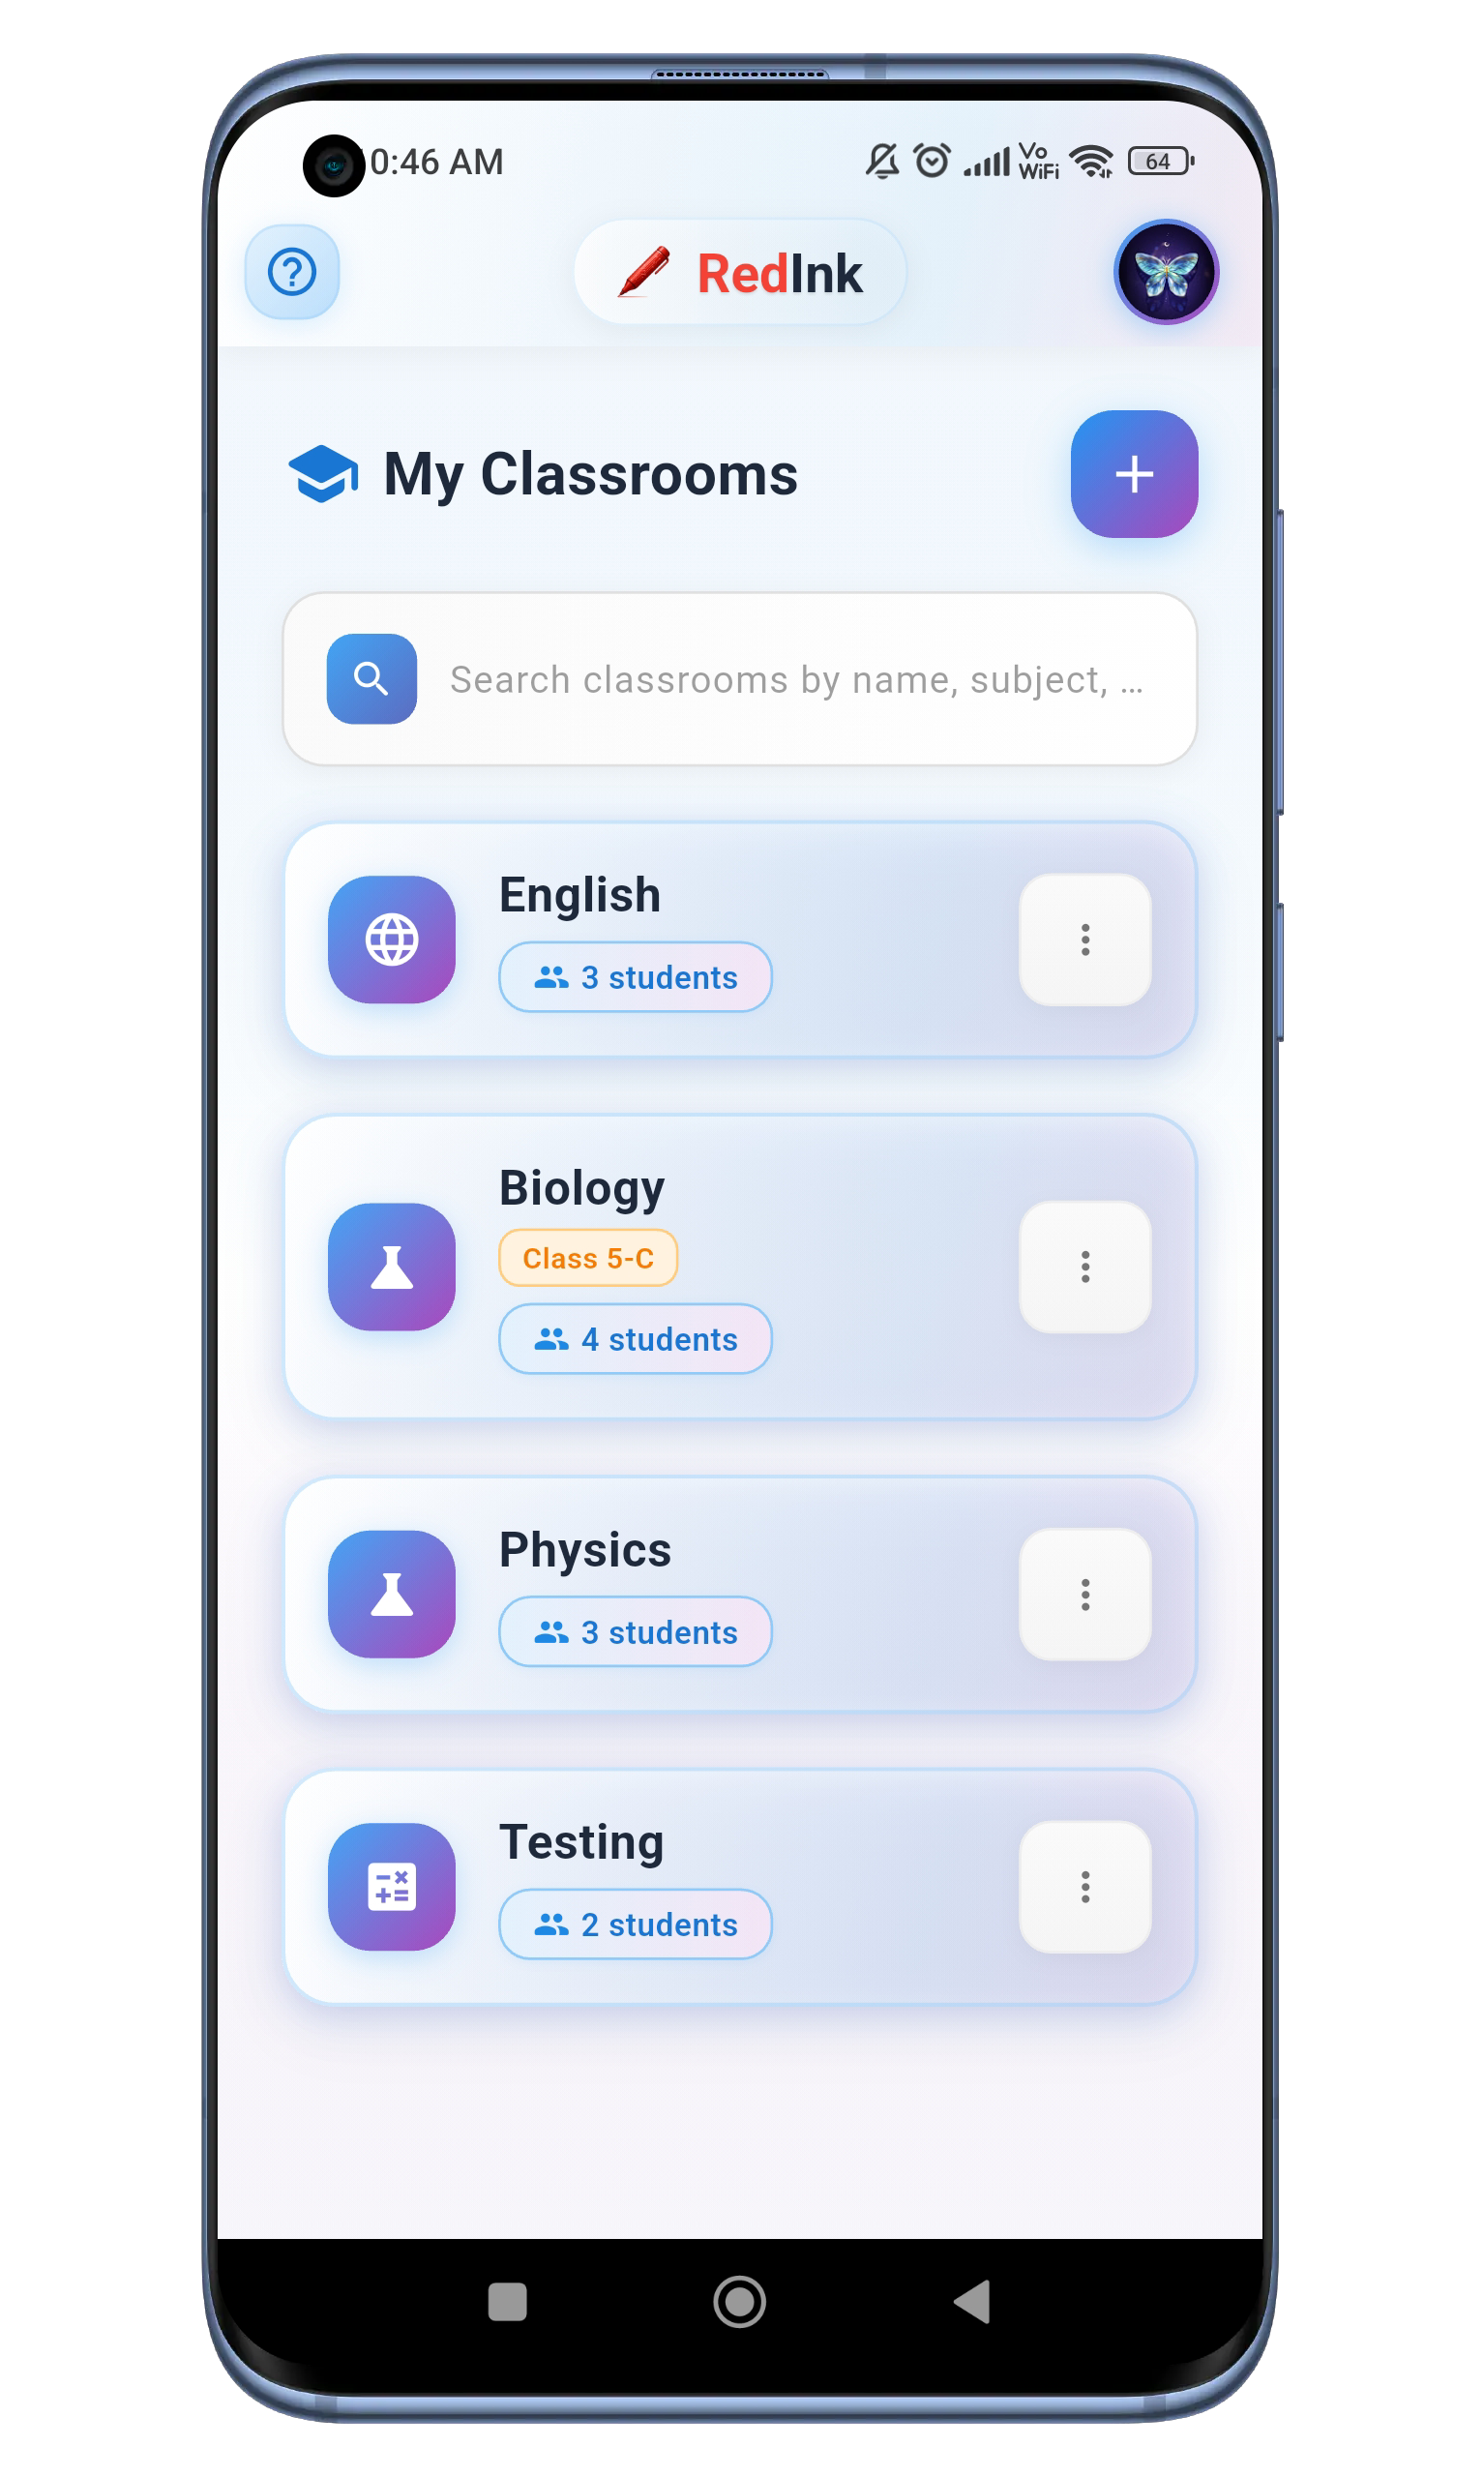
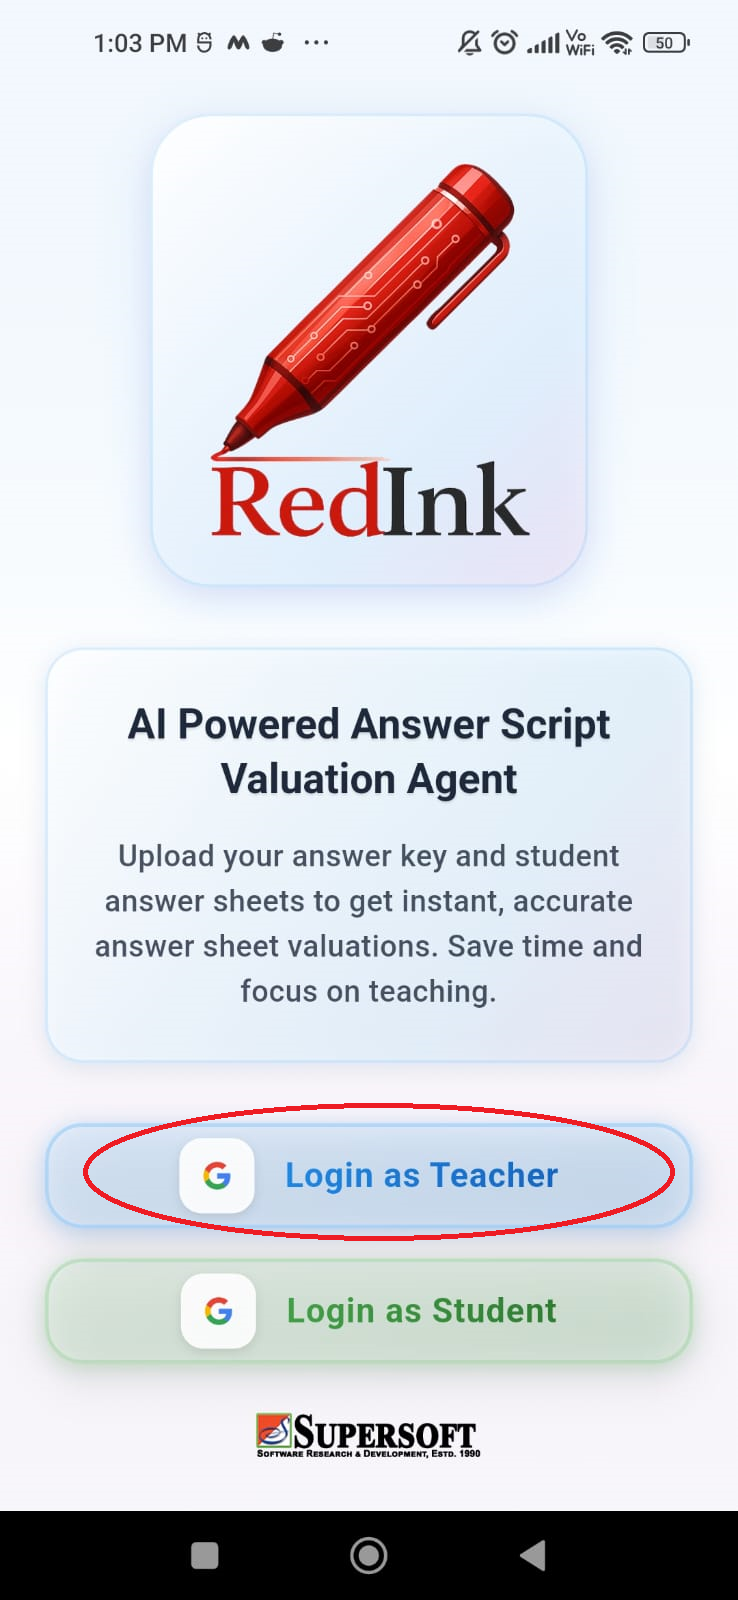
Login to RedInk & Create new Classroom
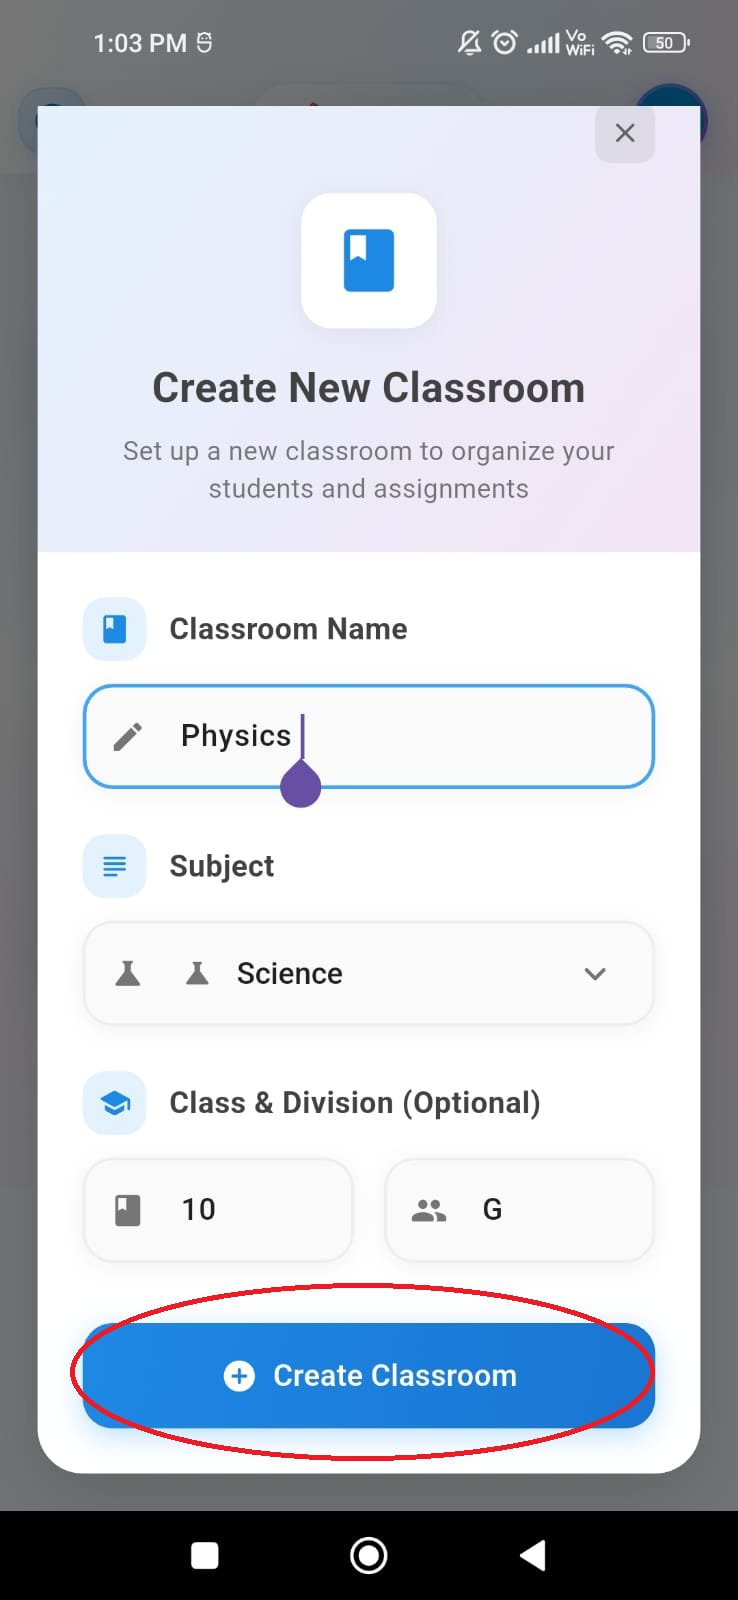
To create a new classroom, first click the "Login as a Teacher" button. After logging in, you'll be on the "My Classrooms" screen. From there, click the "Create Classroom" button.
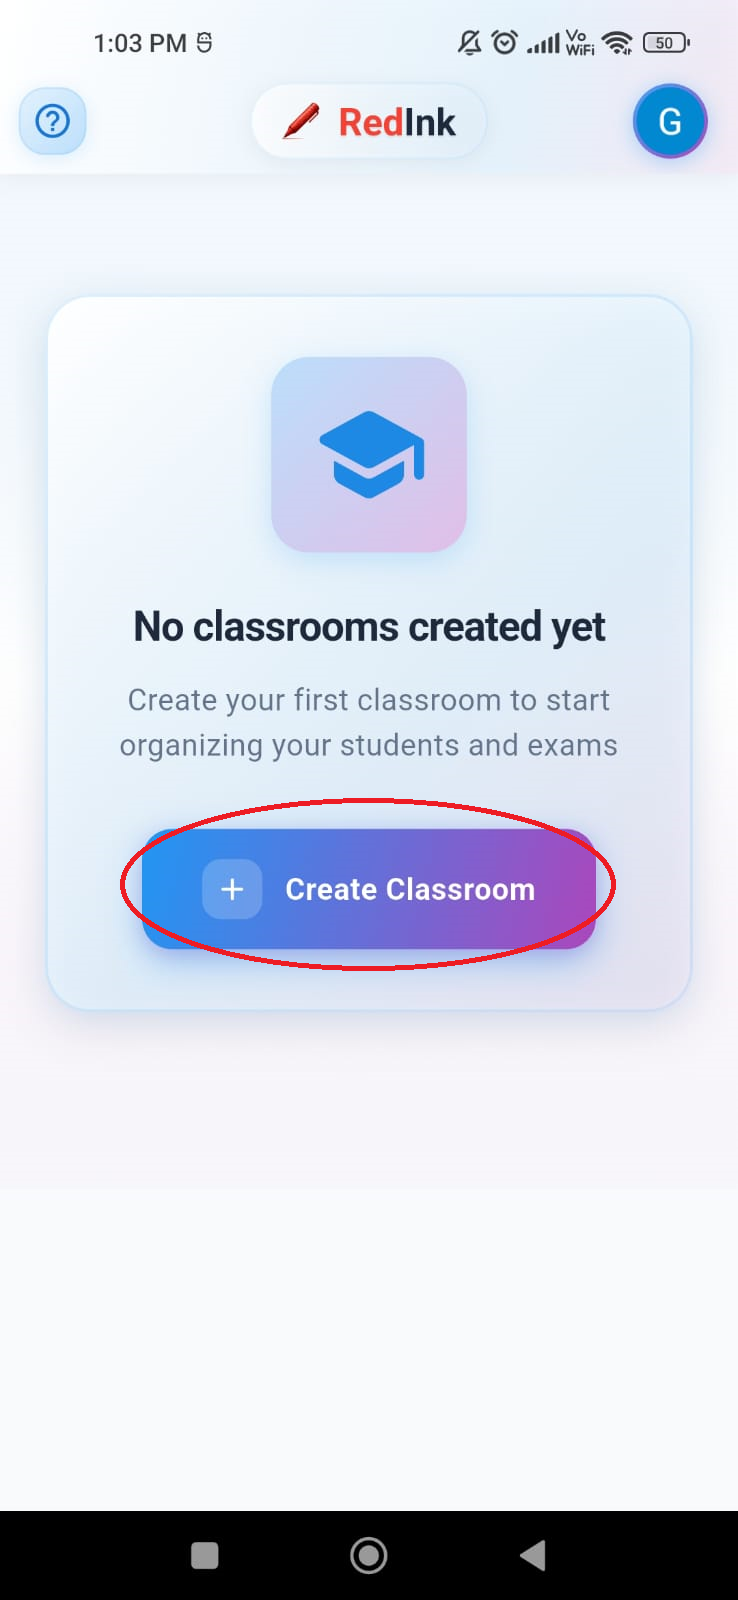
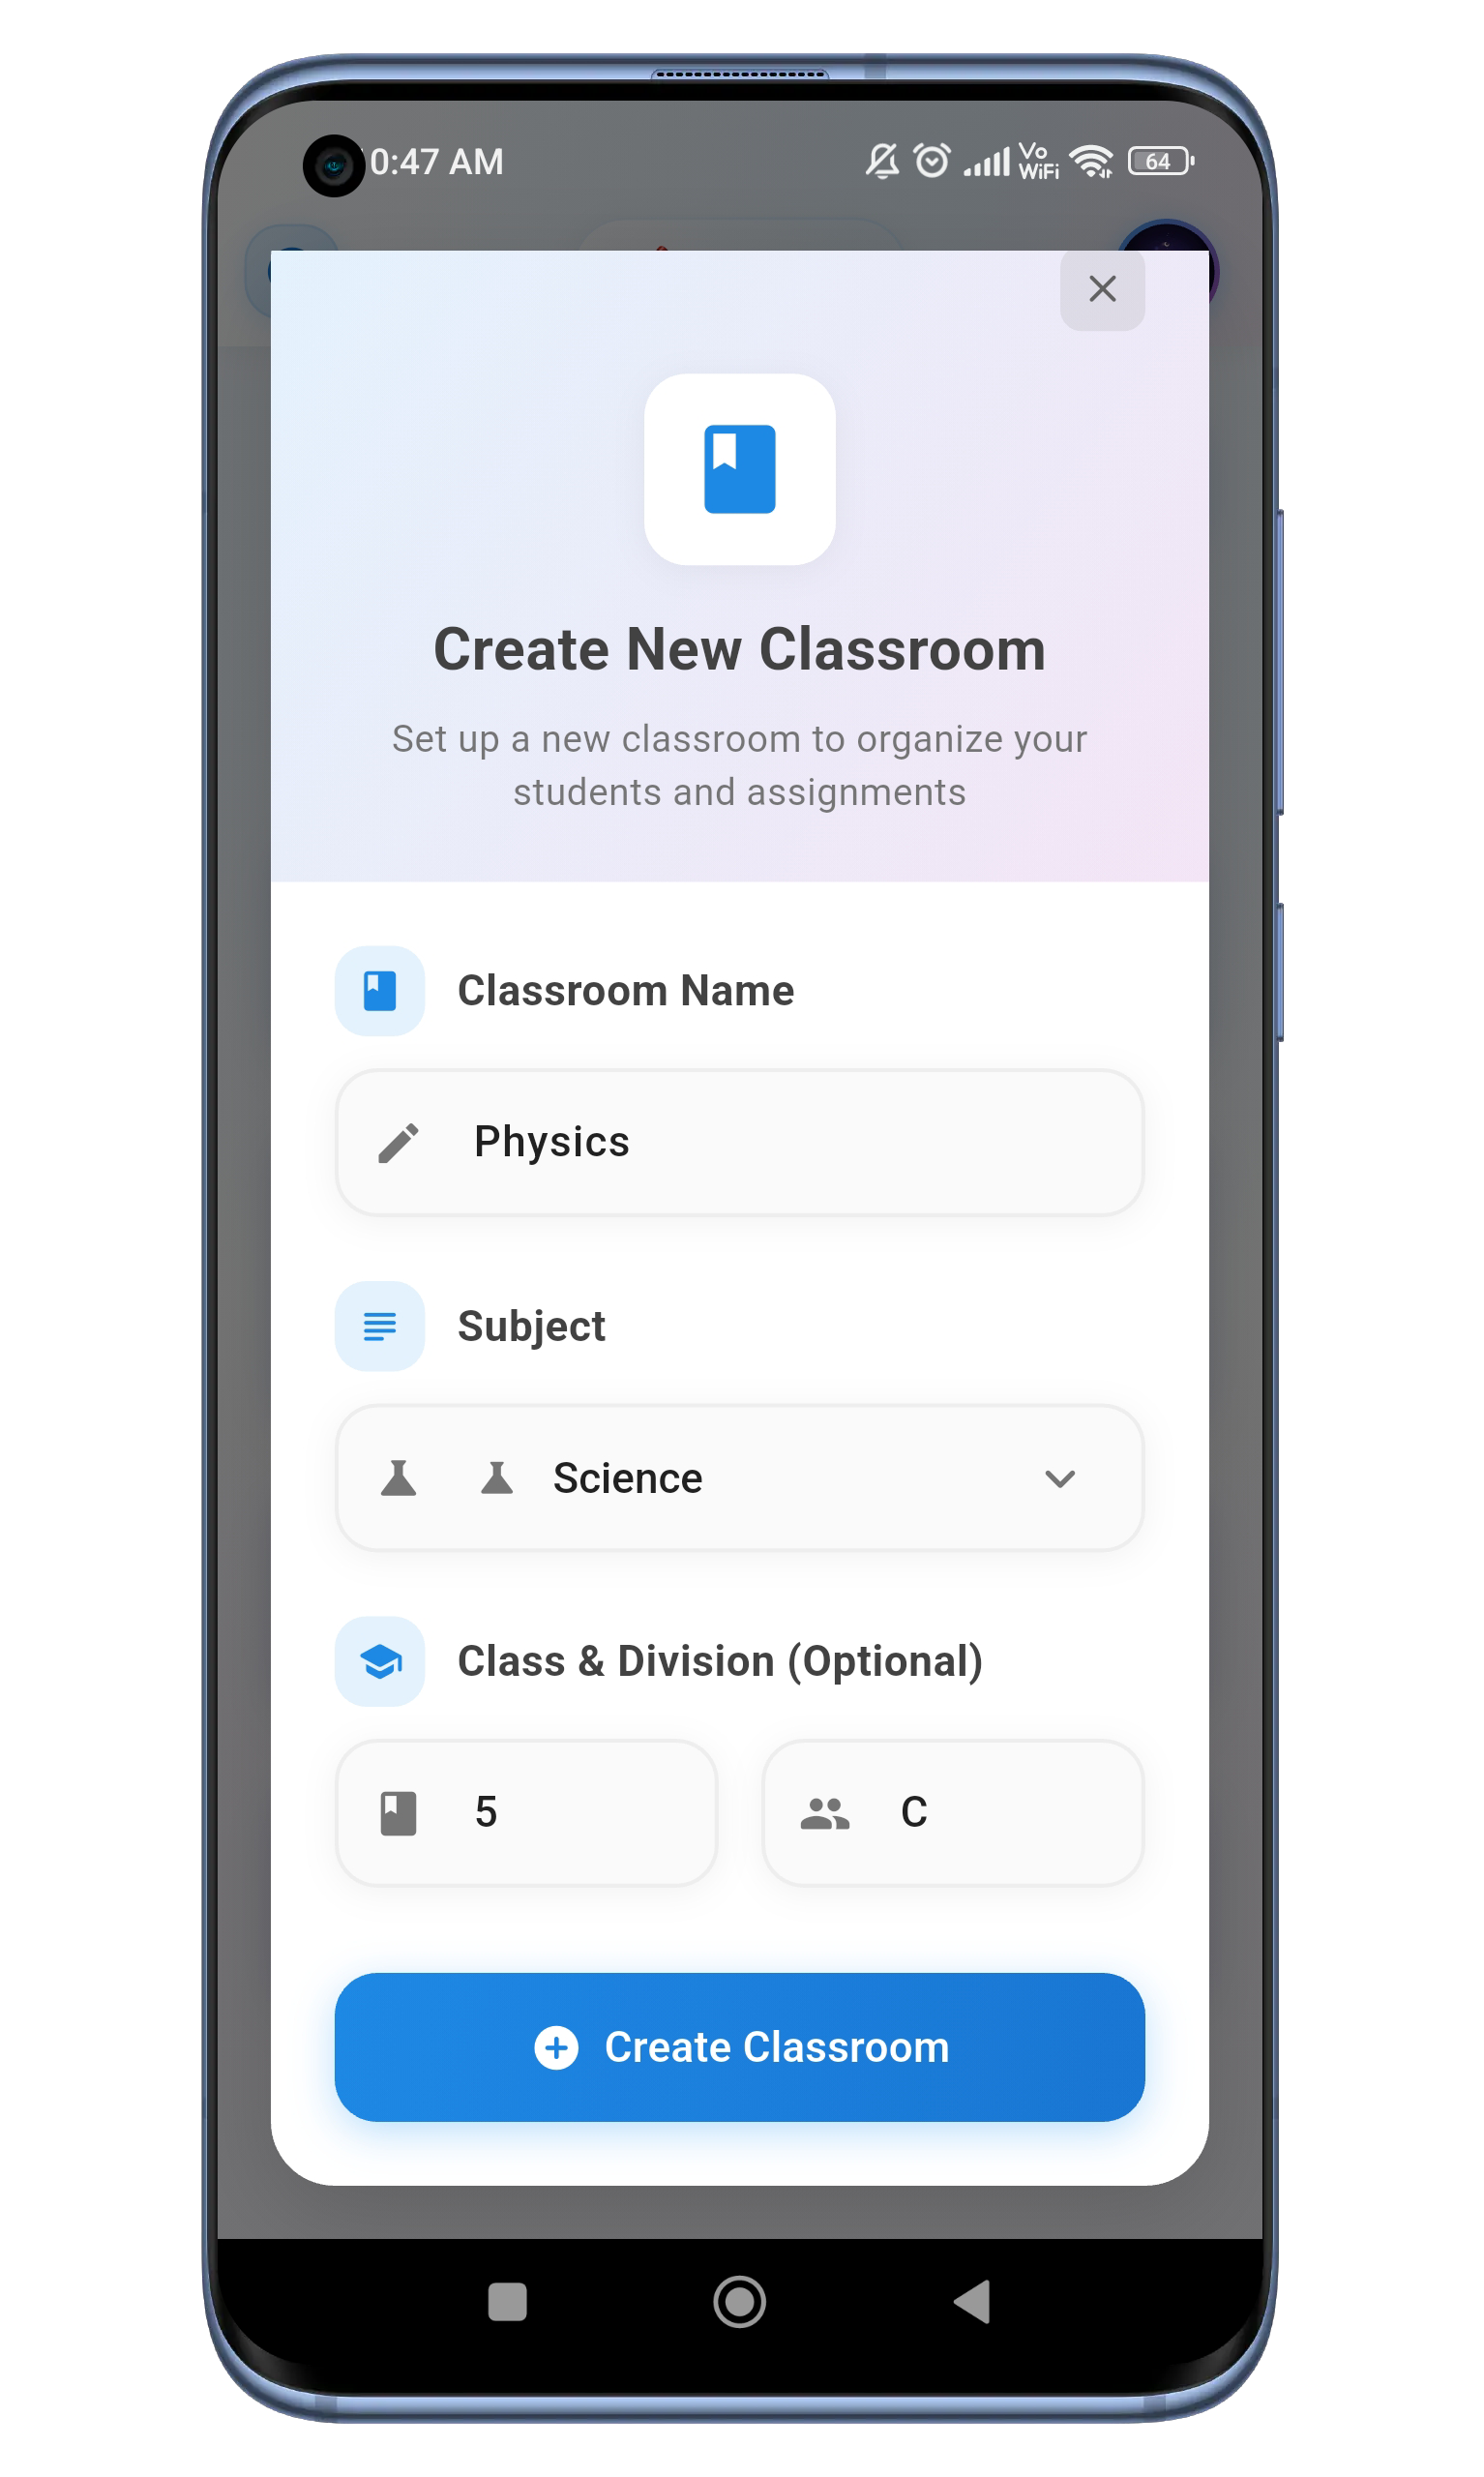
Creating a Classroom
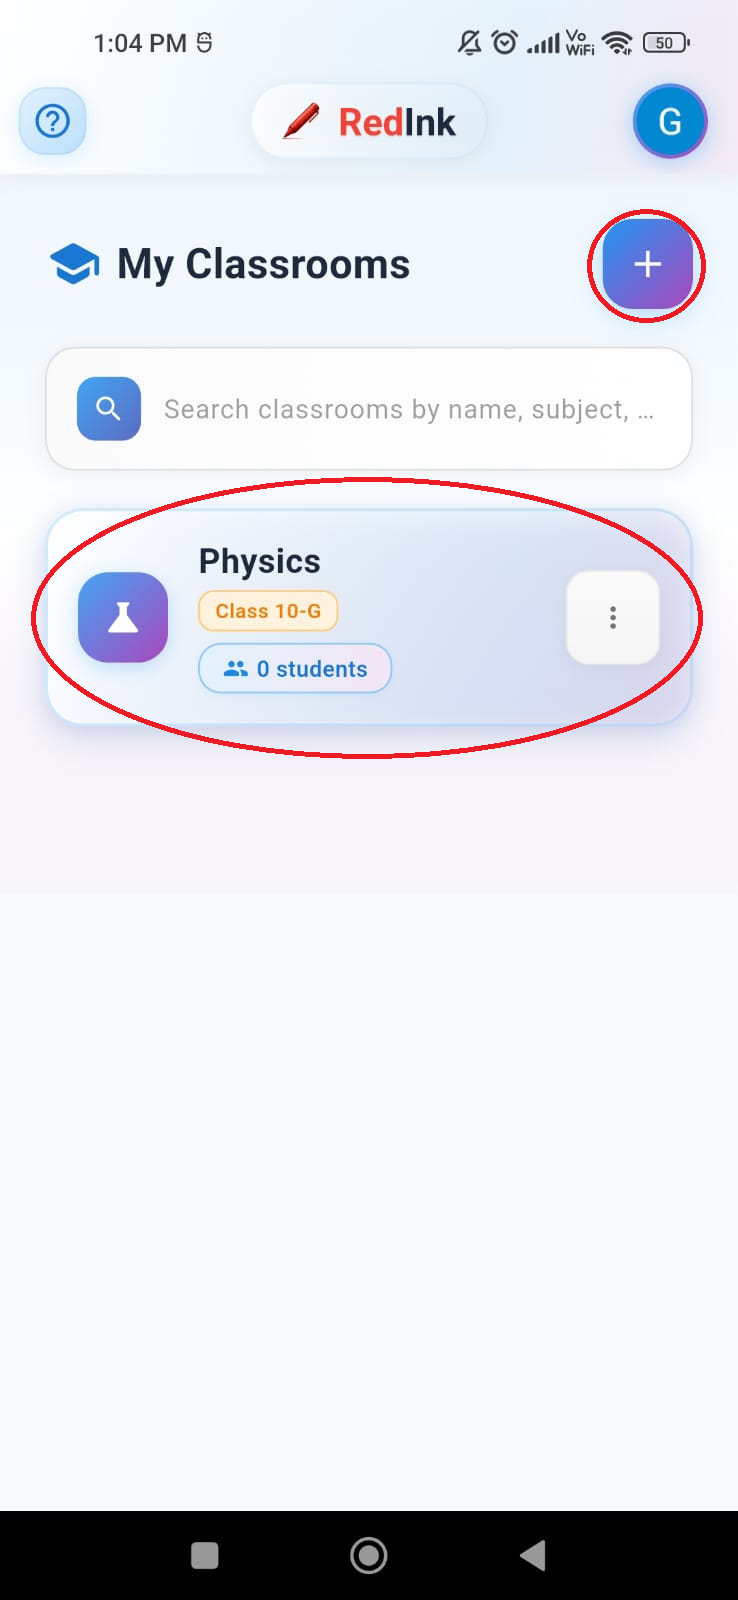
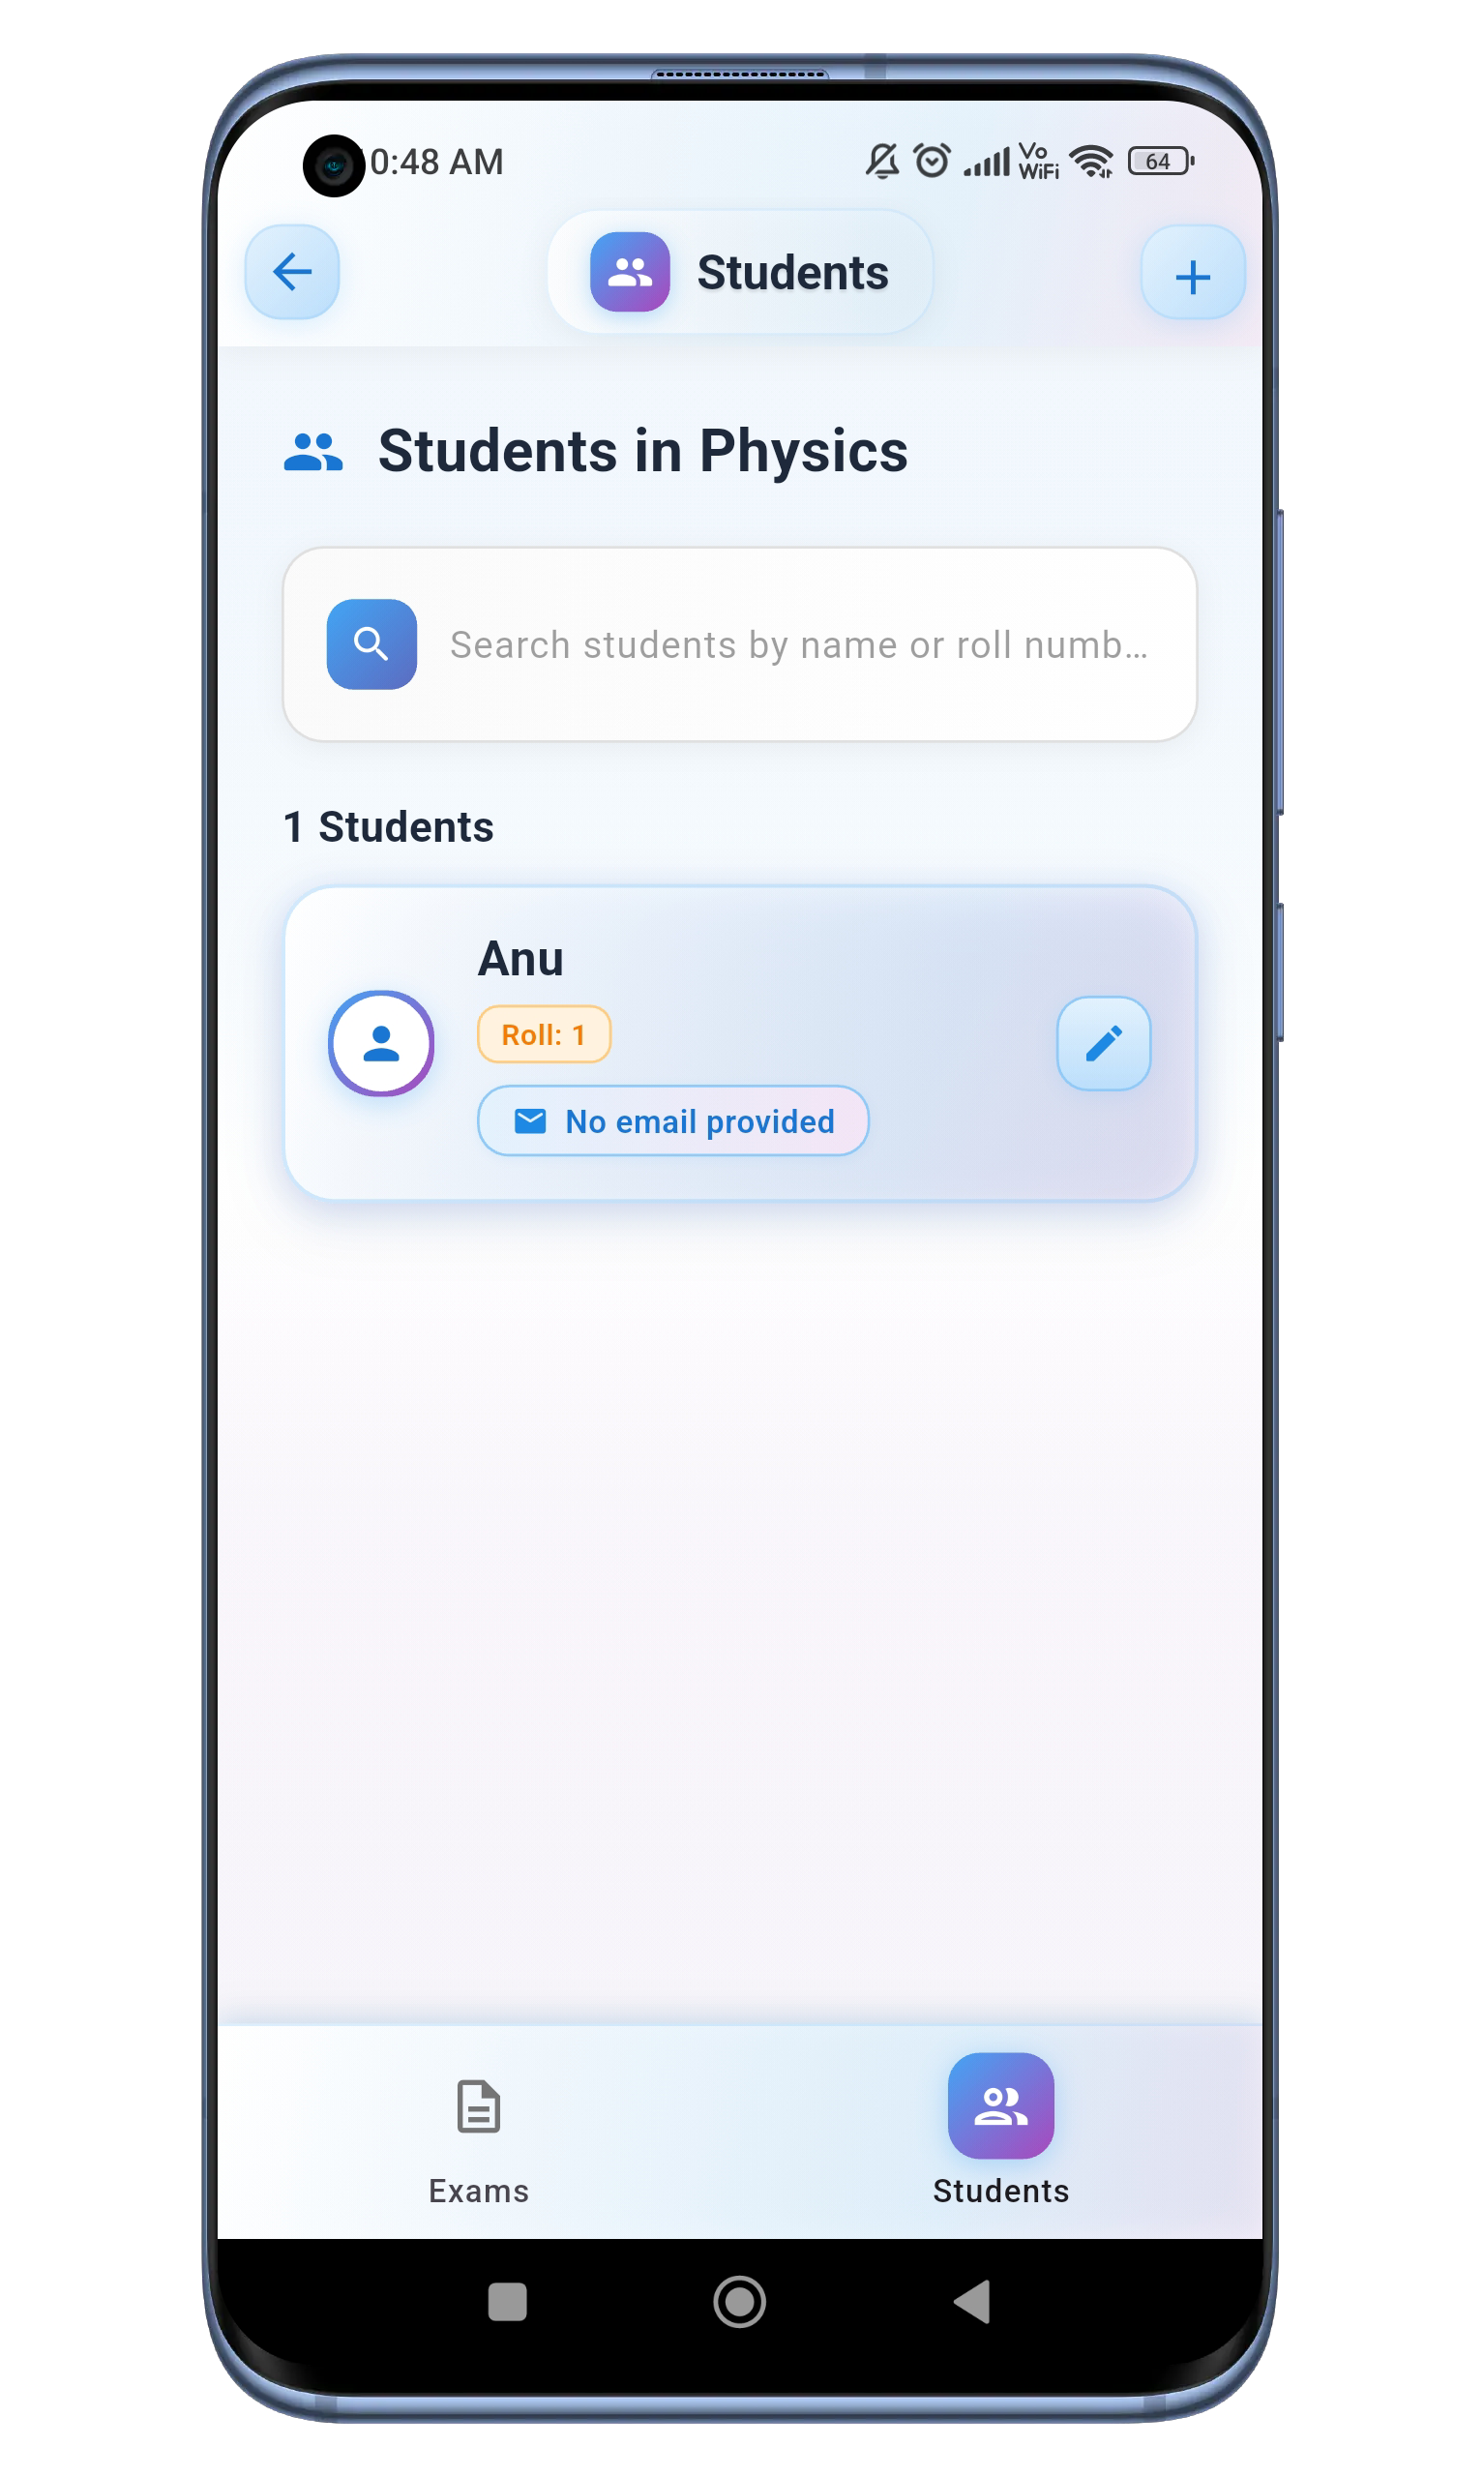
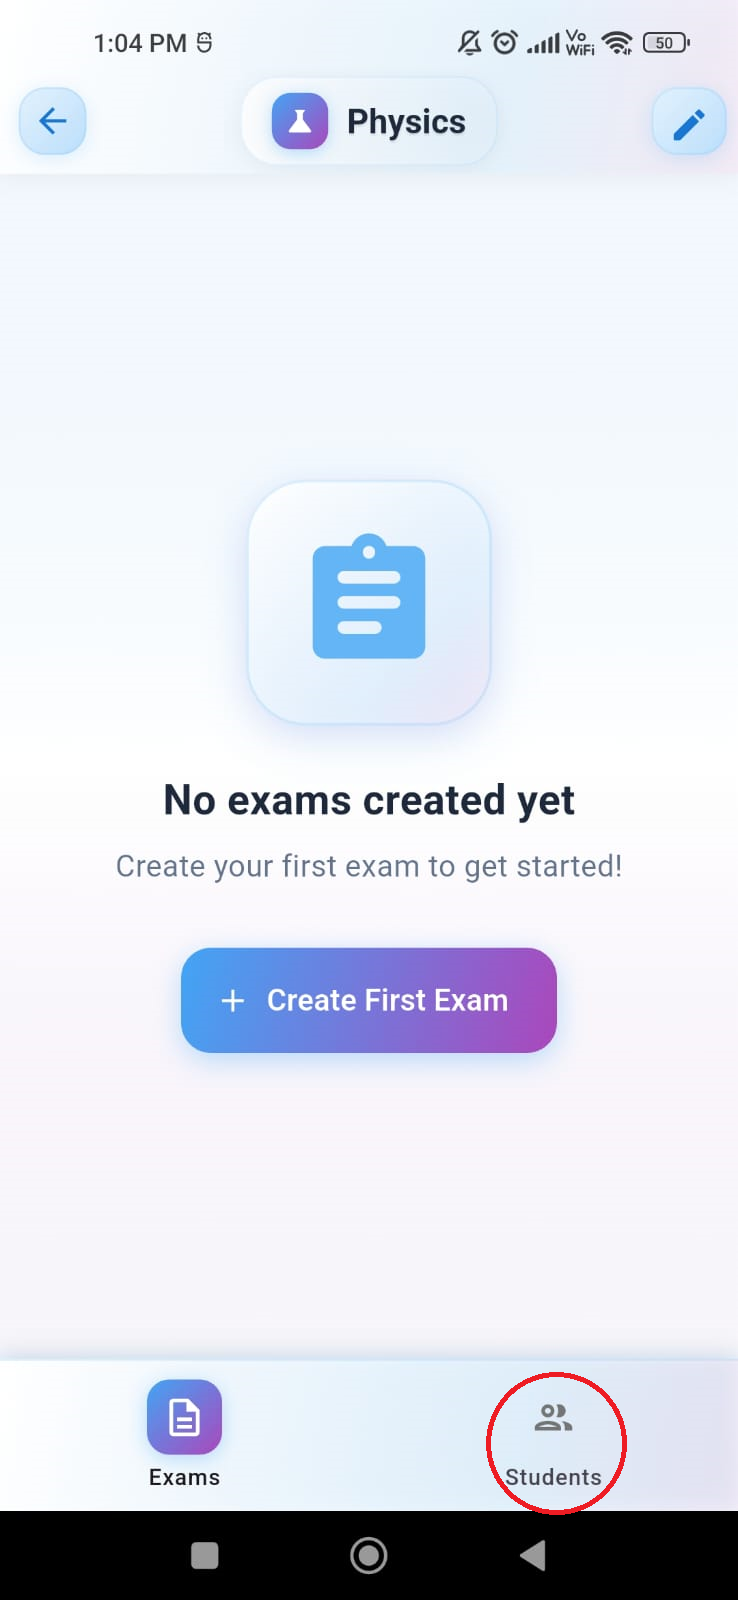
Navigating to Students Tab
Next, tap the 'Students' tab in the bottom navigation bar to go to the students page. To add new students, tap the '+' icon in the top right corner of the app bar.
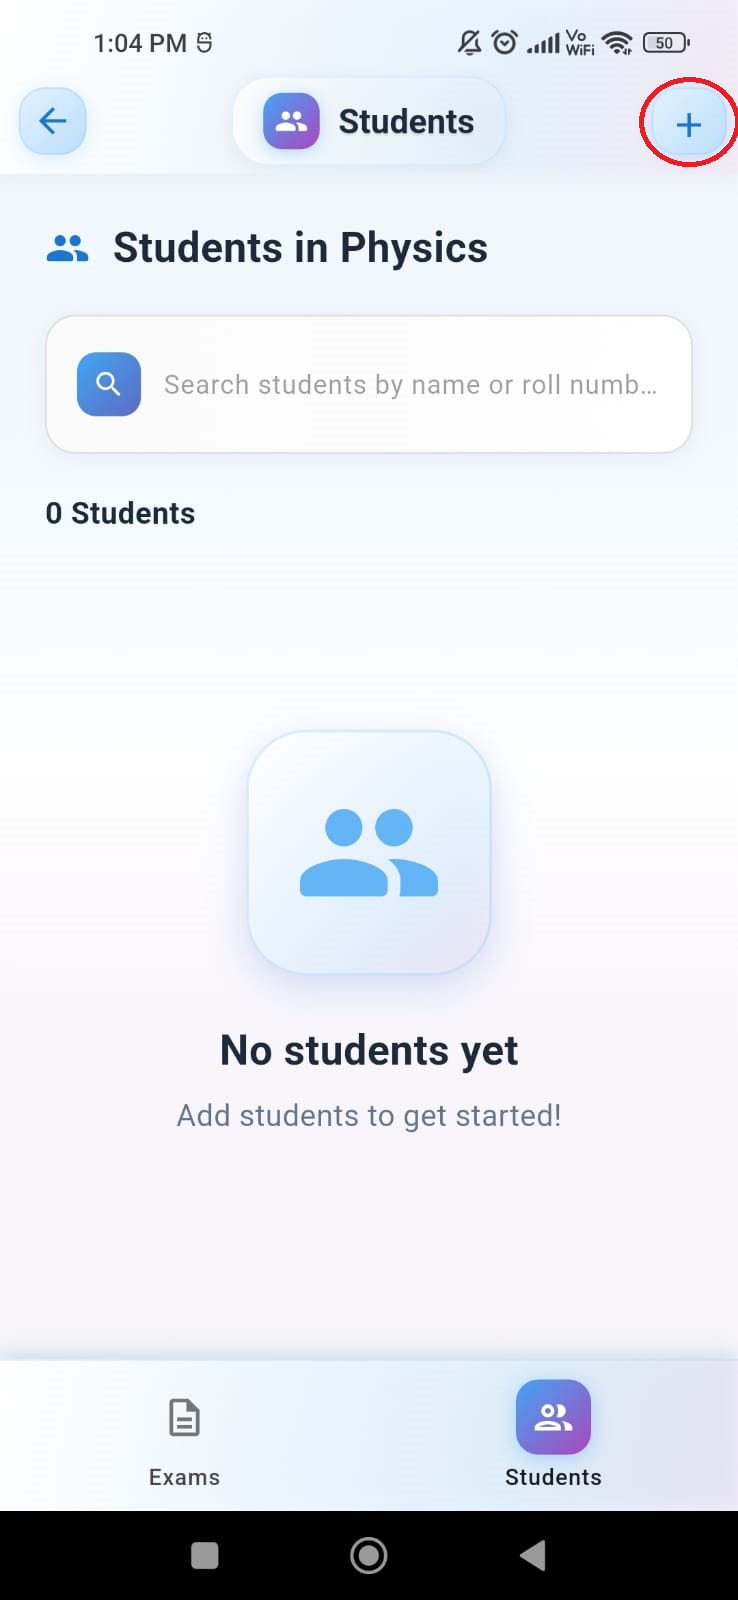
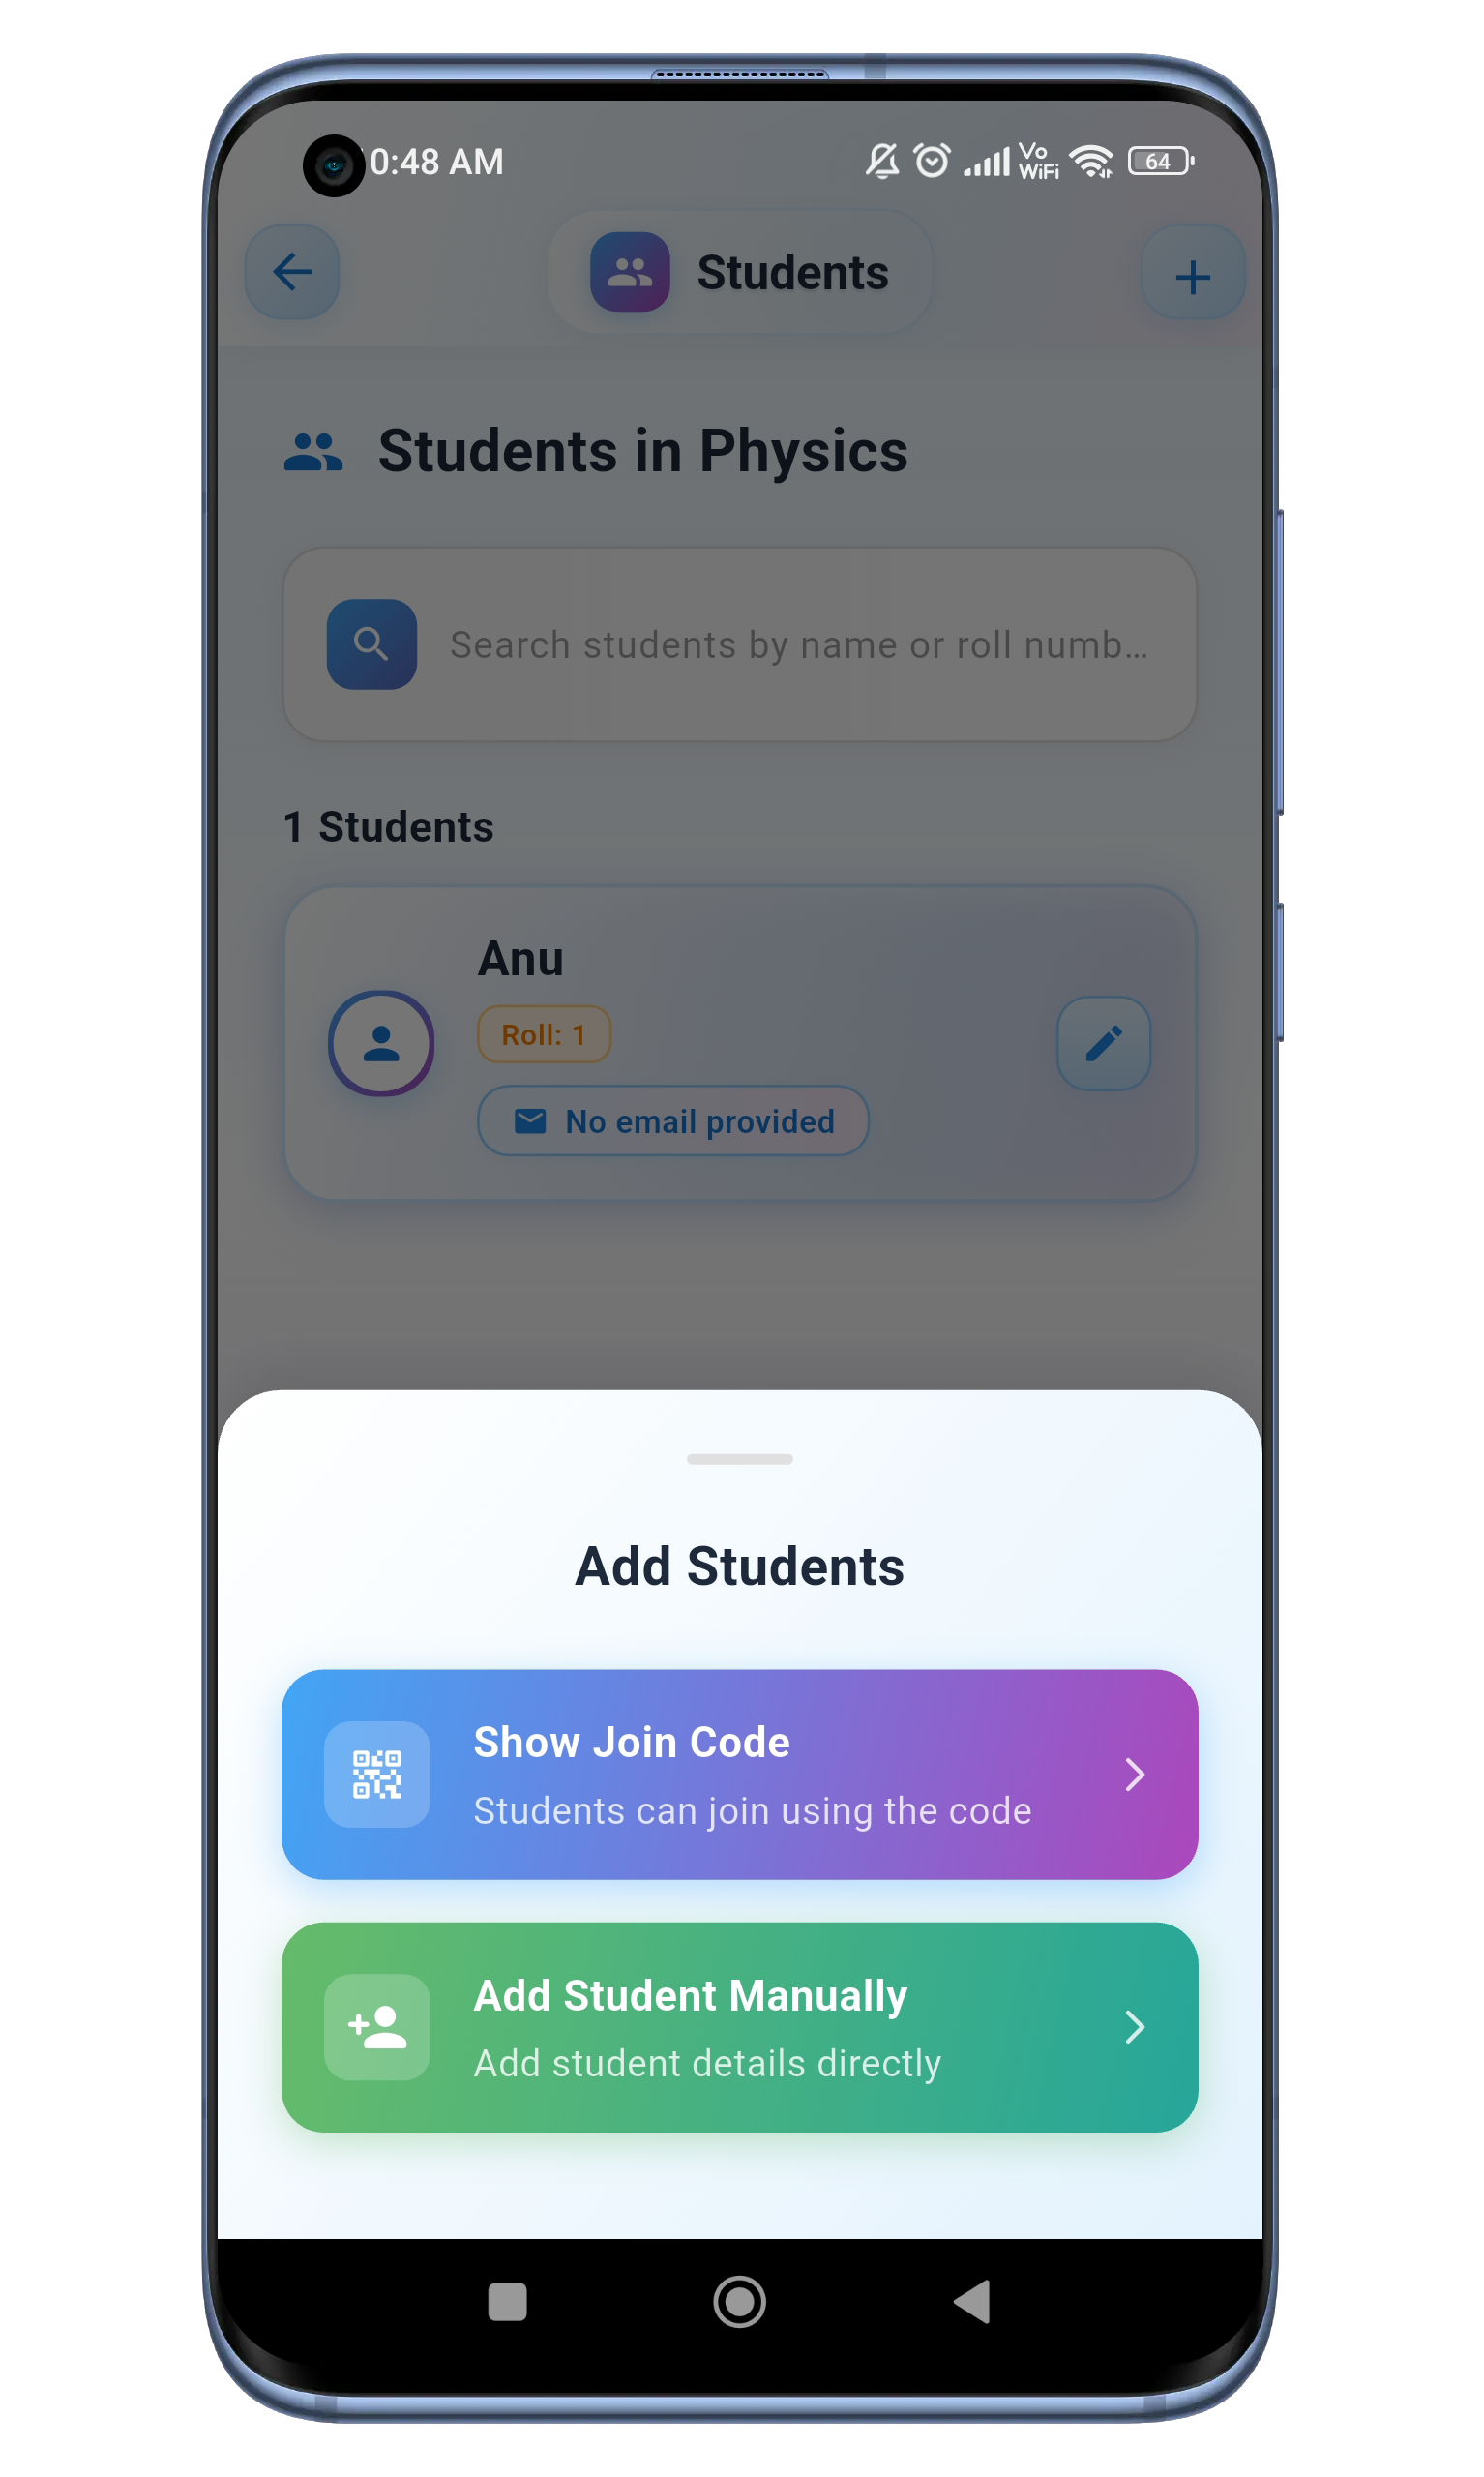
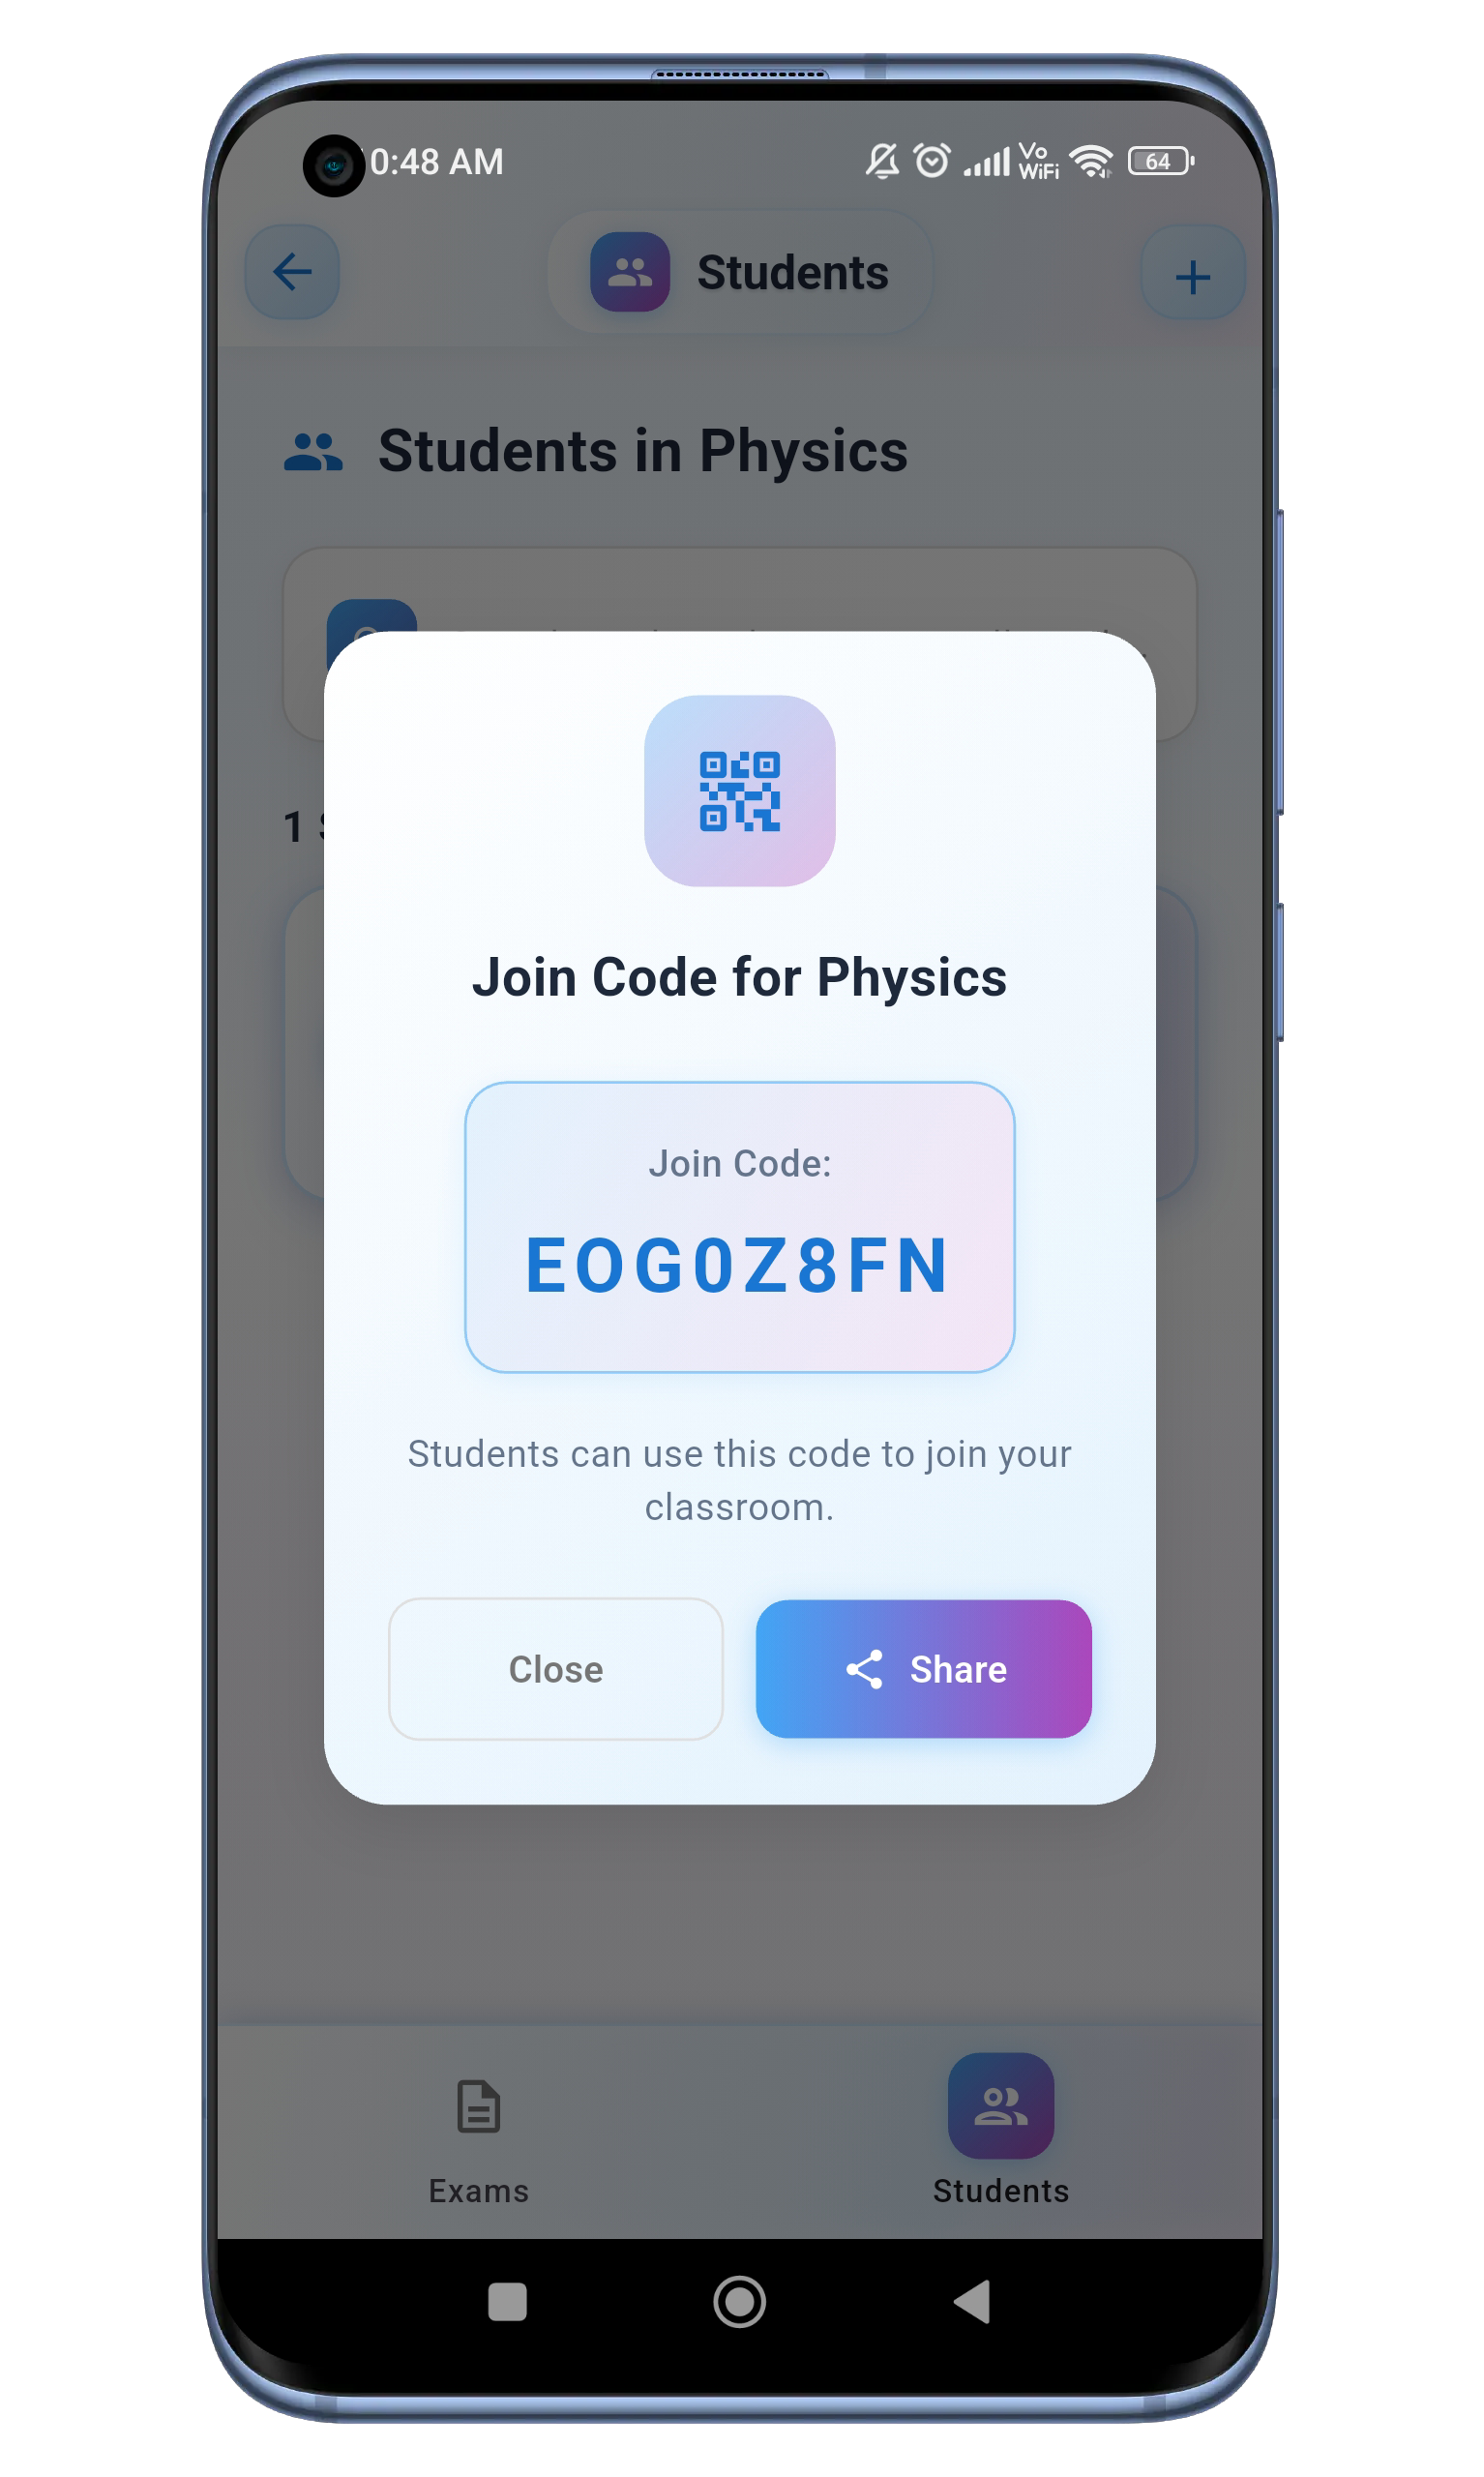
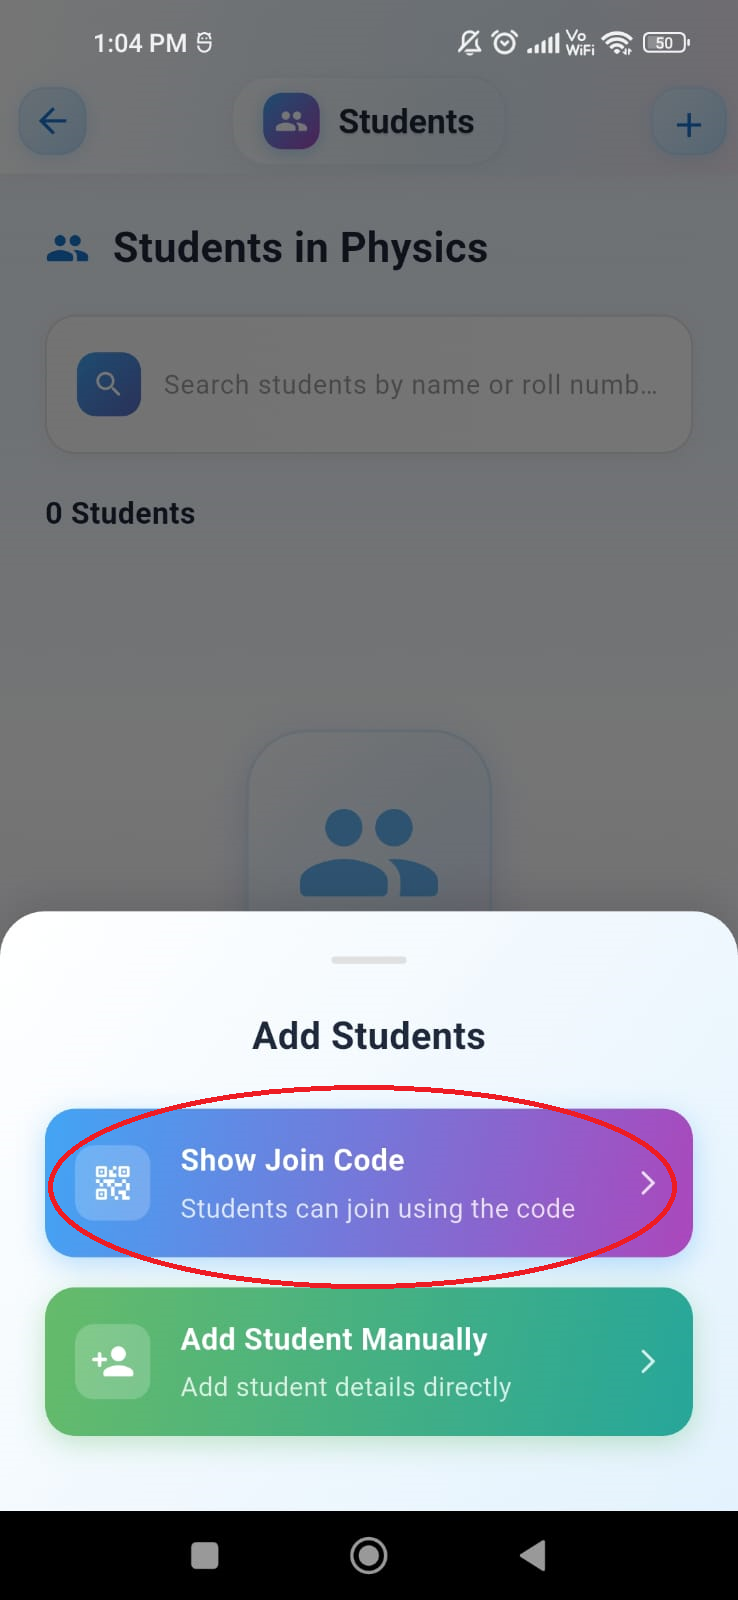
Add Students to Classroom
Tap the "Show Join Code" button in the pop-up to get the classroom's join code. Use the "Share" button to send the code to students via WhatsApp. After sharing, navigate to the "Exams" tab to create a new exam.

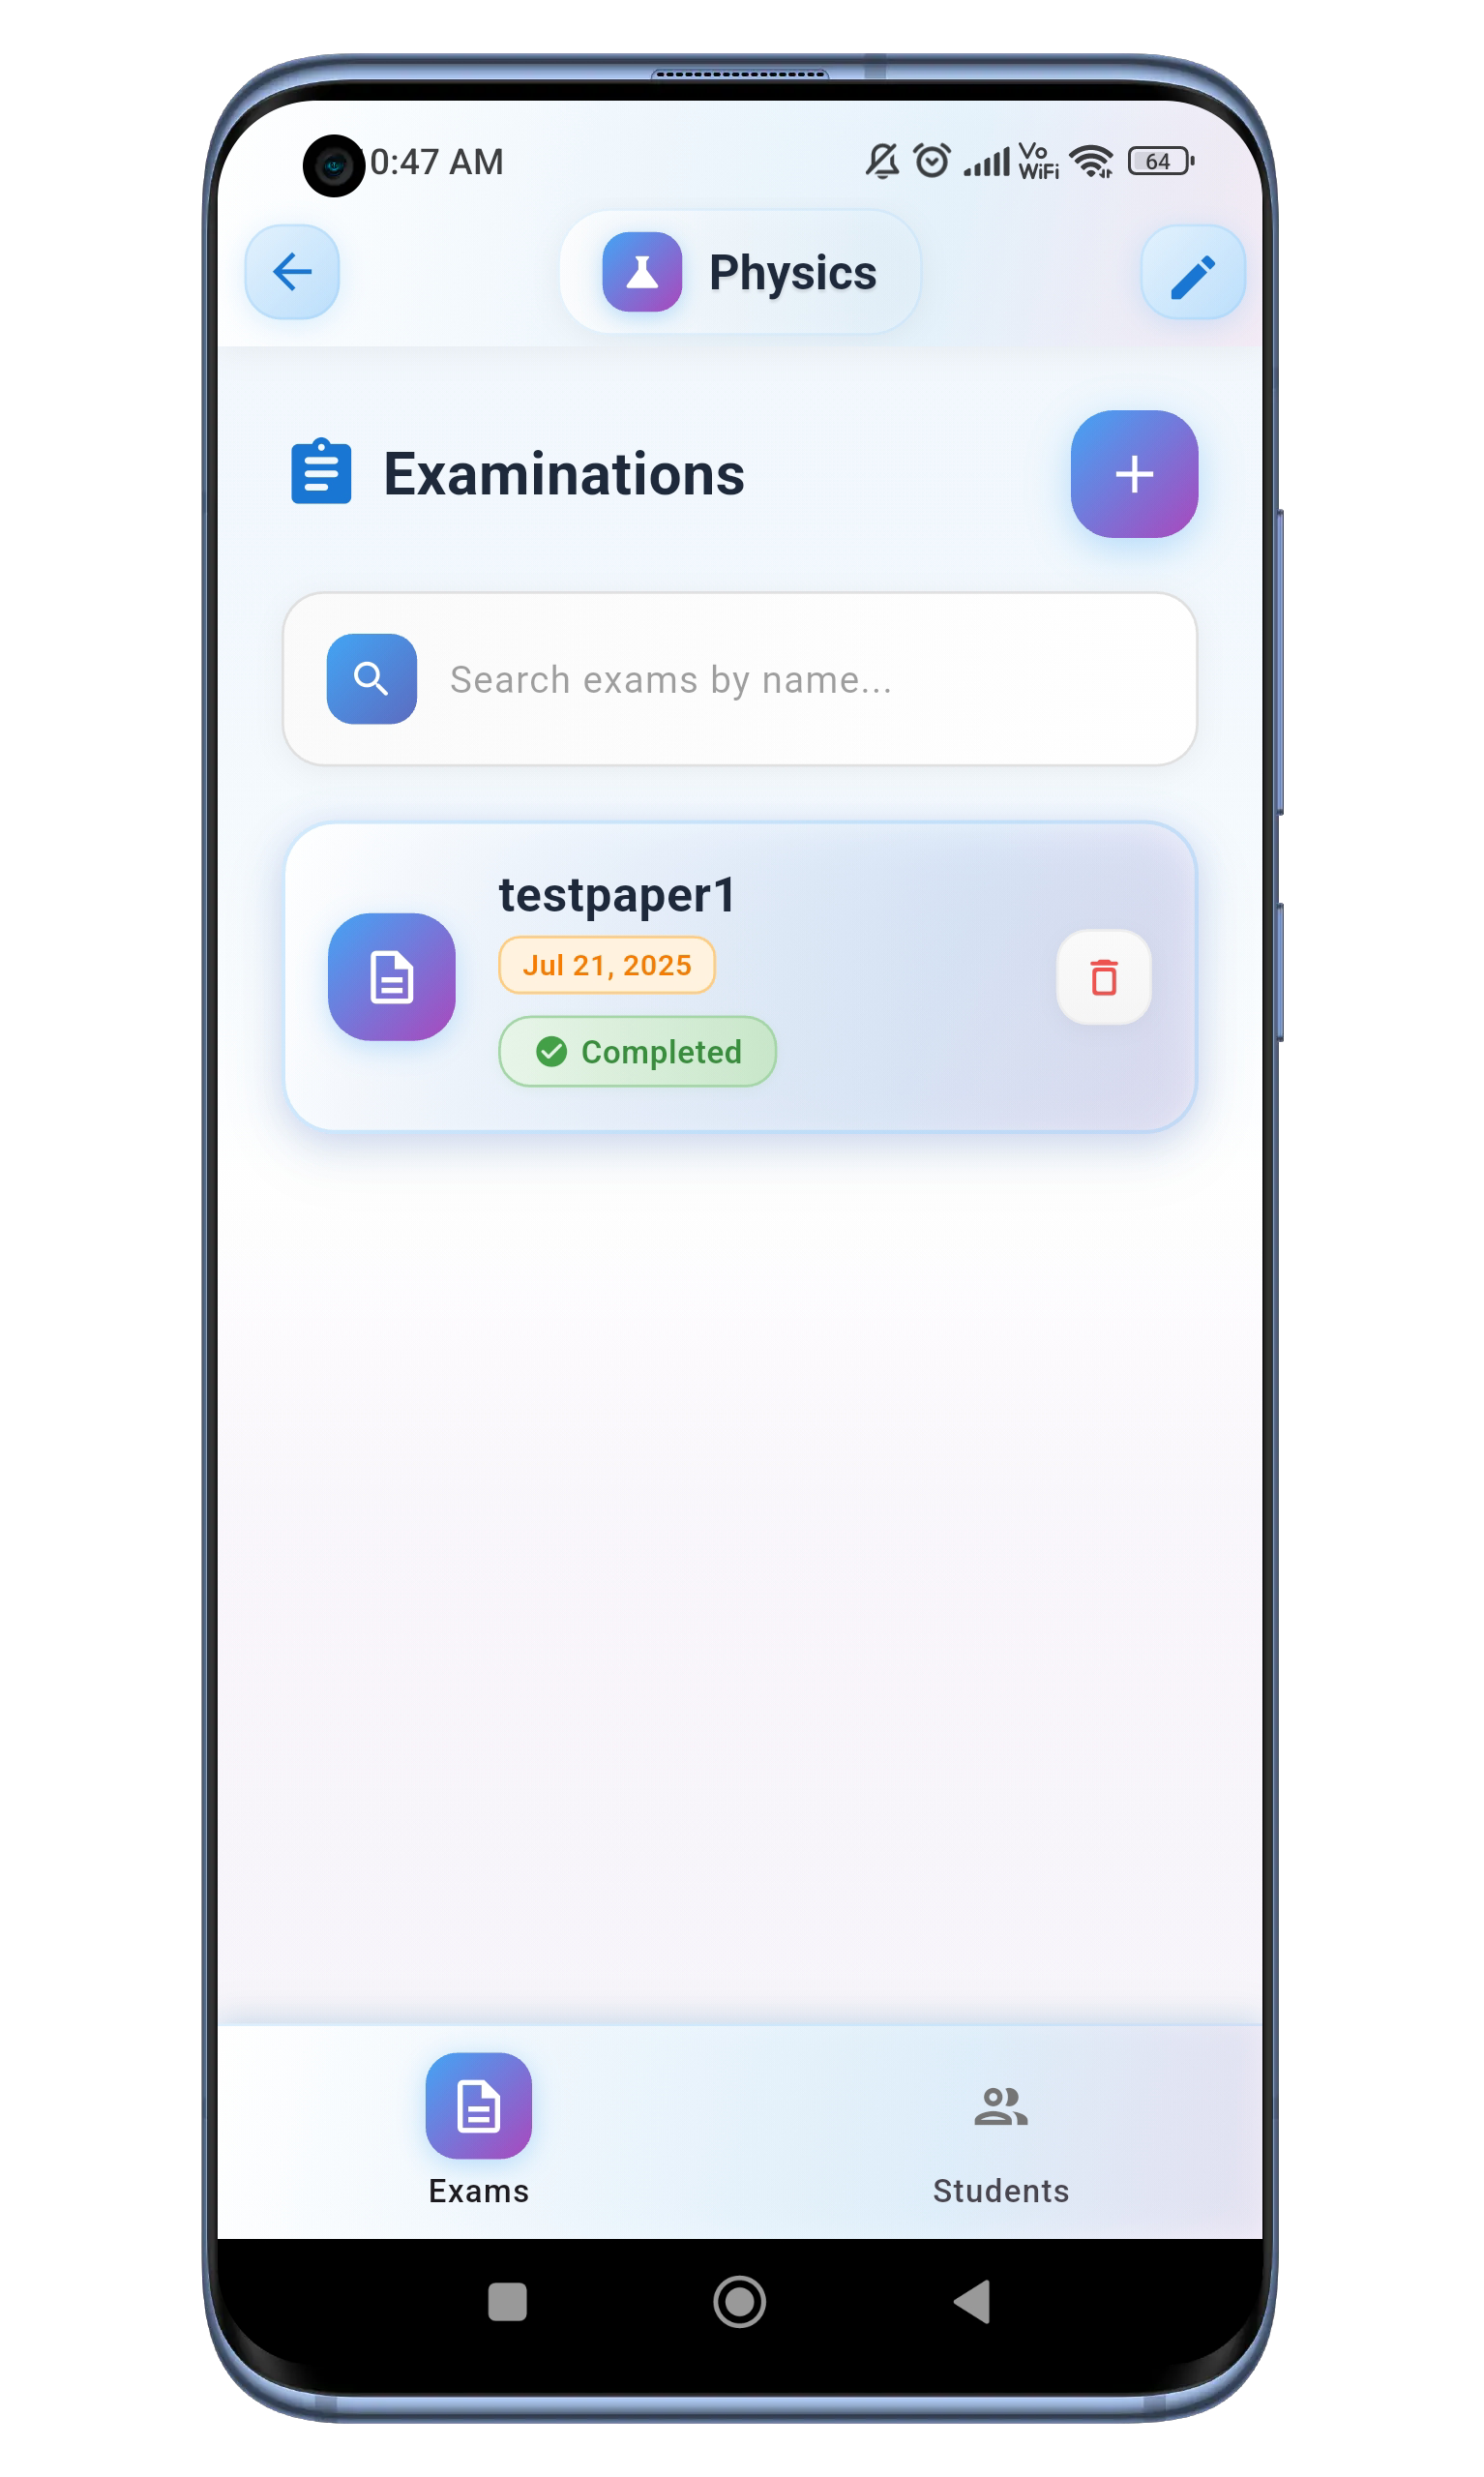
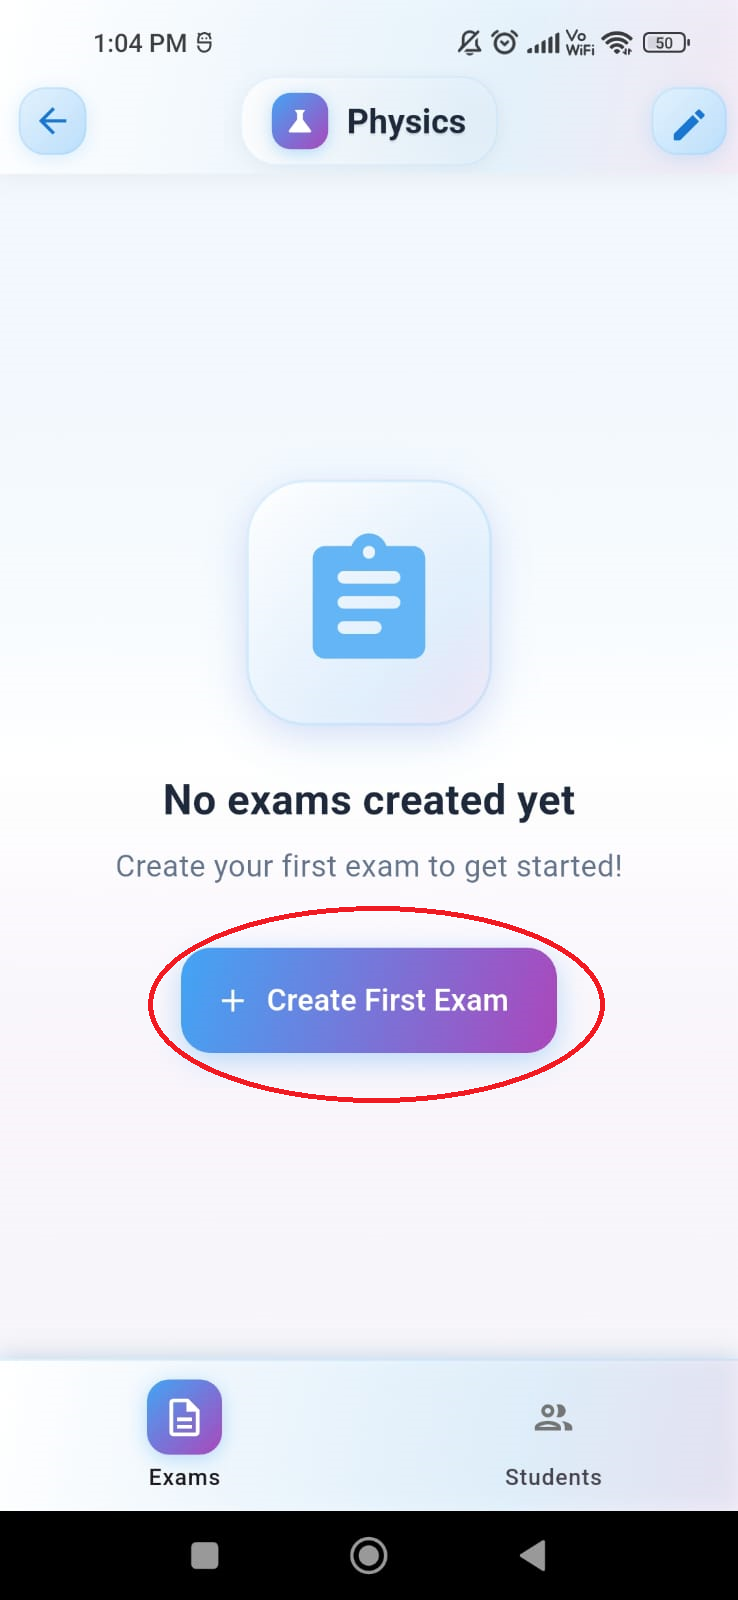
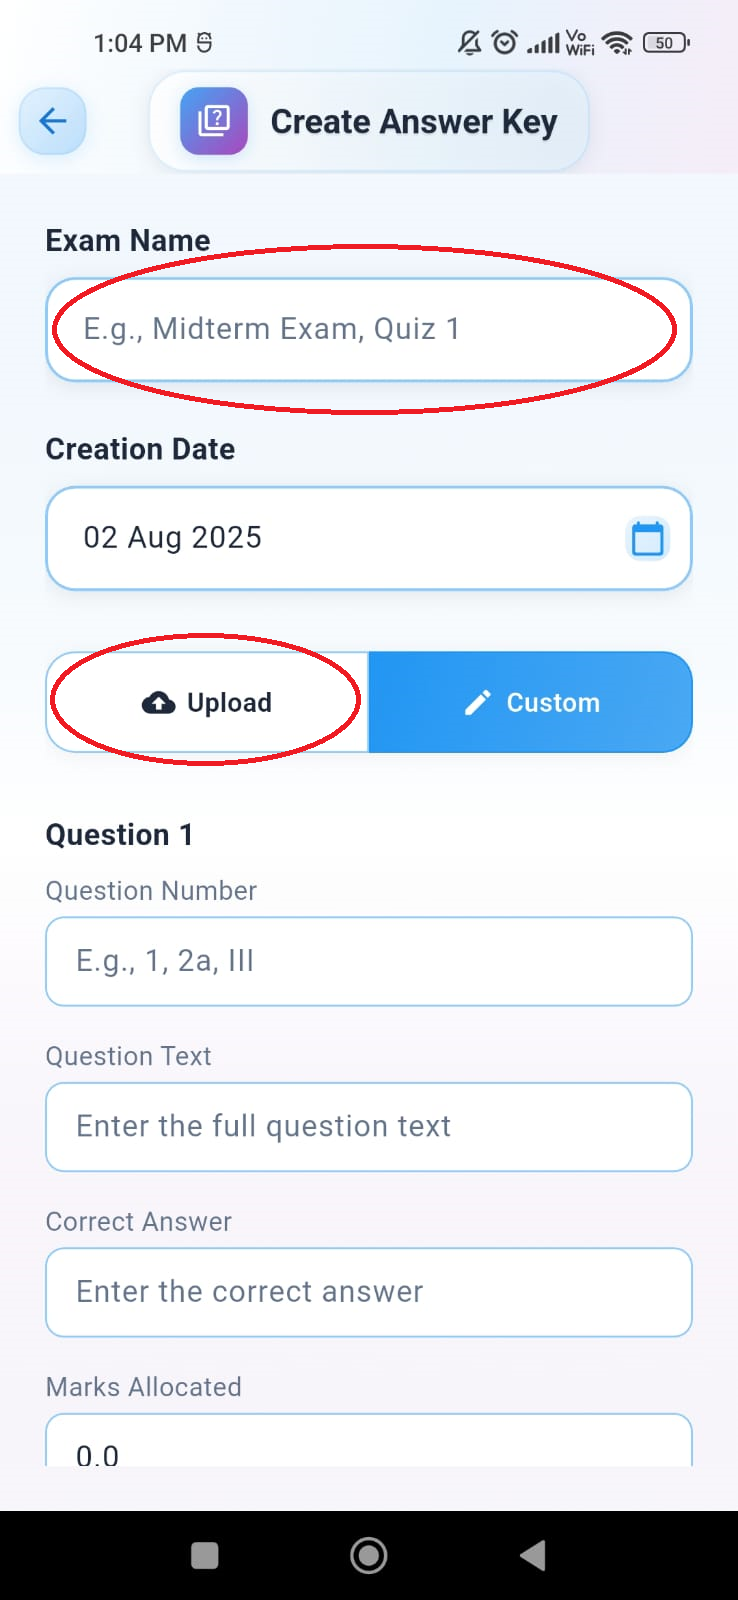
Create an Exam
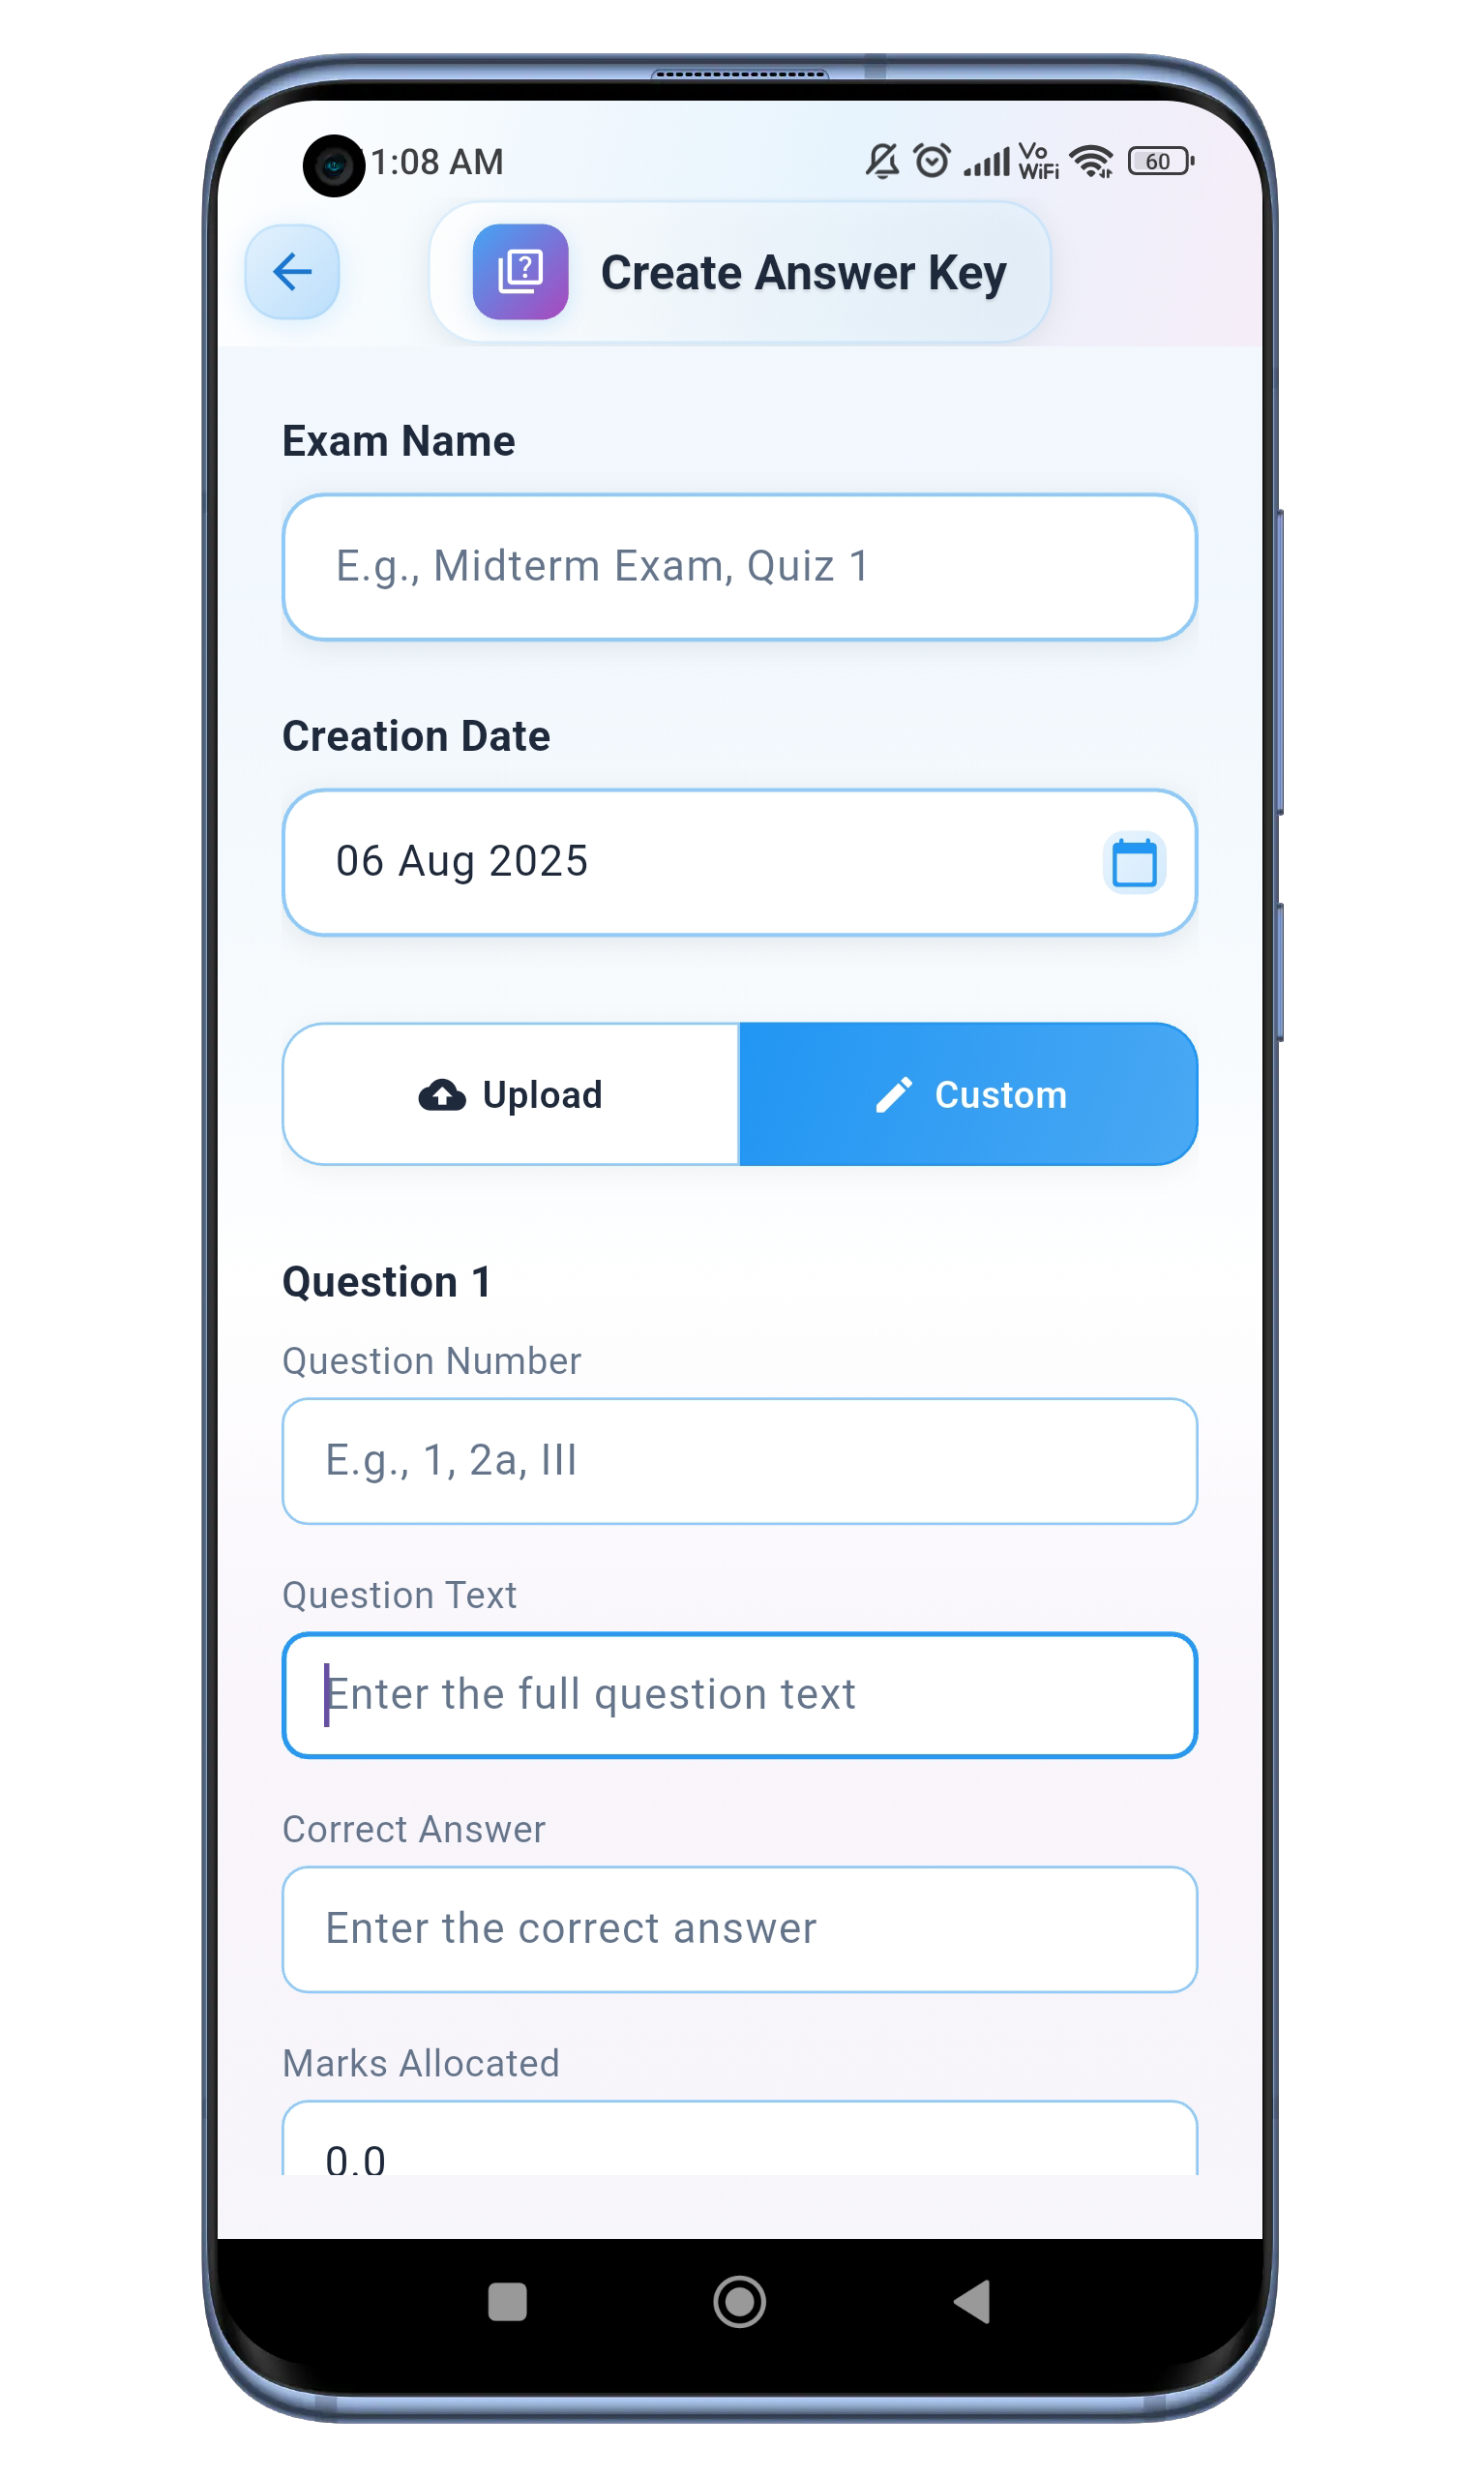
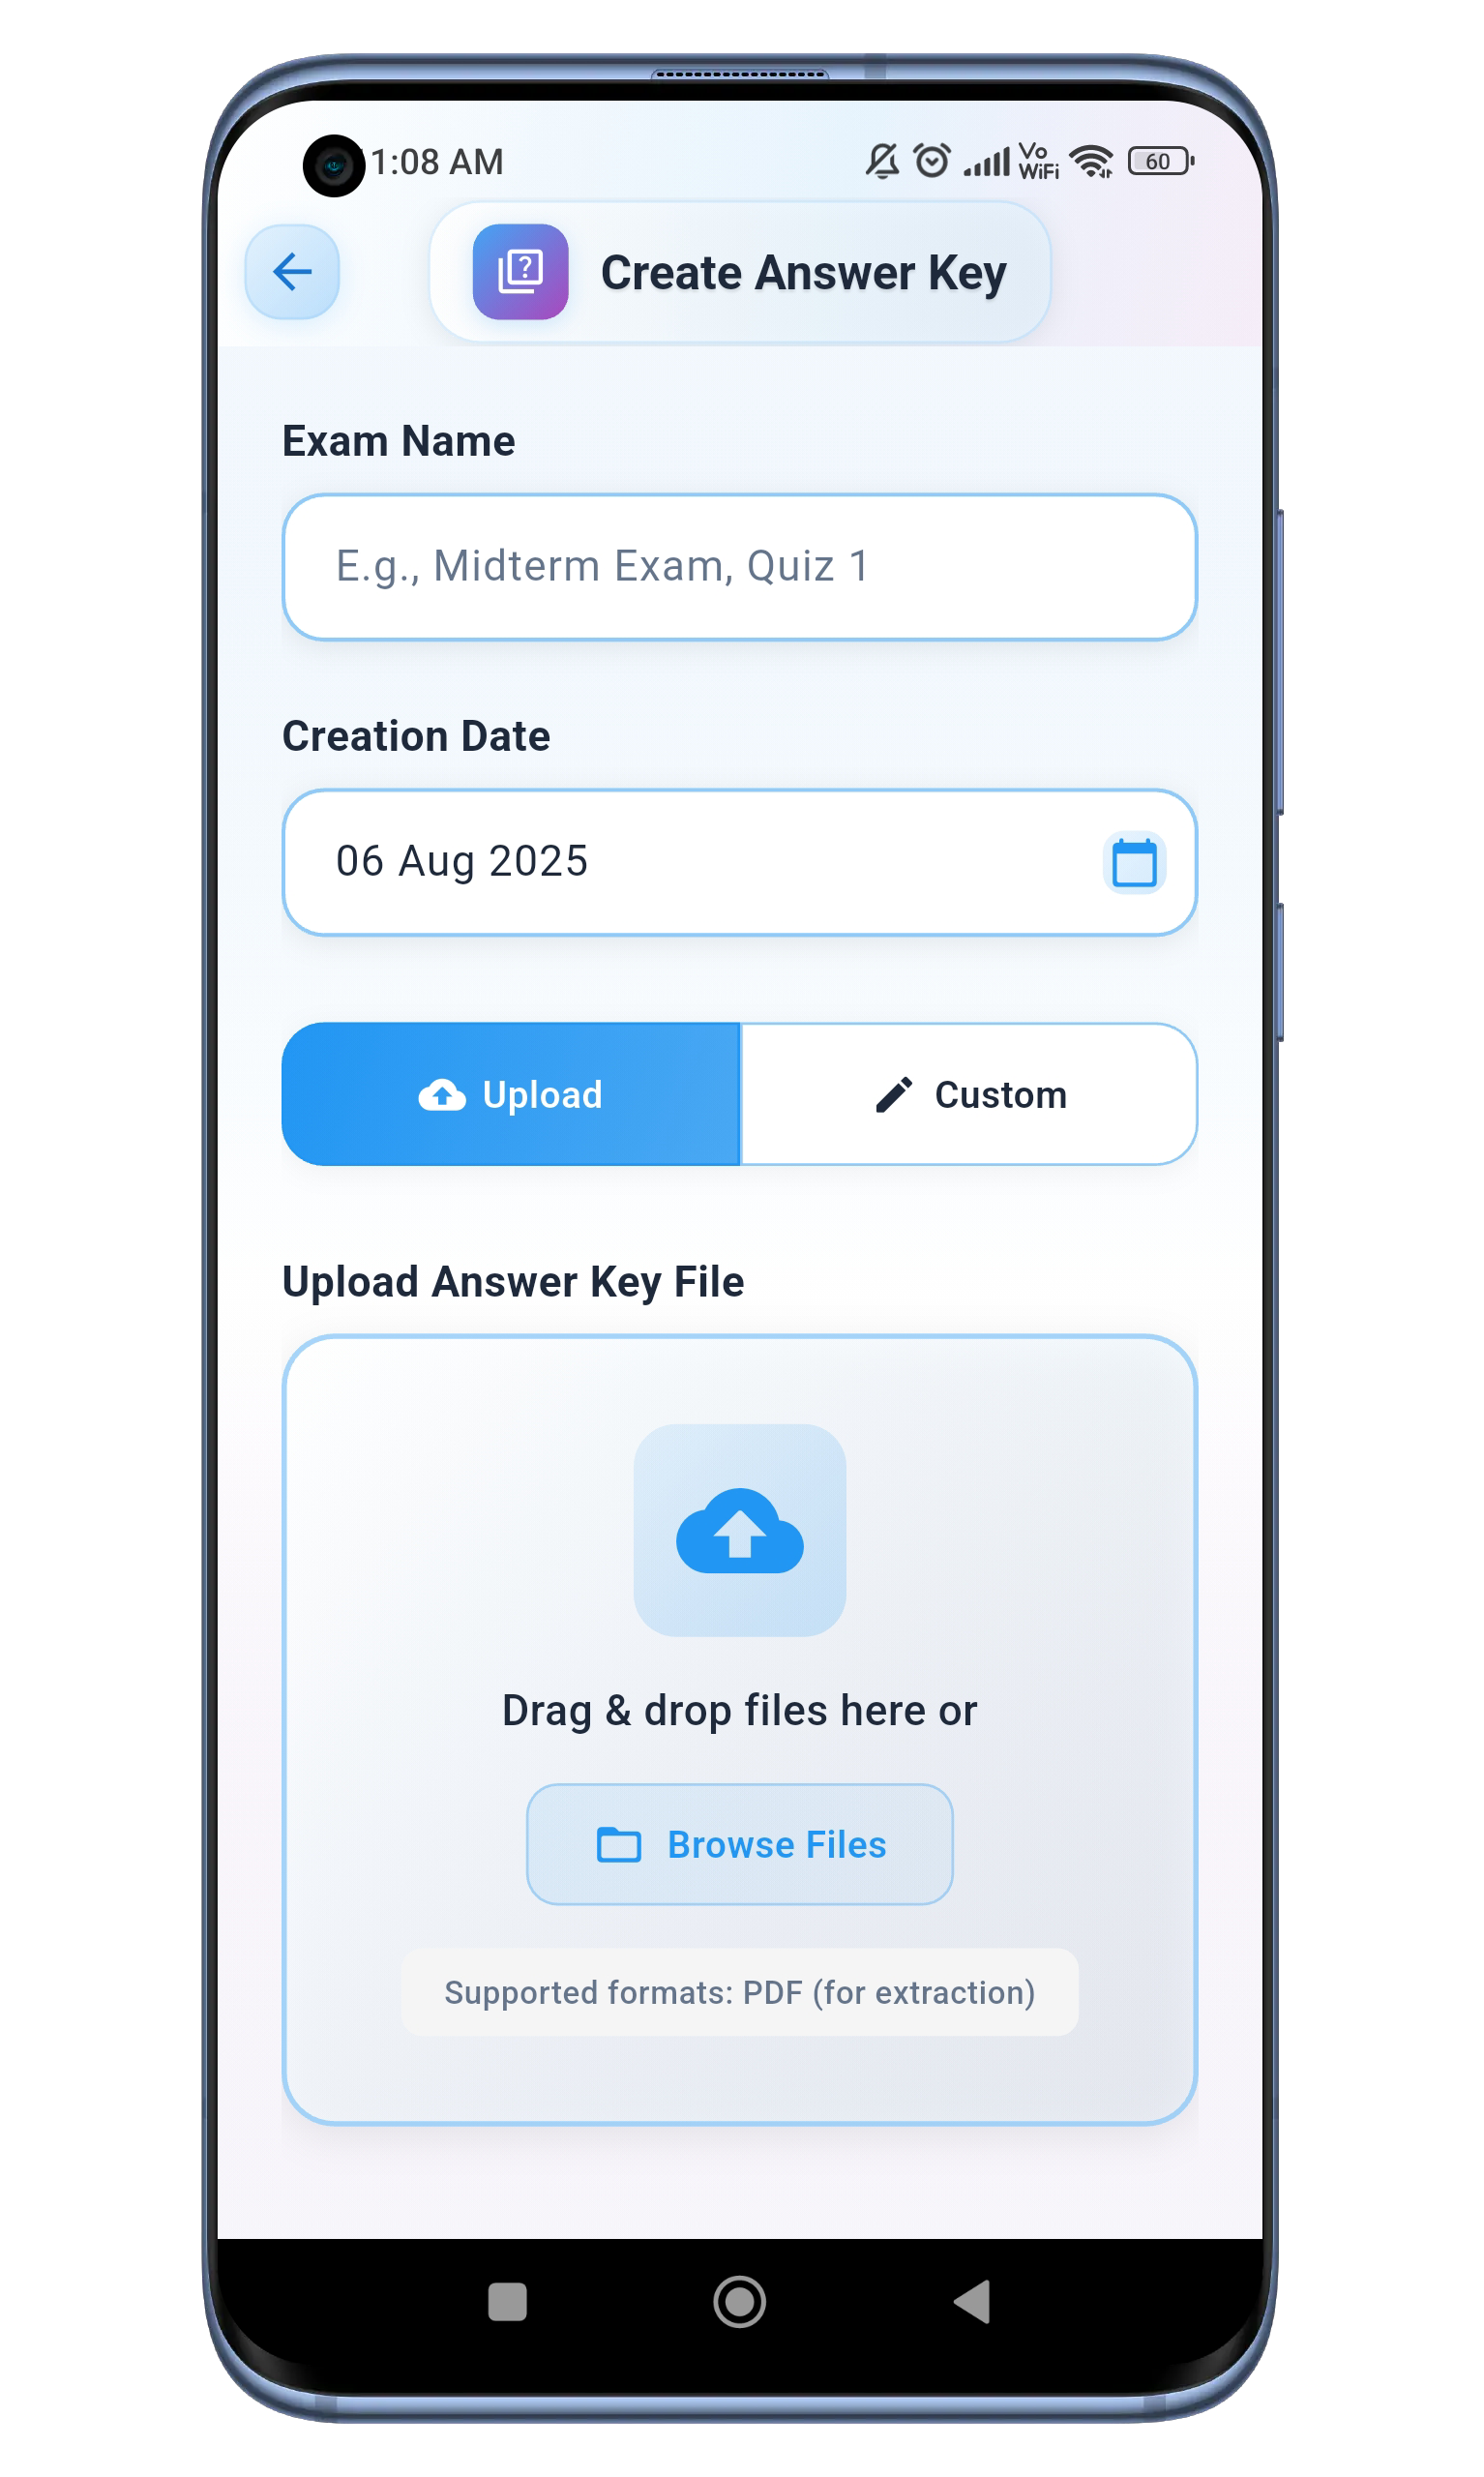
On the Exams screen, click the "Create First Exam" button. Enter the exam's name and choose an answer key creation method. You can use Custom Mode to manually enter questions, marks, and correct answers, or Upload Mode to upload a PDF of the question paper and answer key.
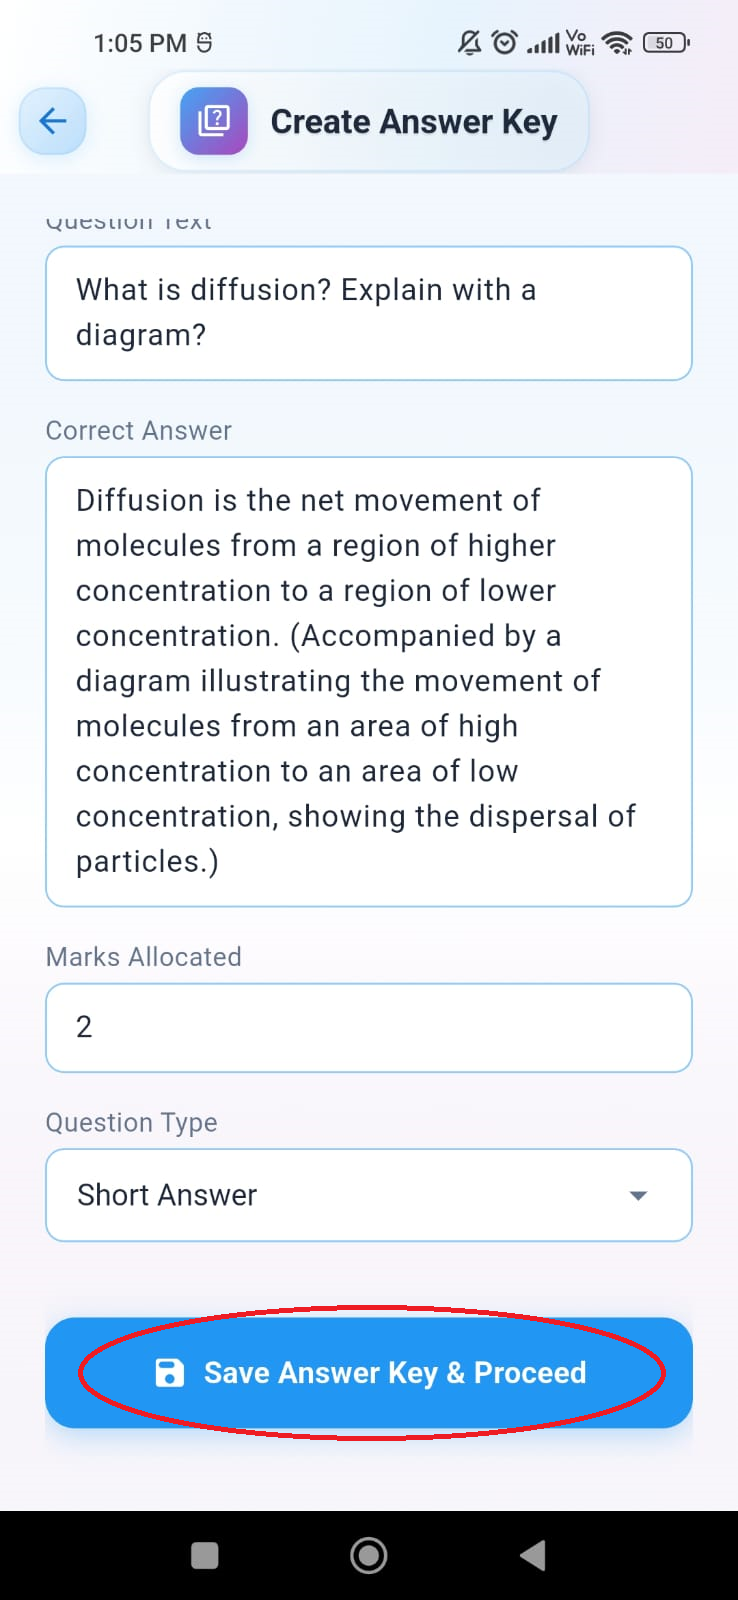
Save Answer Key & Proceed
Click the "Save Answer Key and Proceed" button to save the answer key to the cloud. For Upload Mode, the question paper with the answer key should follow a specific format in PDF.
Download Answer Key Sample
Note: Image valuation may not be correct.
Evaluating Student Answer Sheets Using AI Part 1
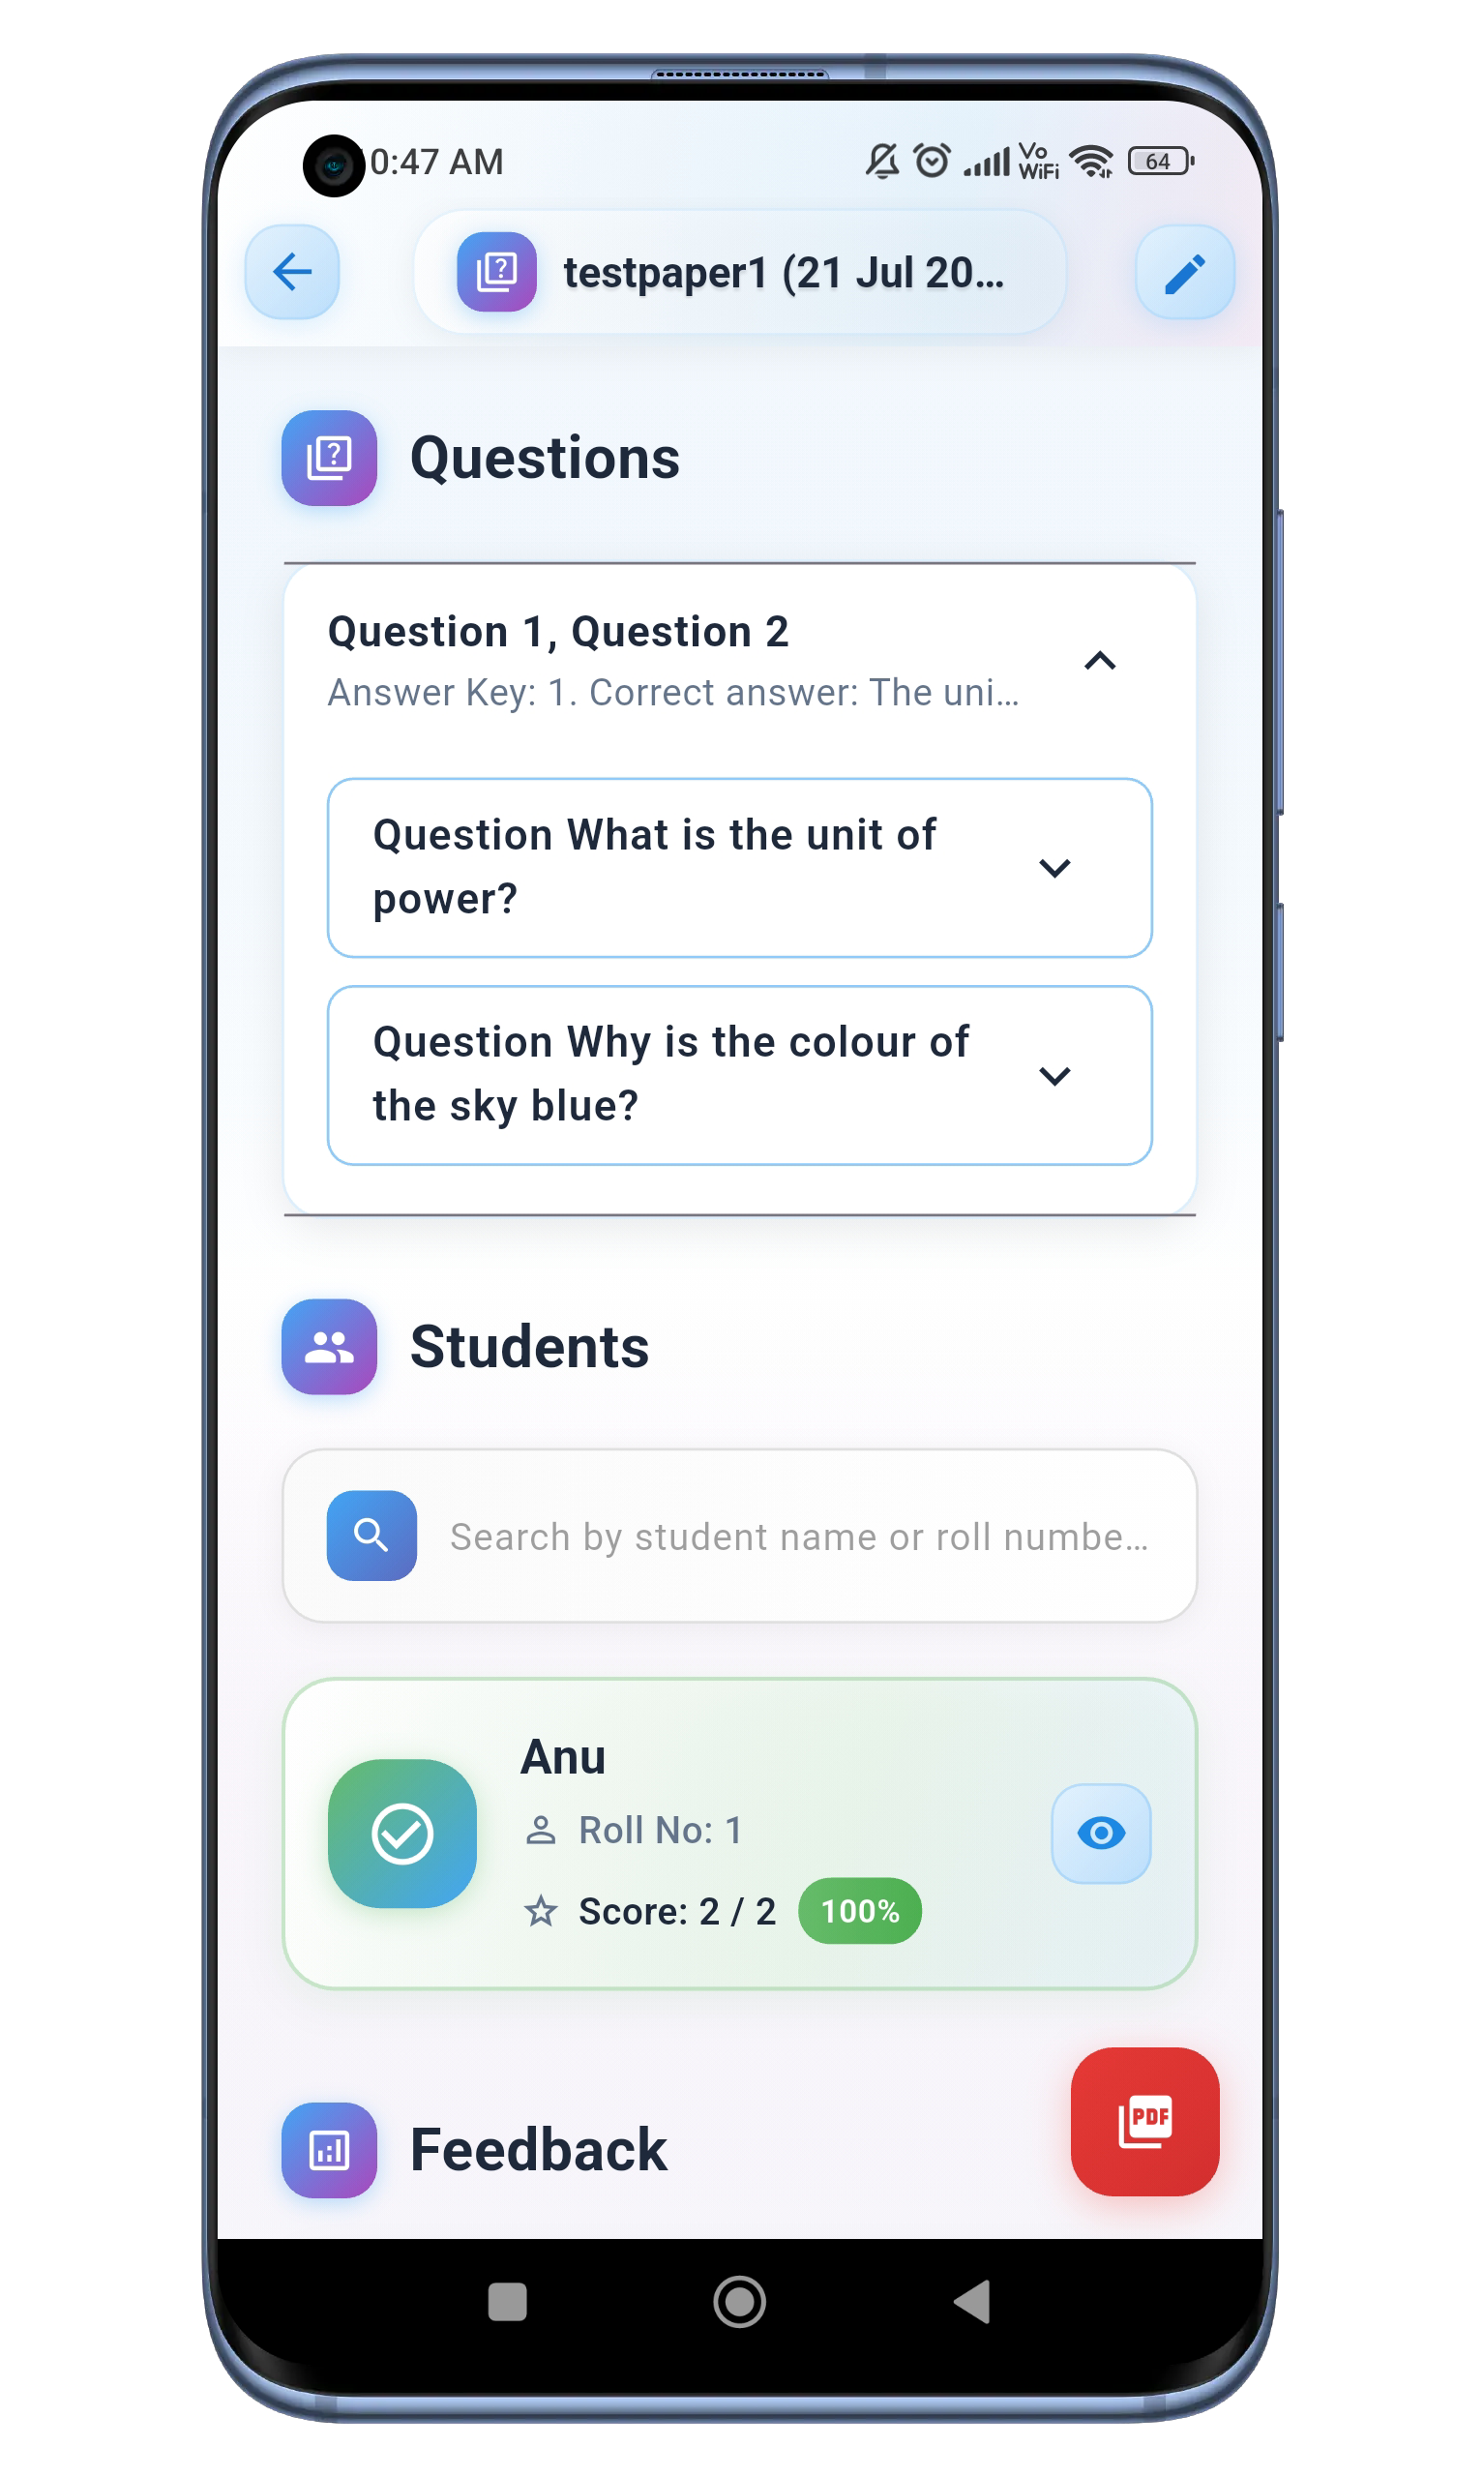
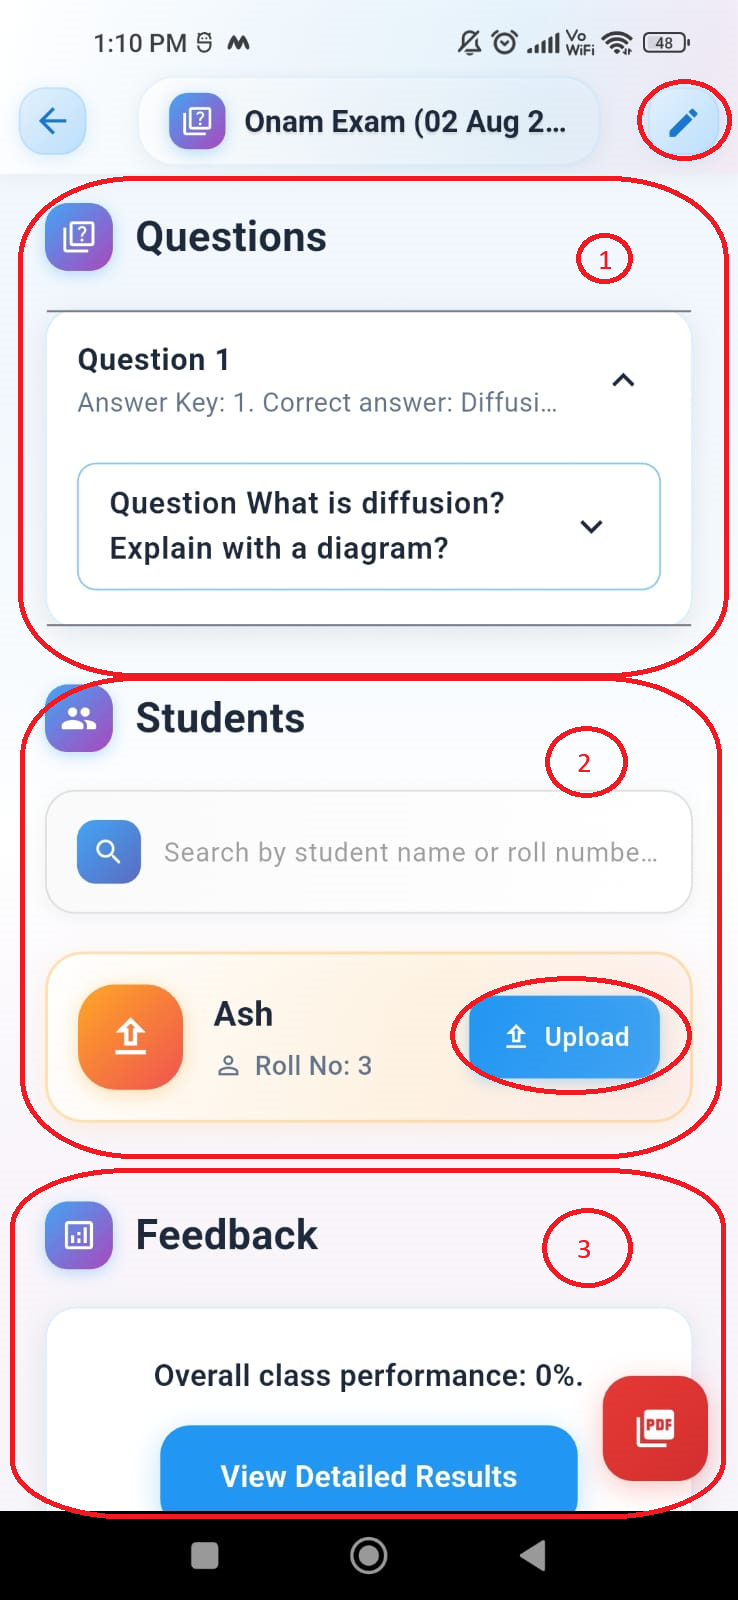
After uploading, the new exam will appear in the **Examinations Screen** list. Tap on the list item to view exam details and upload student answer sheets.
- The Questions section displays questions, answer keys, question numbers, correct answers, and allocated marks. To edit any of these details, click the pencil icon in the top right corner of the screen.
- The Students section lists students in the classroom. To upload a student's answer sheet, click the "Upload" button in their list tile. (Note: Students must first join the classroom using the classroom code to appear in this list. If they are not visible, try restarting the app.)
- The Overall Feedback section provides class details like average scores, topics for reteaching, and a class heatmap.

View Student Results Part 1
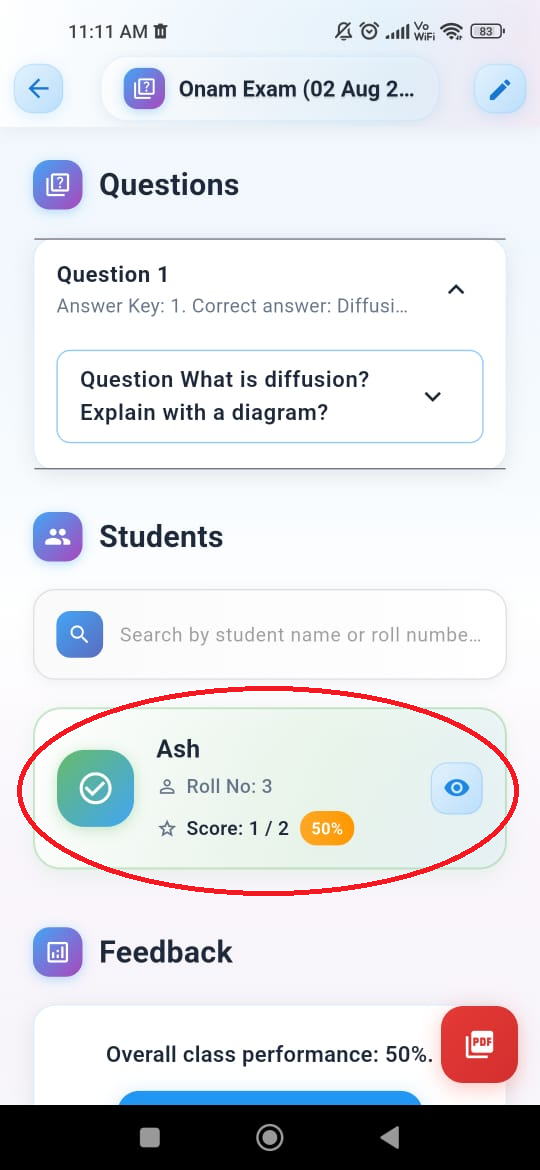
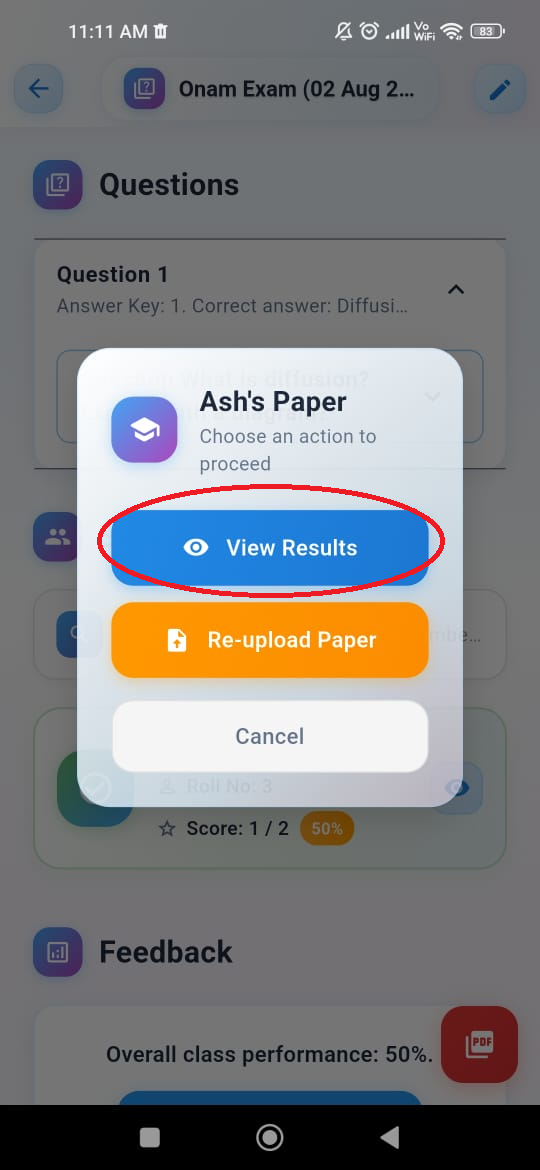
After uploading a student answer sheet, the AI will evaluate it and display the score in the student list tile. To view detailed results or re-upload the answer sheet for a specific student, tap on their list tile. A pop-up dialogue will then appear with options to "View Results" or re-upload the paper. Click on the "View Results" button to see the detailed results.
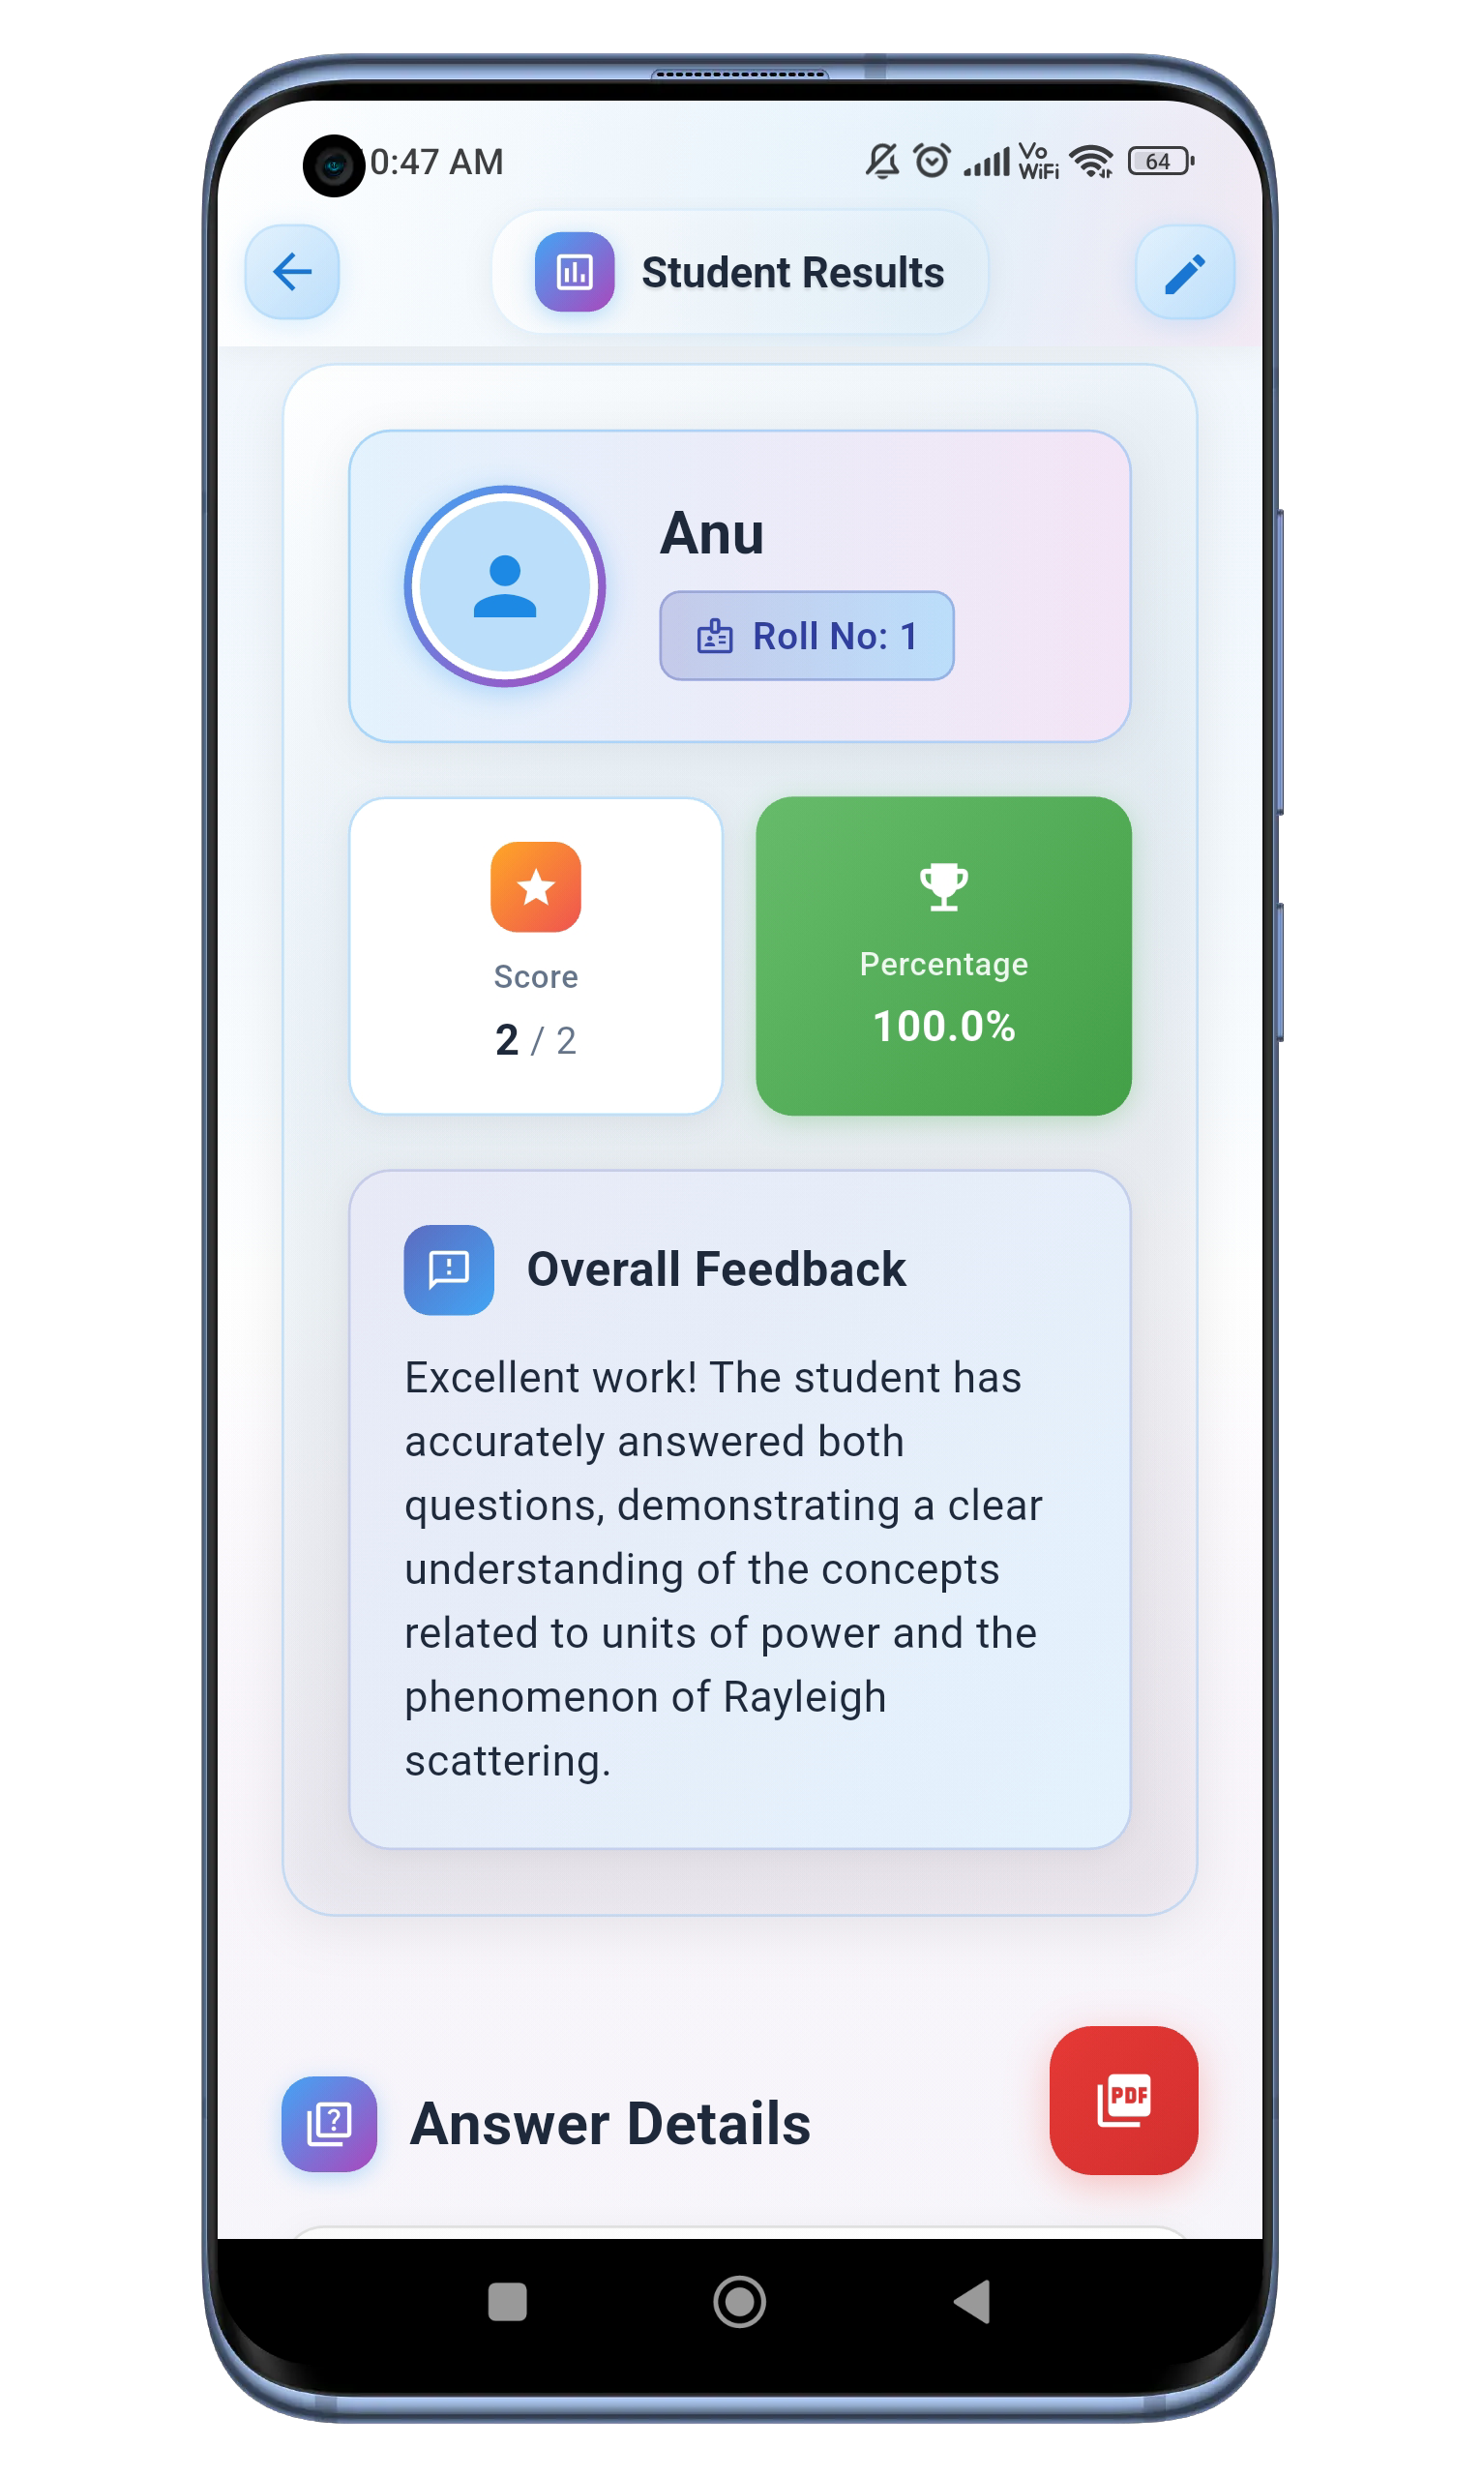
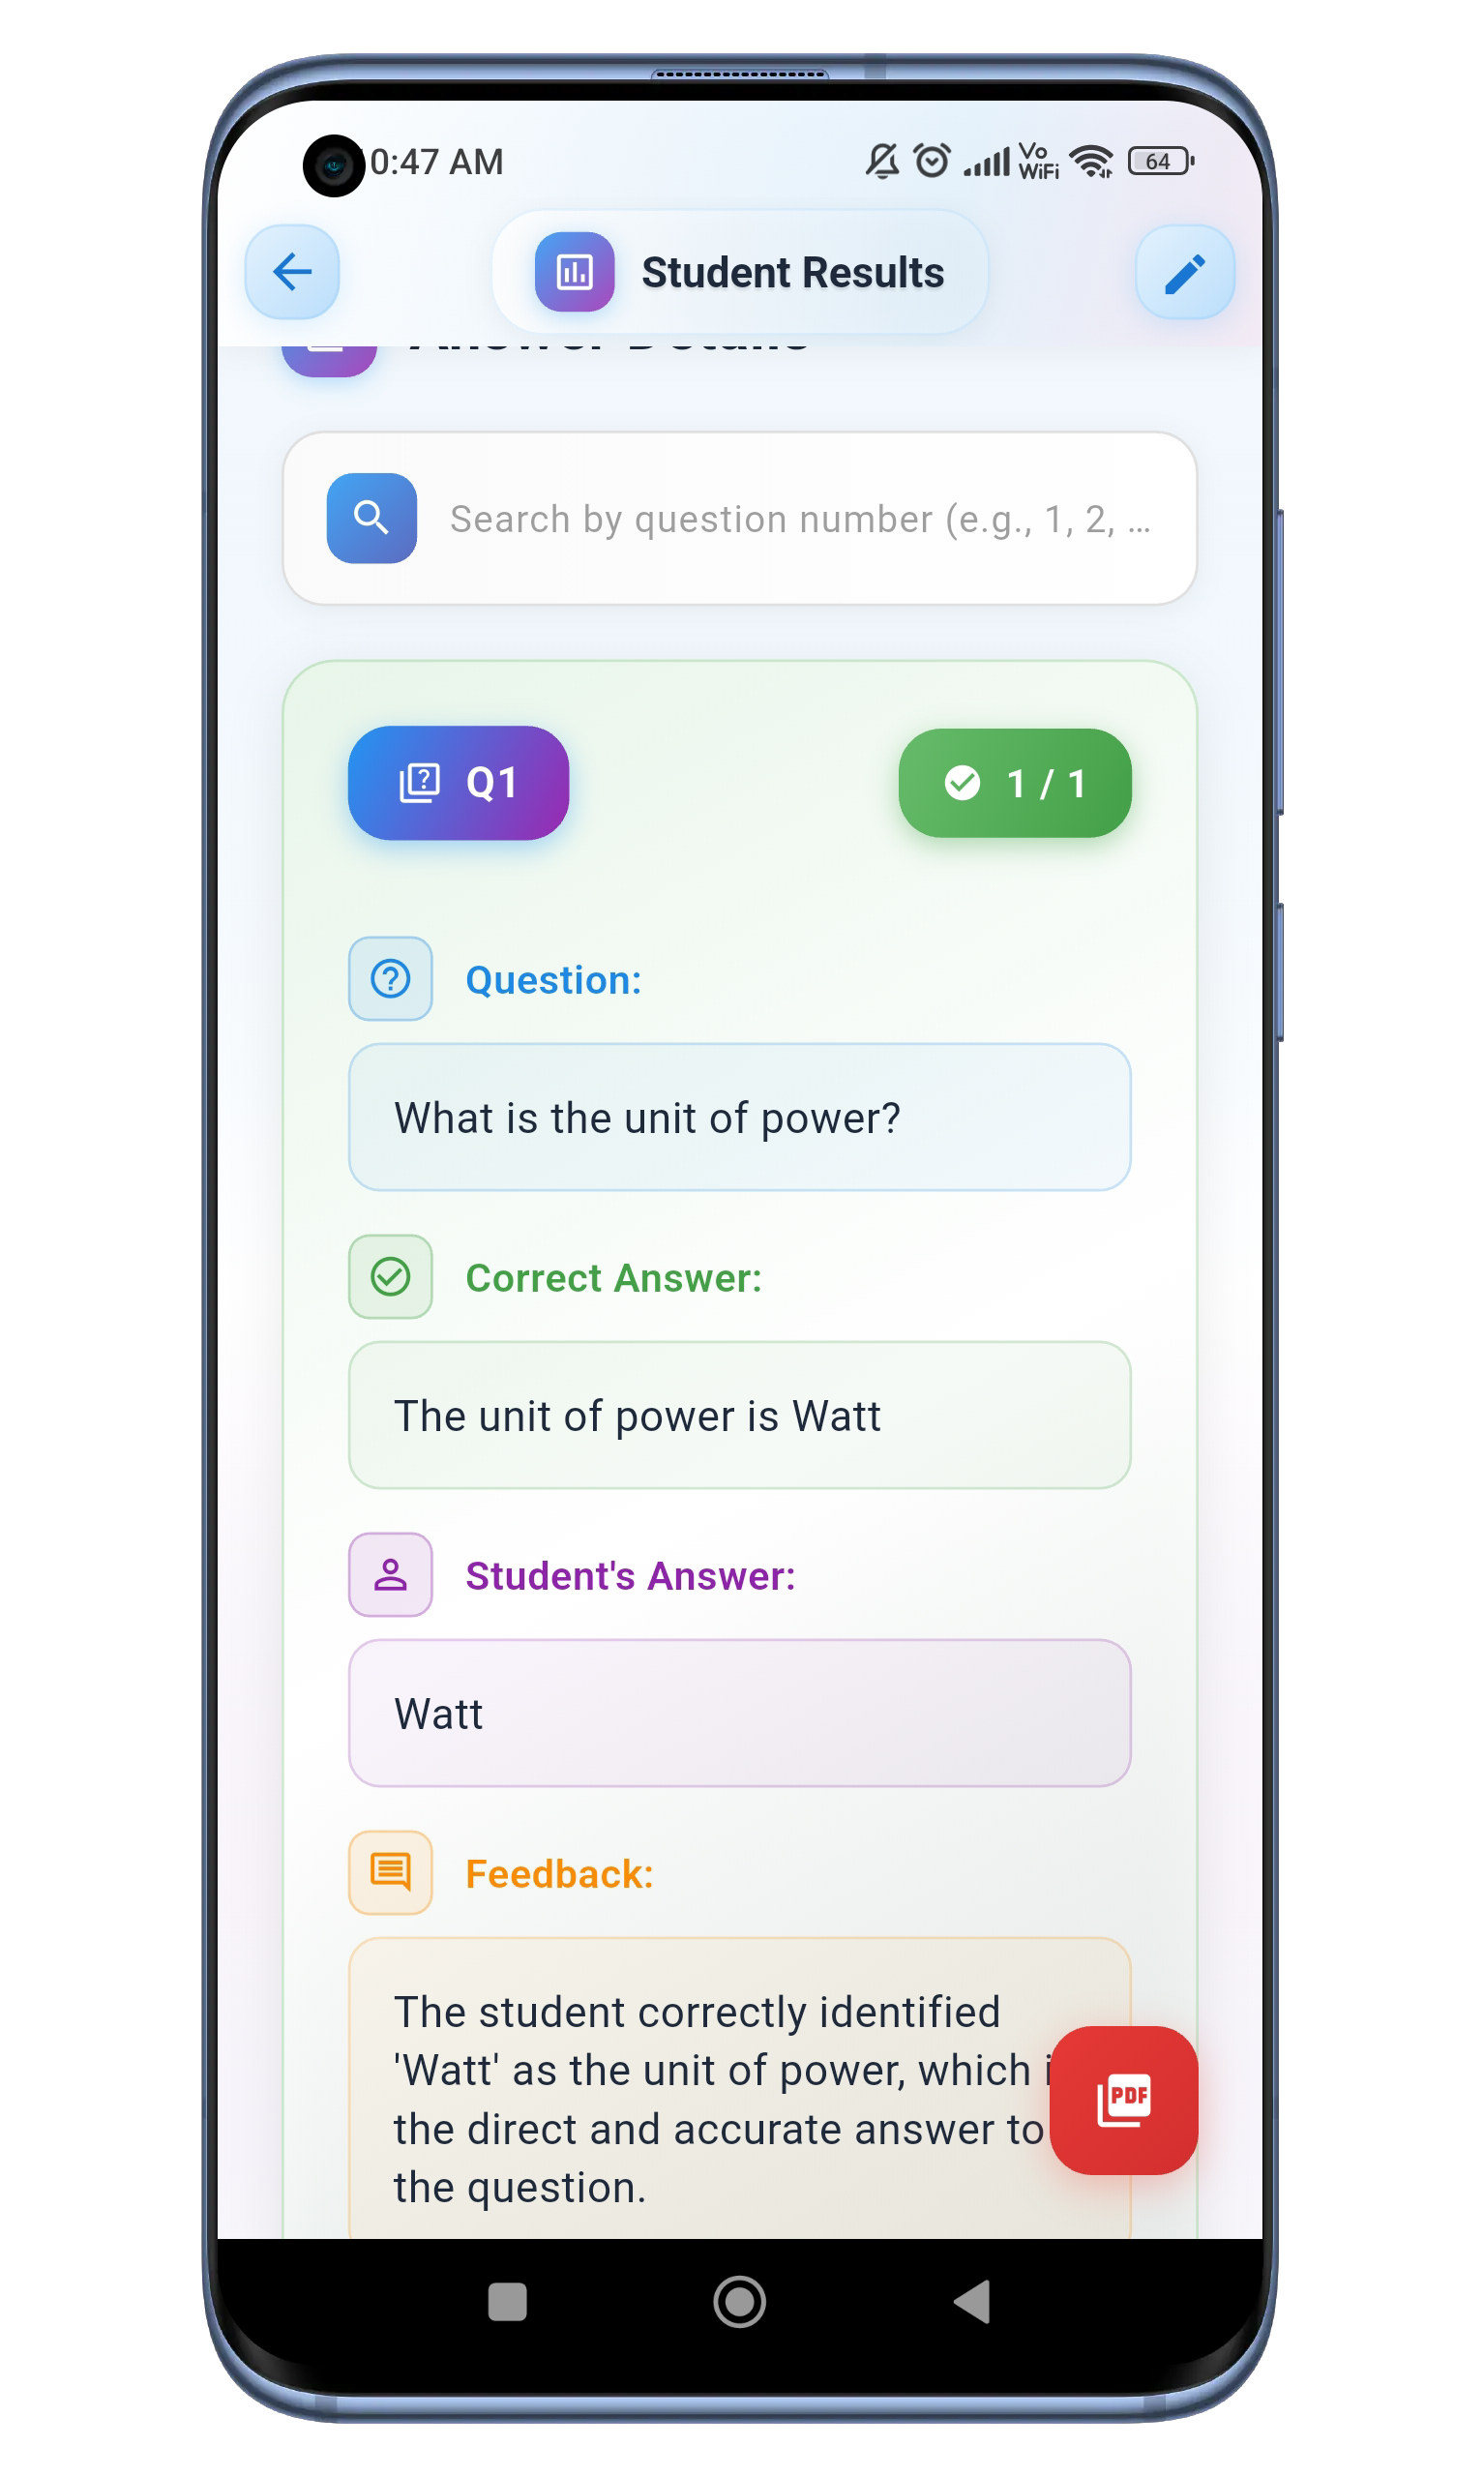
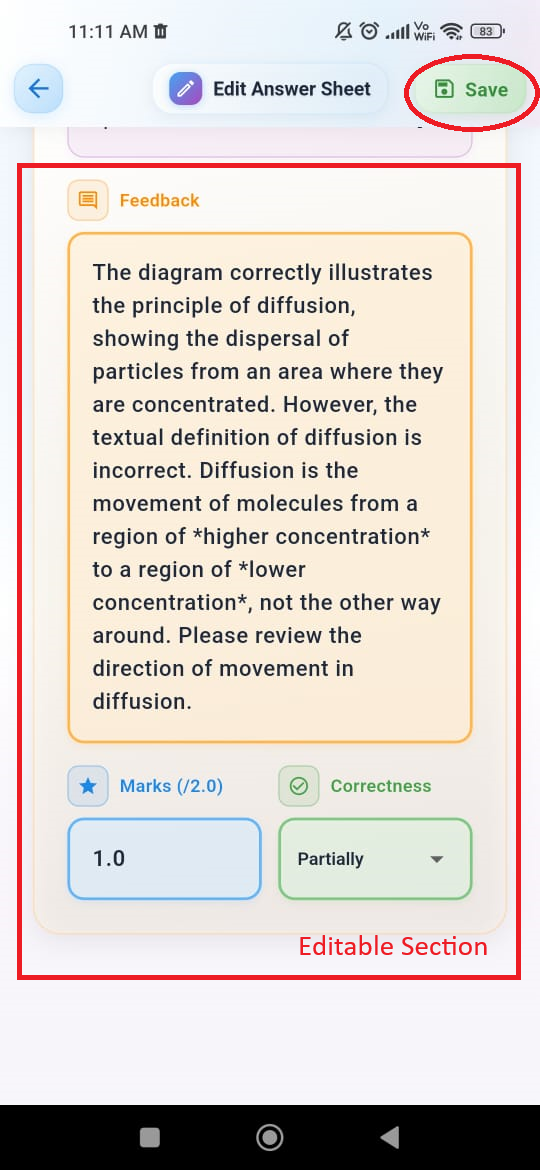
View Student Results Part 2
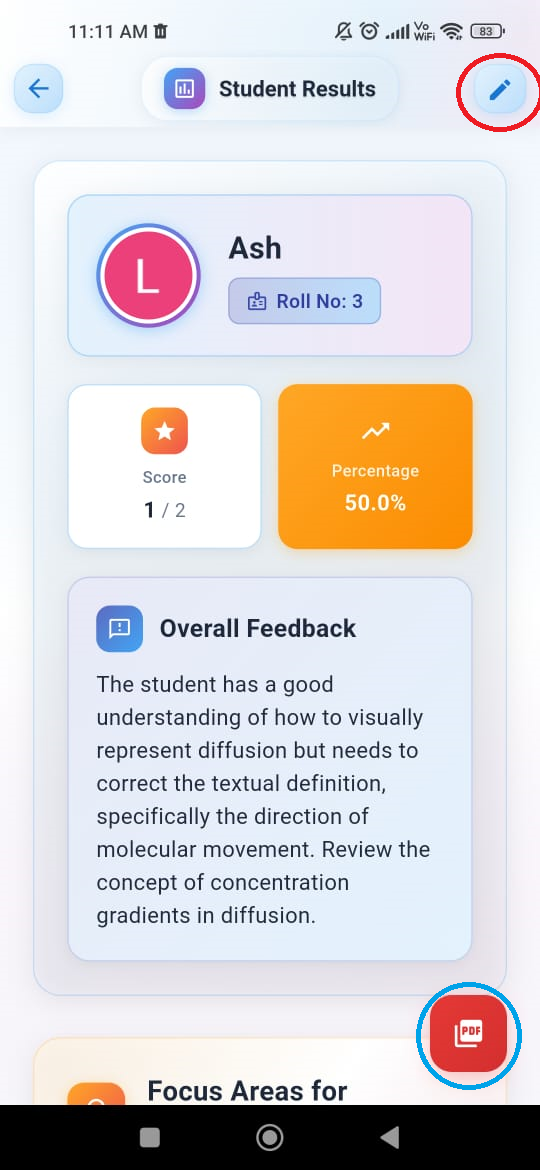
In the **Student Results screen**, you'll find detailed information about the student's performance, including marks obtained and percentage. Both overall feedback from the AI and specific feedback for each answer are provided. To download the PDF report for the student's result, click on the PDF icon located in the bottom right corner of the screen. You can also edit the answer sheet details by clicking on the pencil icon in the top right corner of the app bar. The fields that can be edited include: overall feedback, topics for review, feedback for a particular answer, marks for a particular answer, and the correctness of that particular answer. After editing the answer sheet details, click on the "Save" button.
View Overall Class Performance
Based on the images provided, here is a tutorial on how to navigate the "Class Performance" screens and understand the results.
Tutorial: Understanding Your Class's Performance
This guide will walk you through how to access and interpret the class performance metrics for an exam.
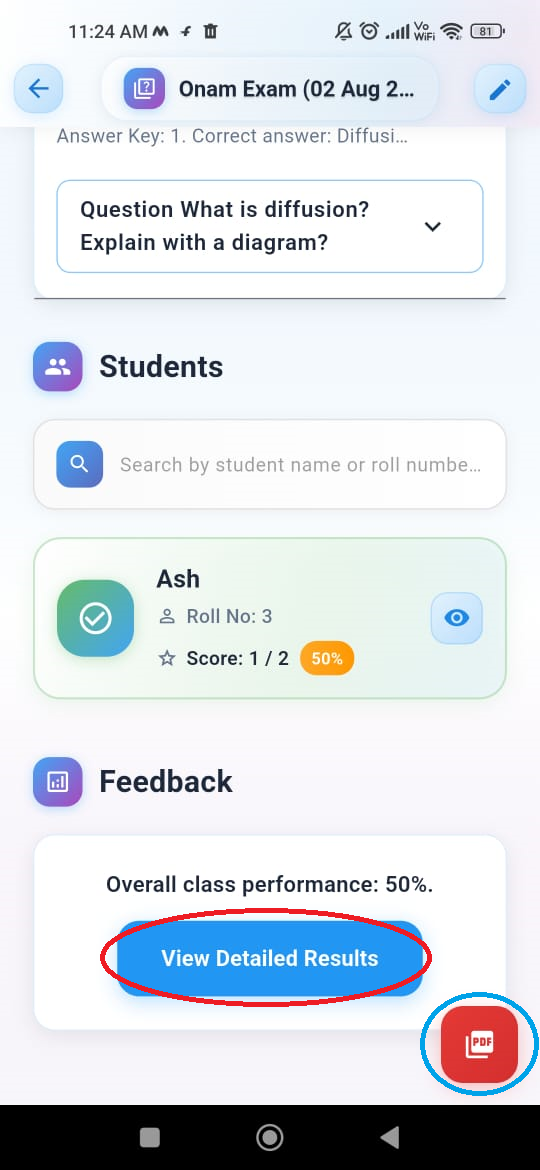
Step 1: Accessing the Overall Results Screen
From the screen showing the overall class performance, you can access detailed results in two ways:
- Tapping the "View Detailed Results" button: This is a blue button located in the "Feedback" section. Tapping this will take you to the detailed "Class Performance" screen.
- Downloading a PDF: If you wish to download a PDF report of the results, you can tap the red circular button with a PDF icon, located at the bottom right of the screen.
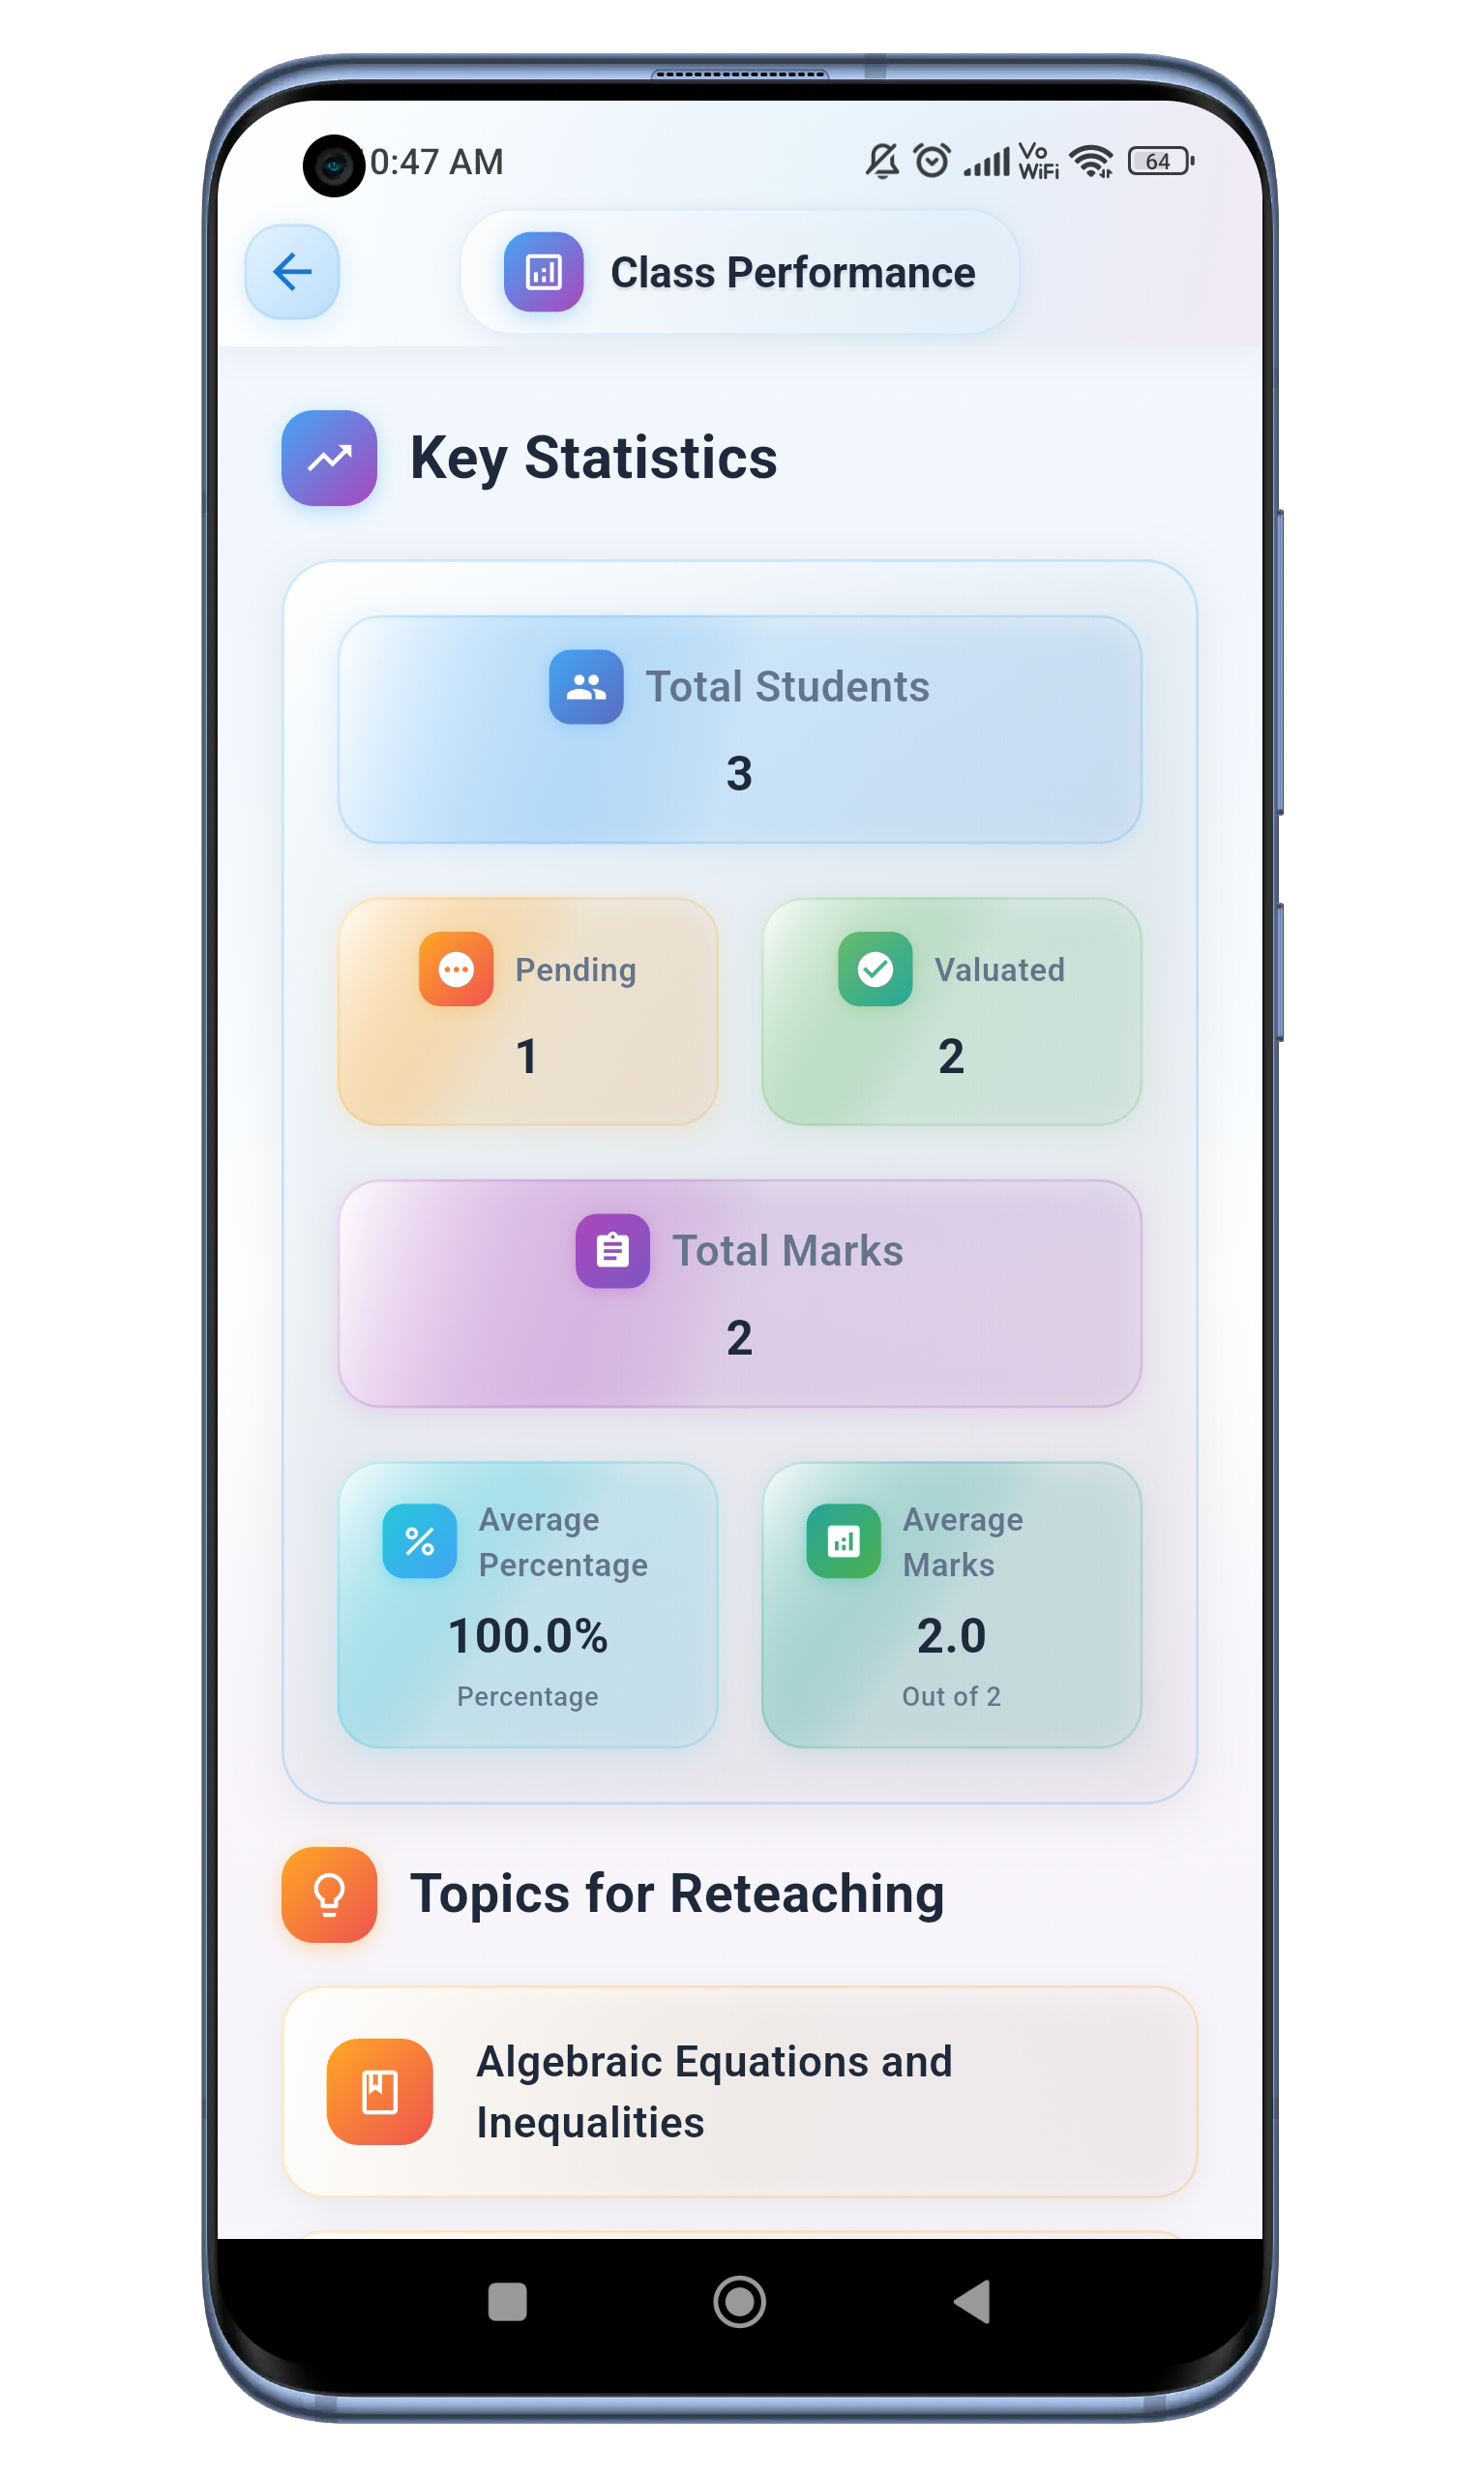
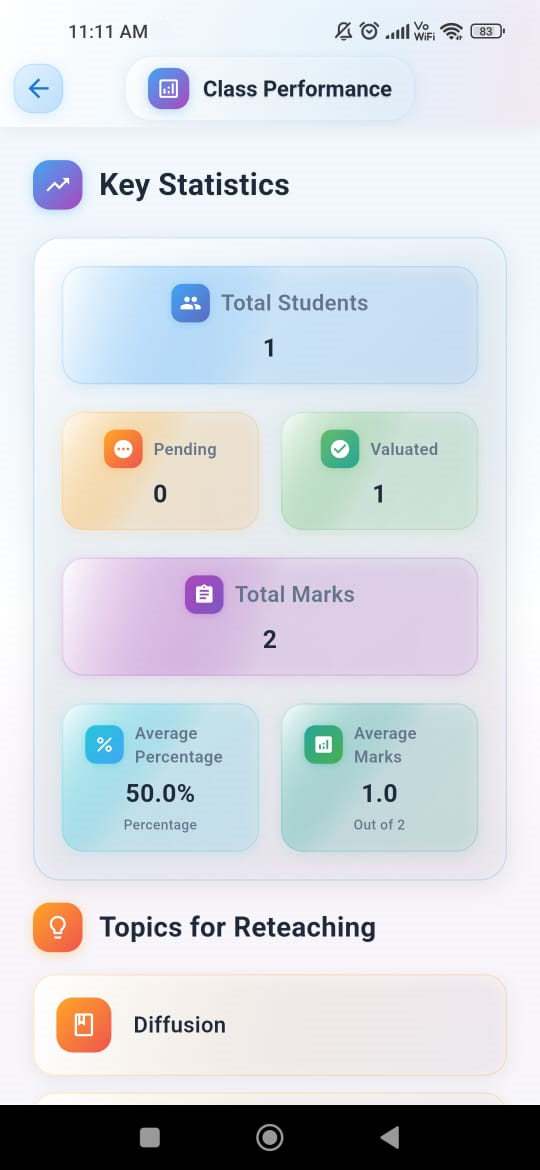
Step 2: Understanding the Key Statistics
Once you are on the "Class Performance" screen, you will see a section titled "Key Statistics". This section provides a high-level overview of the class's performance.
The parameters shown here are:
- Total Students: The total number of students who took the exam.
- Pending: The number of student papers that have not yet been evaluated.
- Valuated: The number of student papers that have been evaluated.
- Total Marks: The total possible marks for the exam.
- Average Percentage: The average score of the class, expressed as a percentage.
- Average Marks: The average score of the class, expressed as a raw score out of the total marks.
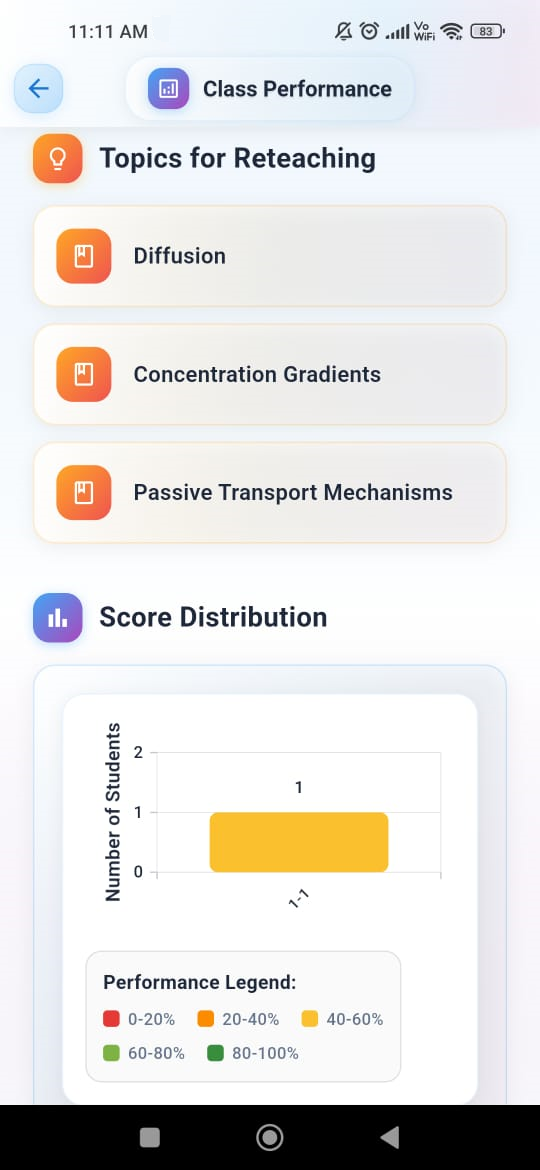
Step 3: Identifying Topics for Reteaching
Below the "Key Statistics" section, there is a section called "Topics for Reteaching". This feature automatically identifies the concepts where students struggled the most.
In the example provided, the topics identified for reteaching are:
- Diffusion
- Concentration Gradients
- Passive Transport Mechanisms
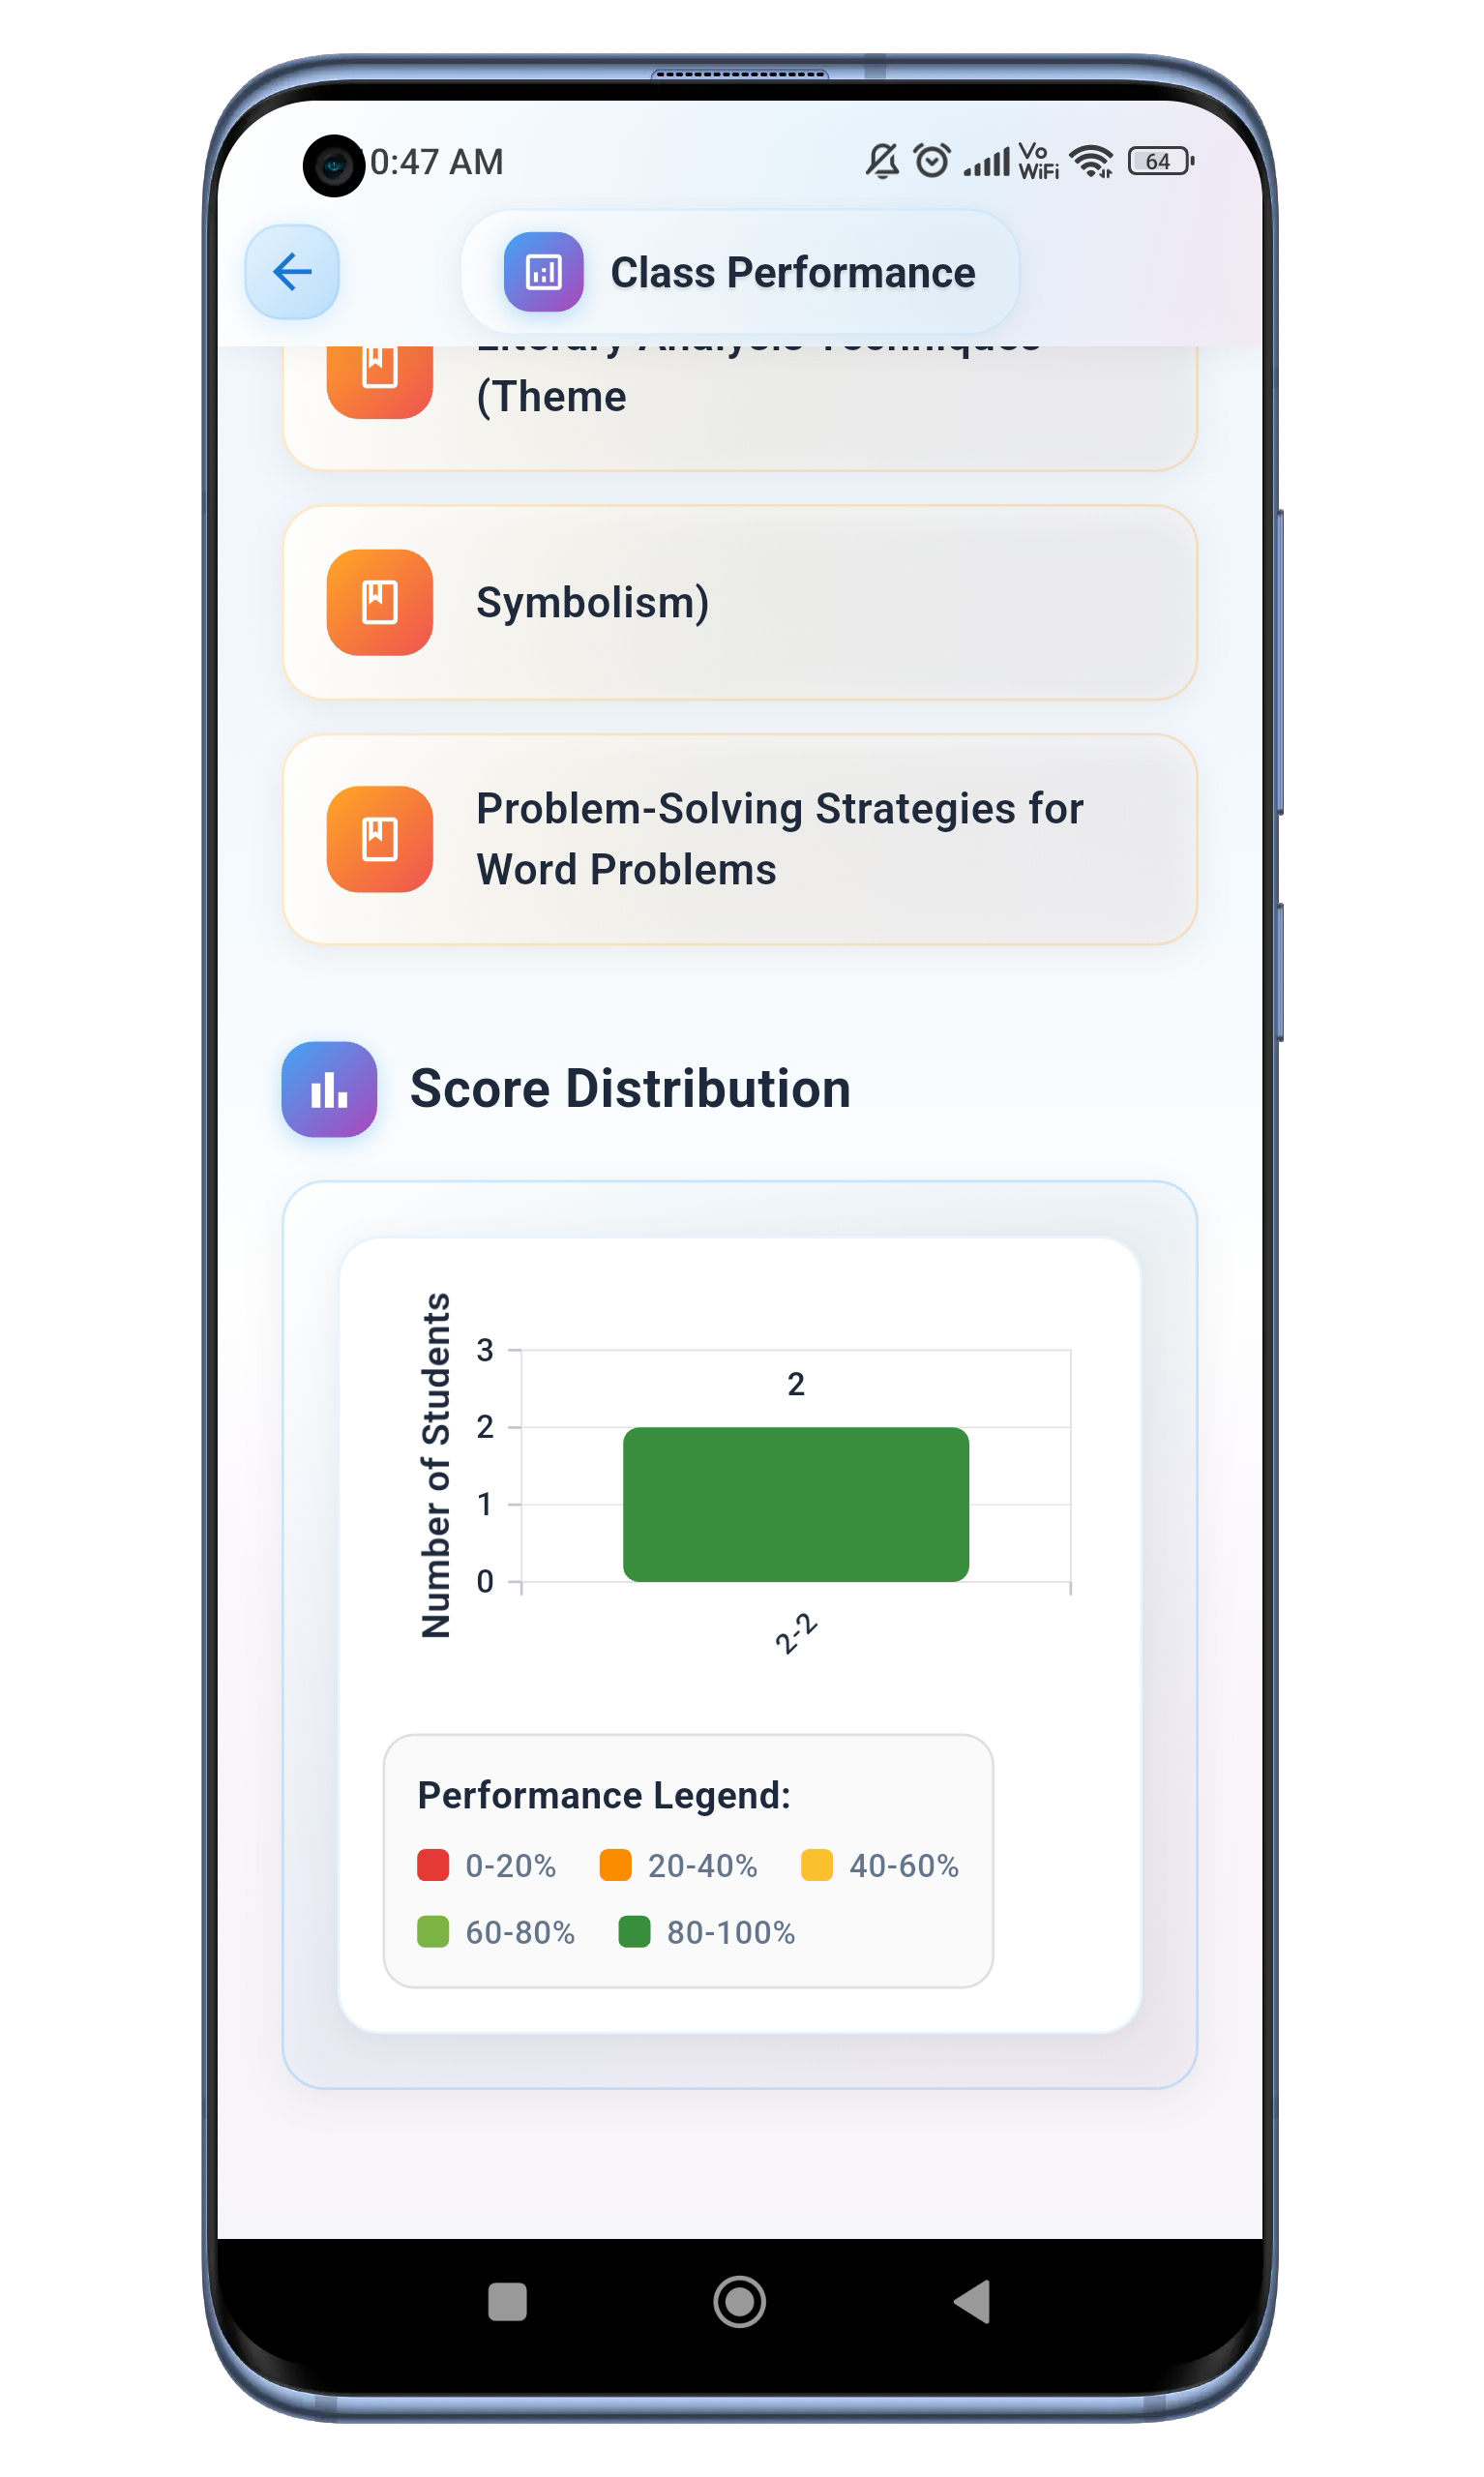
Step 4: Analyzing the Score Distribution
Finally, at the bottom of the screen, you will find a "Score Distribution" graph. This bar chart visually represents how the students' scores are distributed across different performance brackets.
- The x-axis shows the performance brackets (e.g., 0-20%, 20-40%, etc.).
- The y-axis shows the number of students who fall into each bracket.
A legend is provided to help you understand the color coding for each performance bracket:
- Red: 0-20%
- Orange: 20-40%
- Yellow: 40-60%
- Light Green: 60-80%
- Dark Green: 80-100%
By using this screen, you can quickly assess the overall health of your class's performance, identify areas that need more attention, and see how individual students are performing relative to their peers.
Student's Guide
Access Your Portal
Log in to your student portal using credentials to view your evaluated papers.

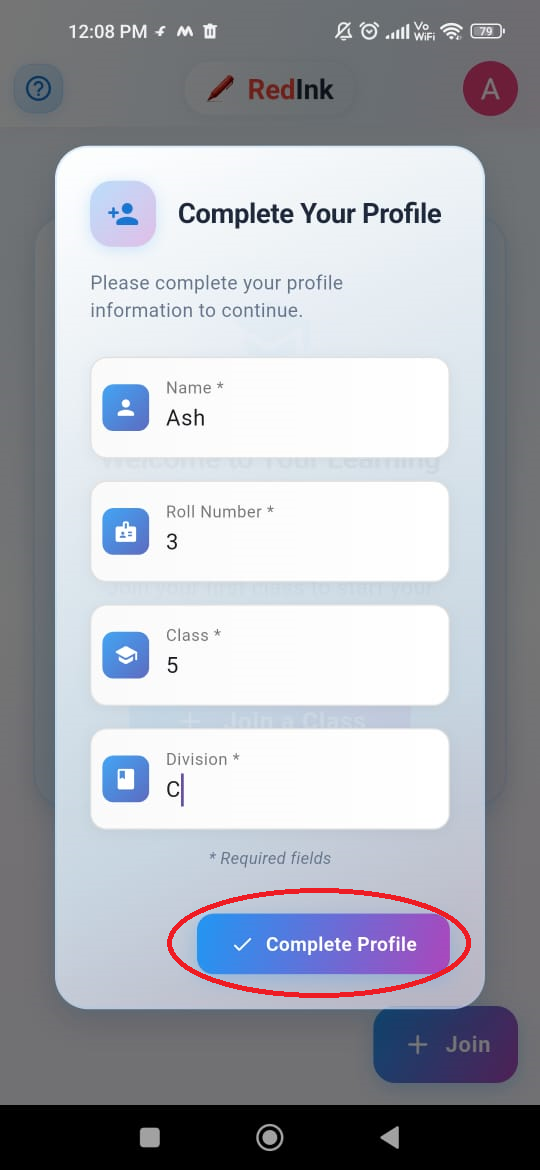
Completing Your Profile
Enter your details: Fill in the required fields:
- Name
- Roll Number
- Class
- Division
Submit the form: After entering all your information, tap the blue "Complete Profile" button at the bottom of the screen.
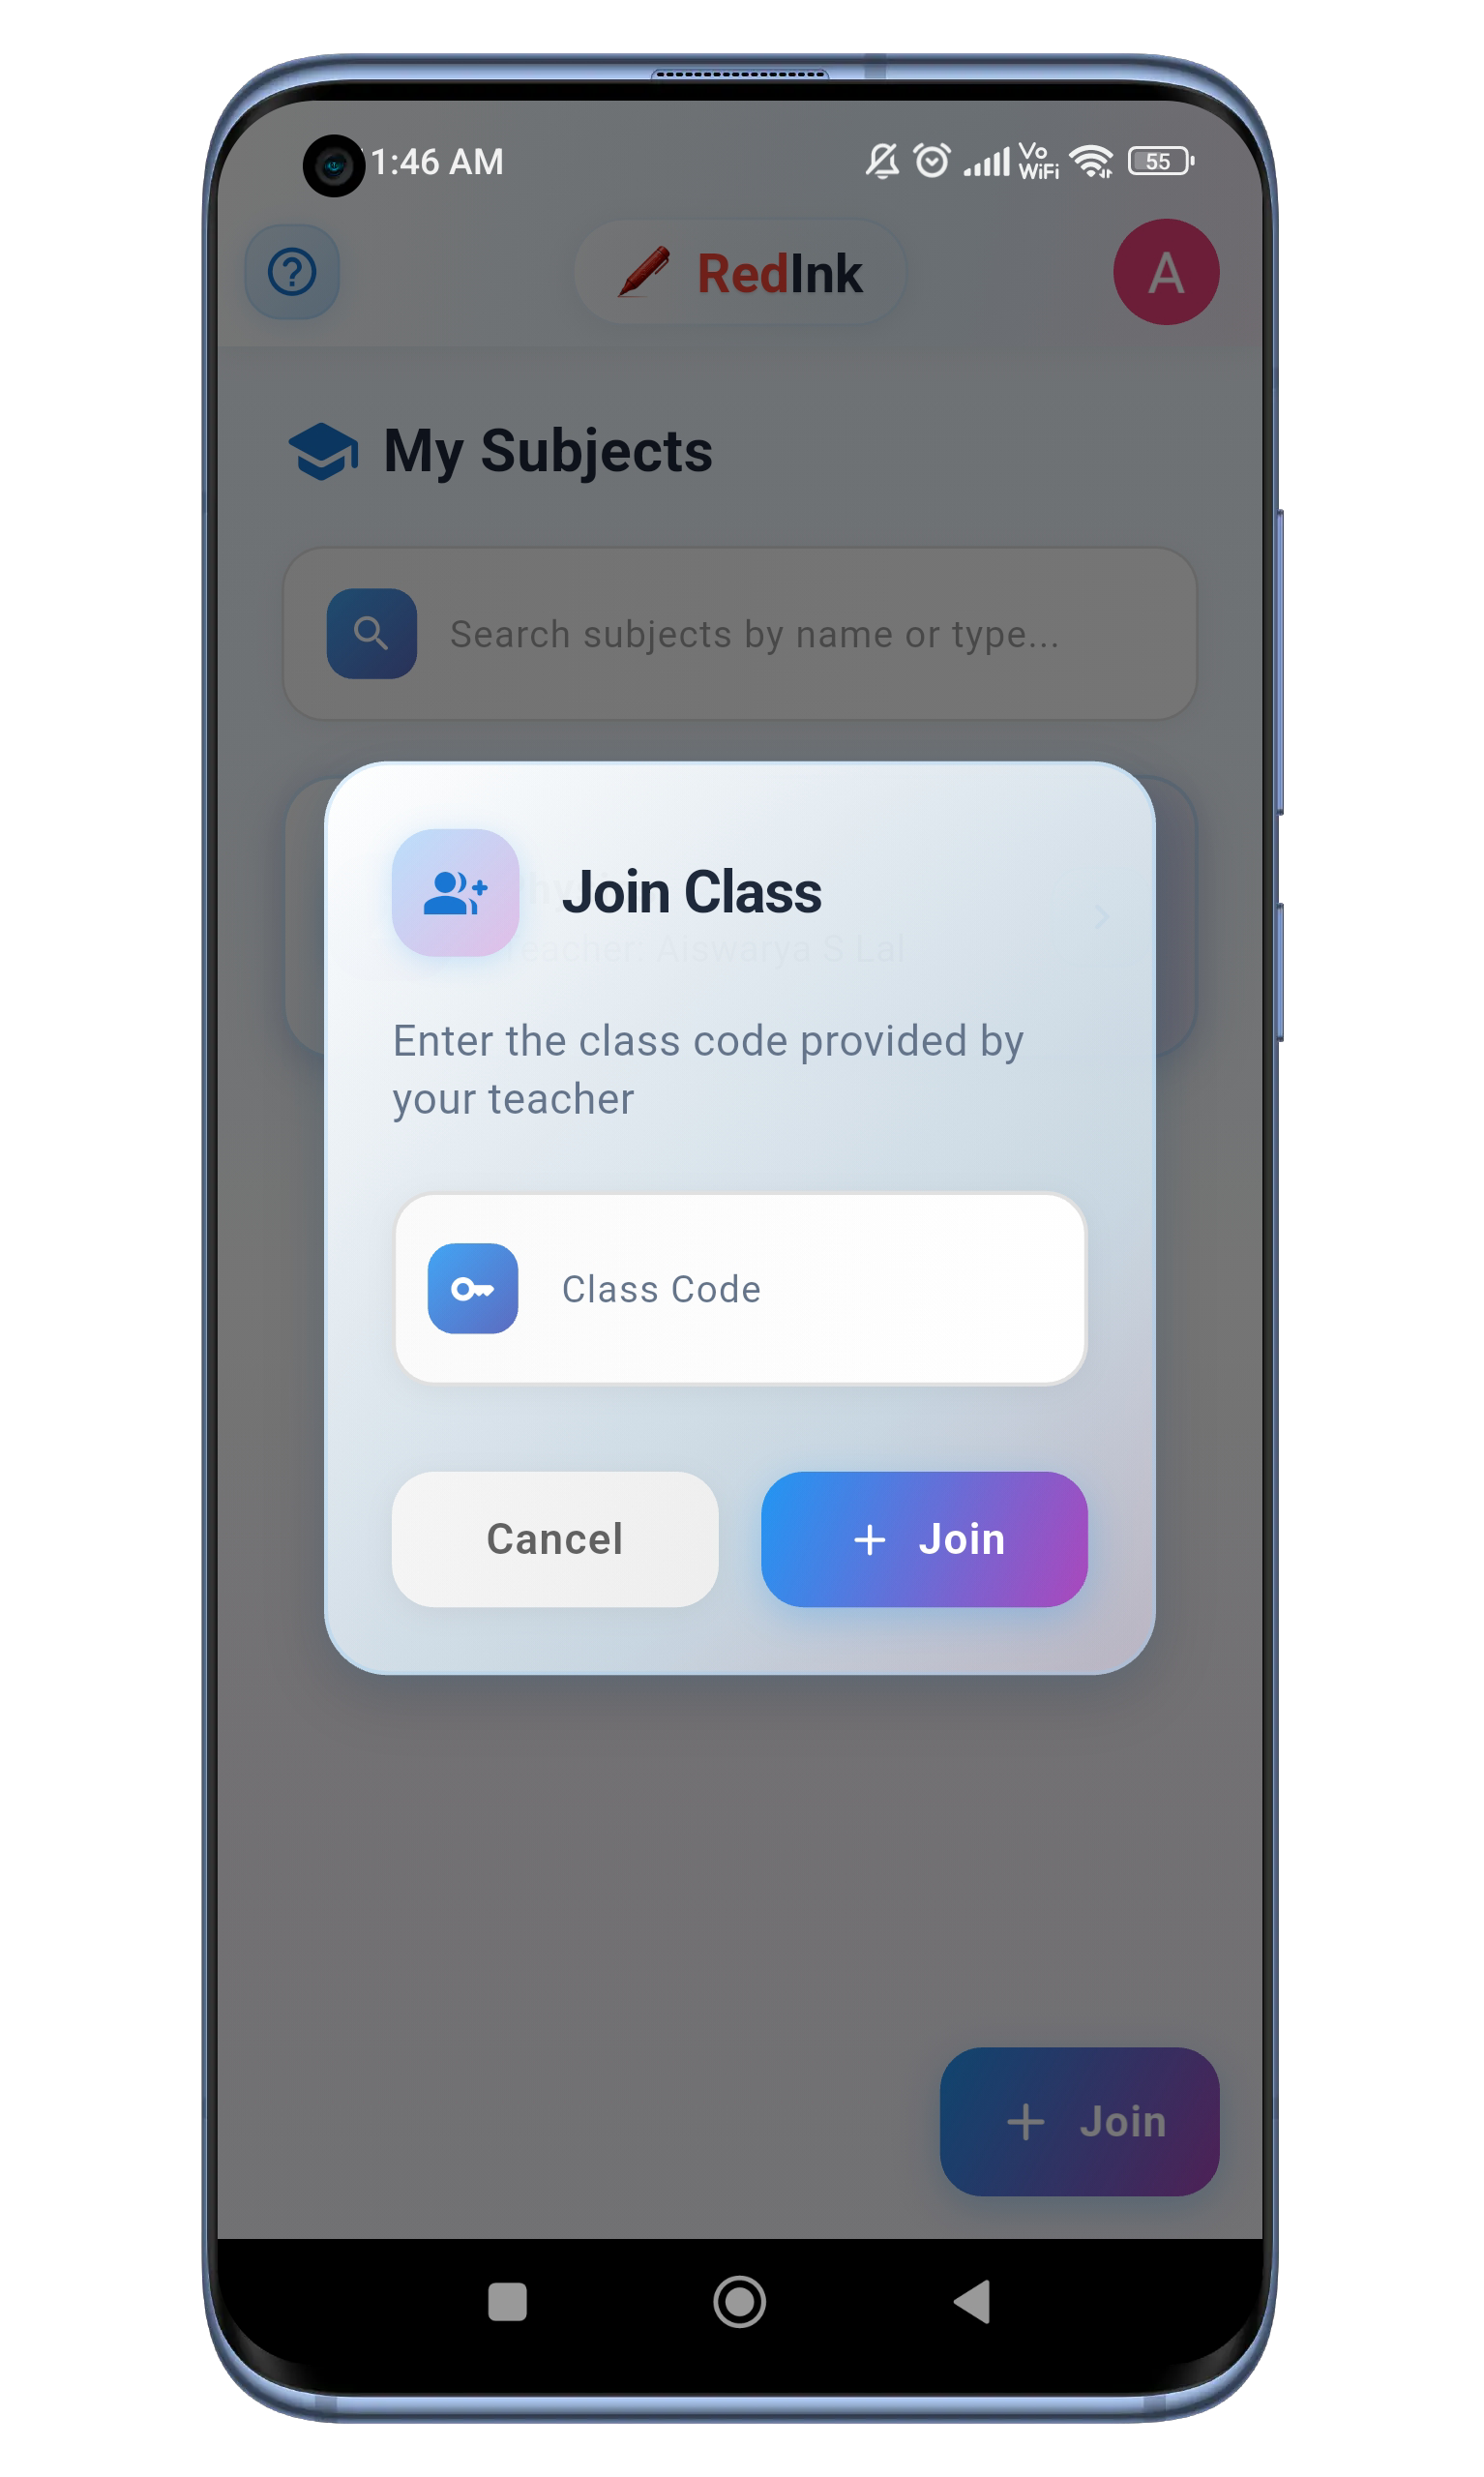
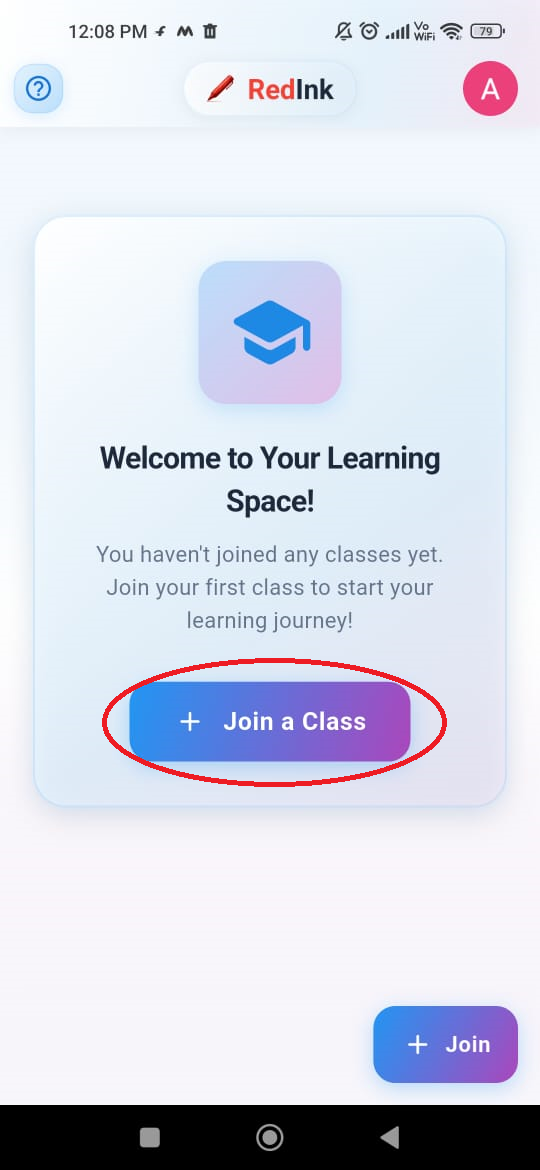
Joining a Class
- Access the "Join Class" screen: From your student dashboard, tap the "+ Join a Class" button. This will open a pop-up window titled "Join Class".
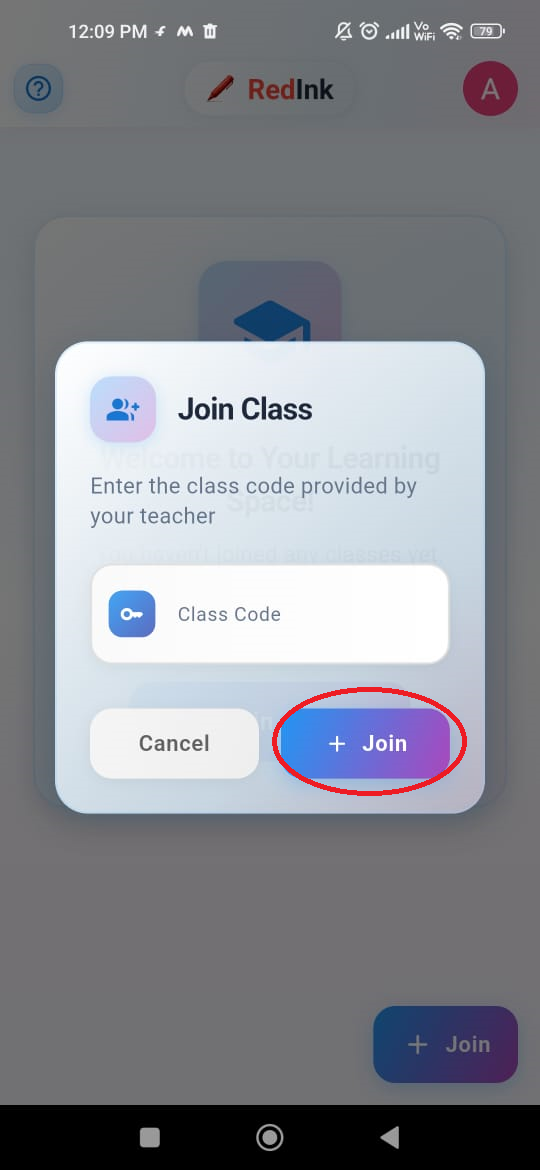
- Enter the Class Code: In the "Join Class" pop-up, enter the unique class code that your teacher has provided you with.
- Join the Class: Tap the blue "+ Join" button to enroll in the class.
You will now be a member of the classroom and can view your exam results.
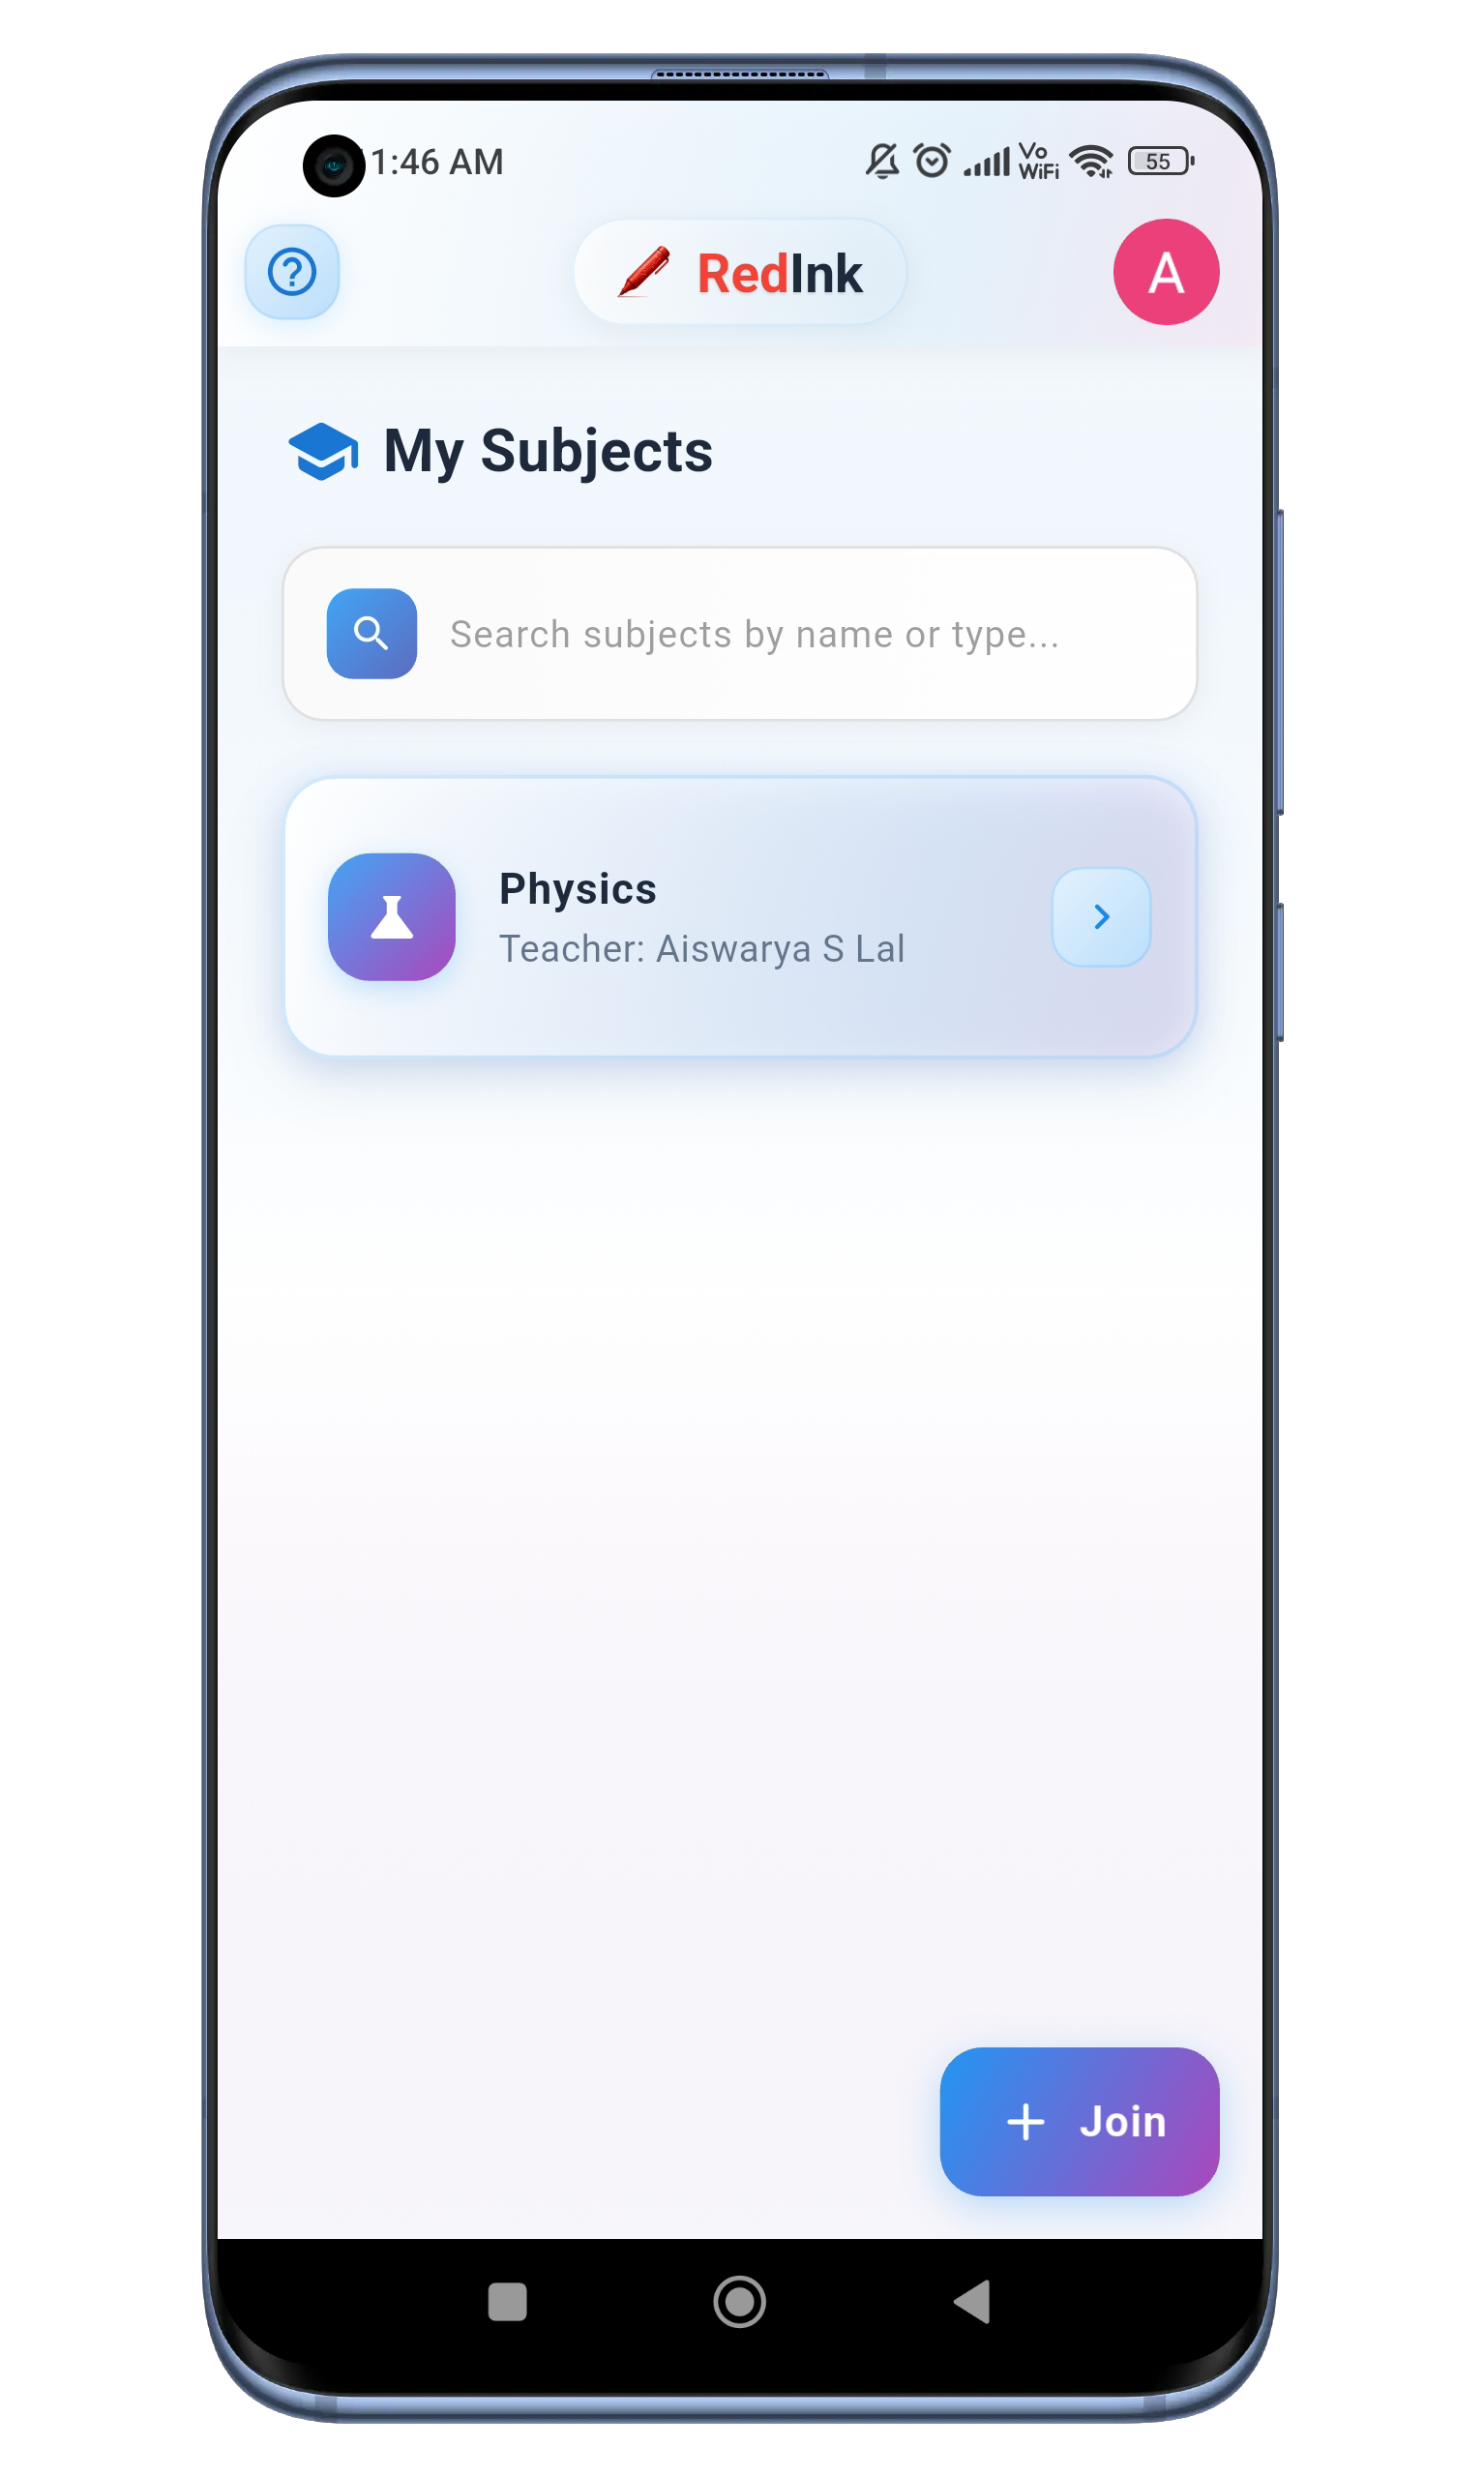
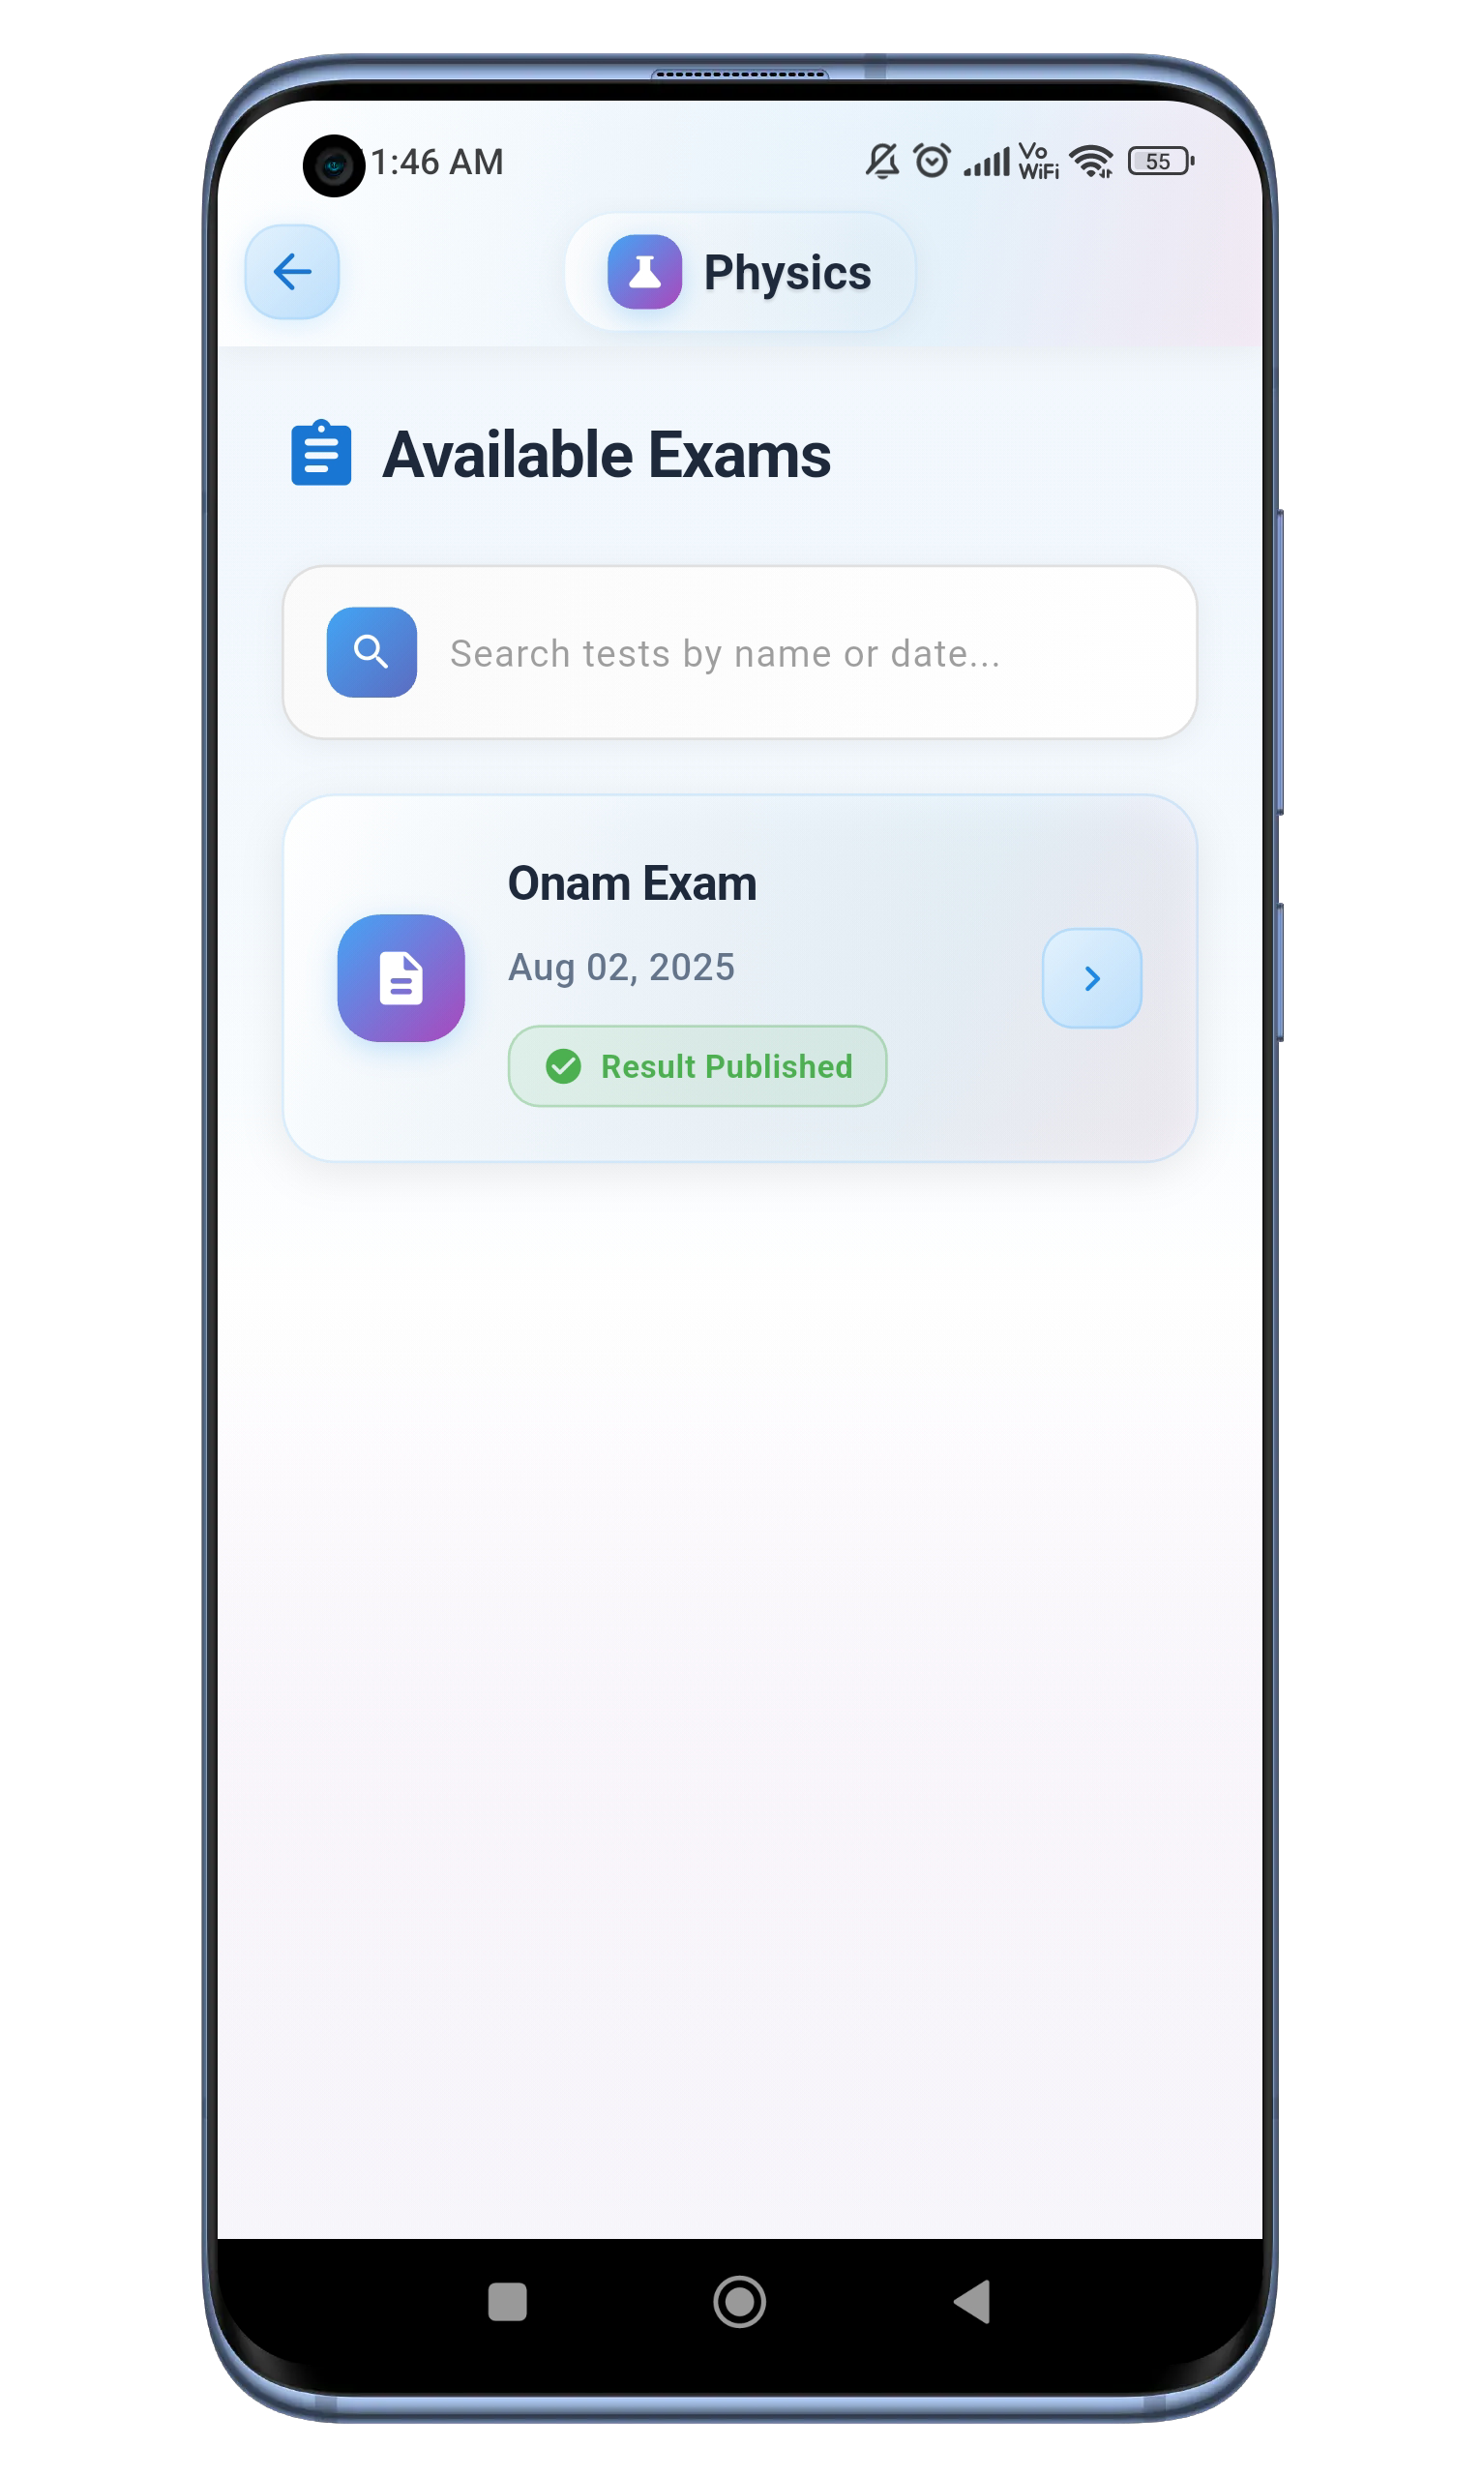
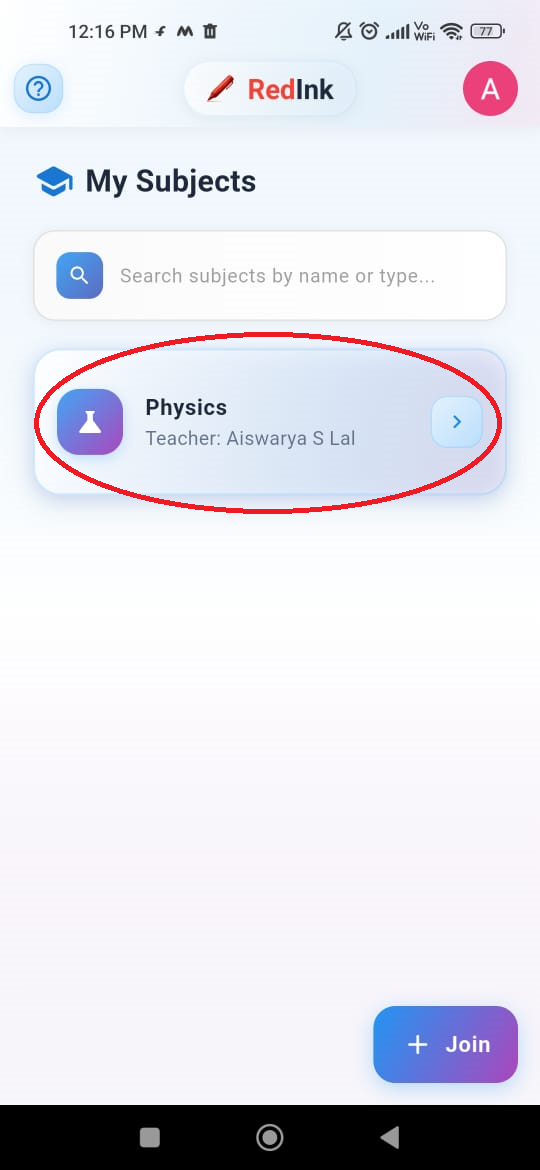
Viewing Your Exam Results
- Select a Subject: From the "My Subjects" screen (your student dashboard after joining a class), tap on the subject for which you want to view results. In this case, tap on "Physics".
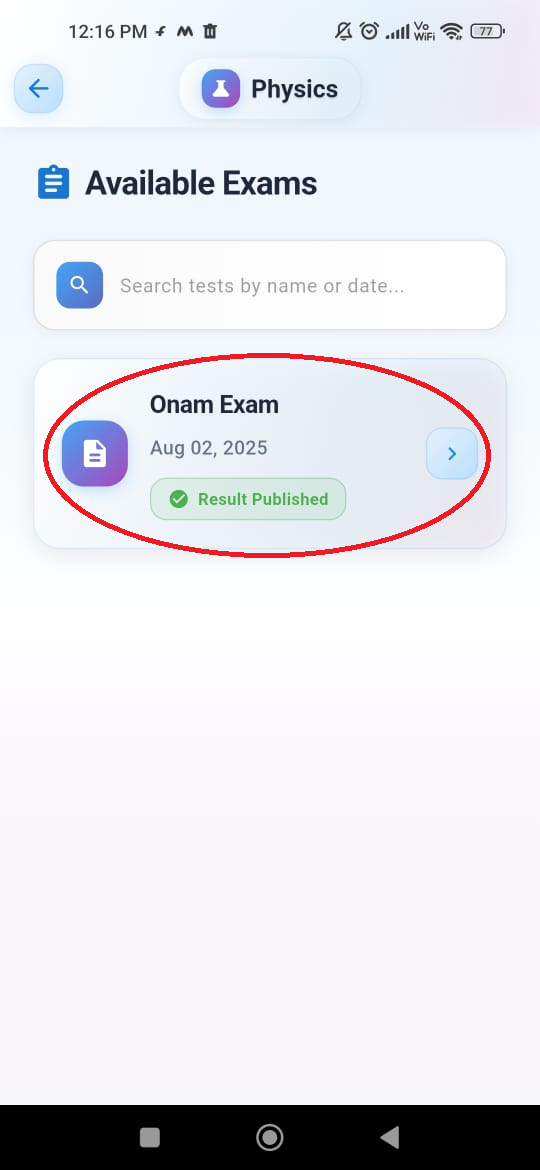
- Go to Available Exams: This will take you to the "Available Exams" screen.
- View Results: Tap on the exam you want to see the results for, such as "Onam Exam". You will be able to view your detailed performance for that exam.
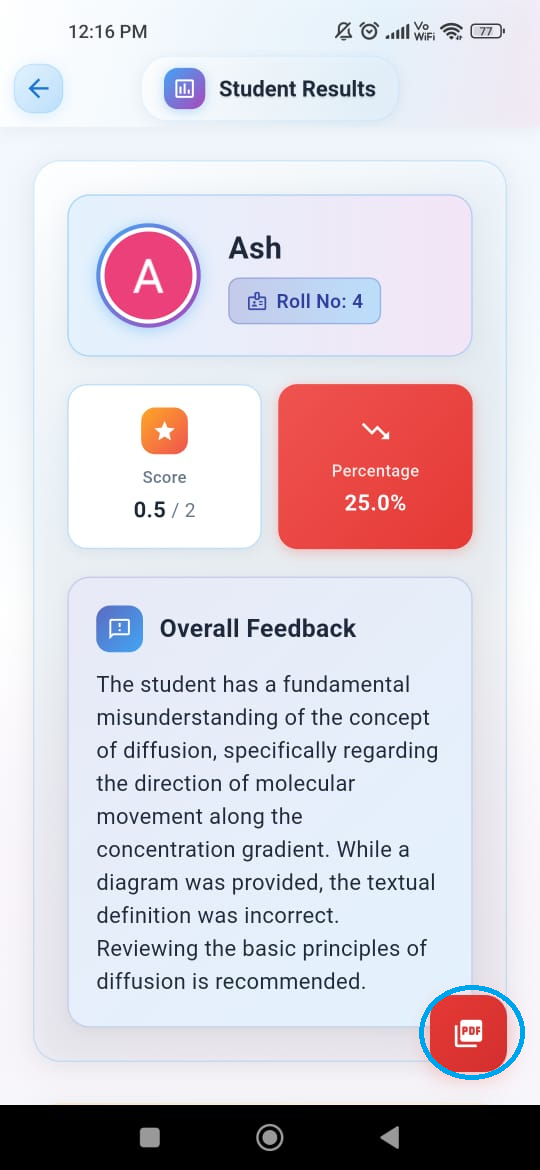
Understanding Your Student Results
This screen provides a detailed breakdown of your performance on an exam.
- View Your Score and Percentage: At the top, you can see your raw score (e.g., 0.5 / 2) and your overall percentage (e.g., 25.0%).
- Read the Overall Feedback: The "Overall Feedback" section provides a detailed explanation from your teacher about your performance. It highlights areas where you excelled or struggled, offering specific recommendations for improvement.
- Download Your Report: To download a detailed PDF report of your results, tap the red circular button with the PDF icon located in the bottom-right corner of the screen.
Adobe Scan Guide
Learn how to properly scan answer sheets for best AI evaluation results
Download Adobe Scan
Install Adobe Scan from your app store. It's free and provides high-quality document scanning.
Position Your Document
Place the answer sheet on a flat surface with good lighting. Ensure the entire document is visible.
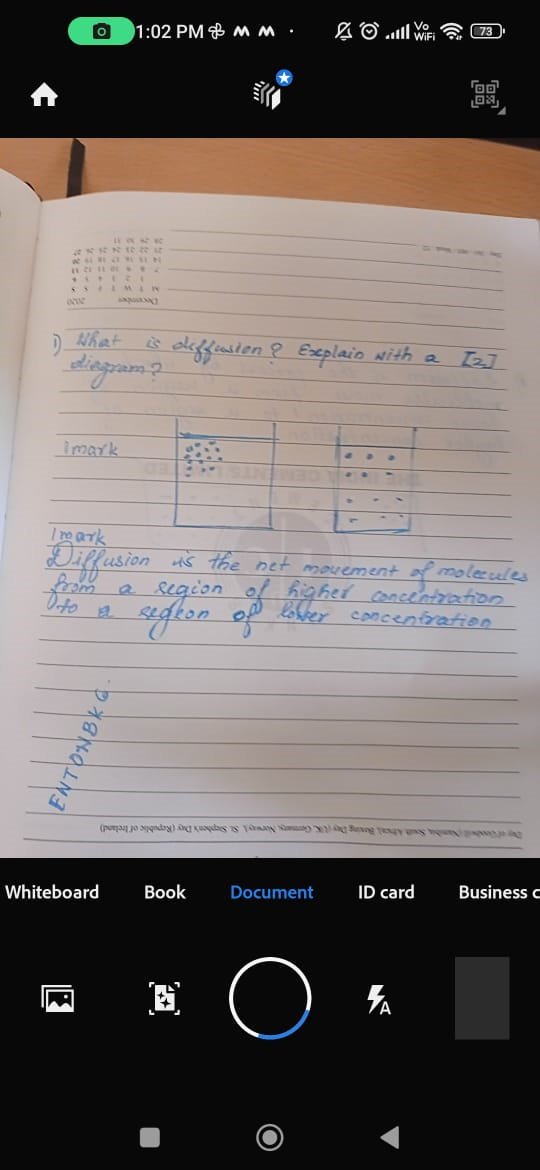
Capture High-Quality Scan
Tap the capture button. Adobe Scan will automatically detect document boundaries and enhance quality.
Add Multiple Pages
For multi-page answer sheets, tap "Keep Scanning" to add more pages. Scan all pages of the answer booklet.
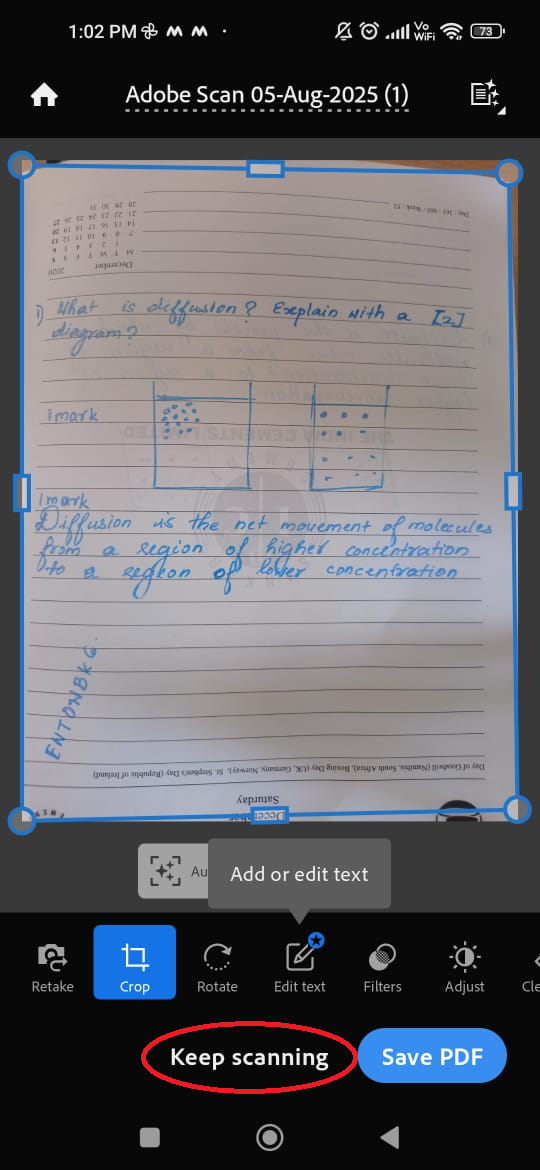
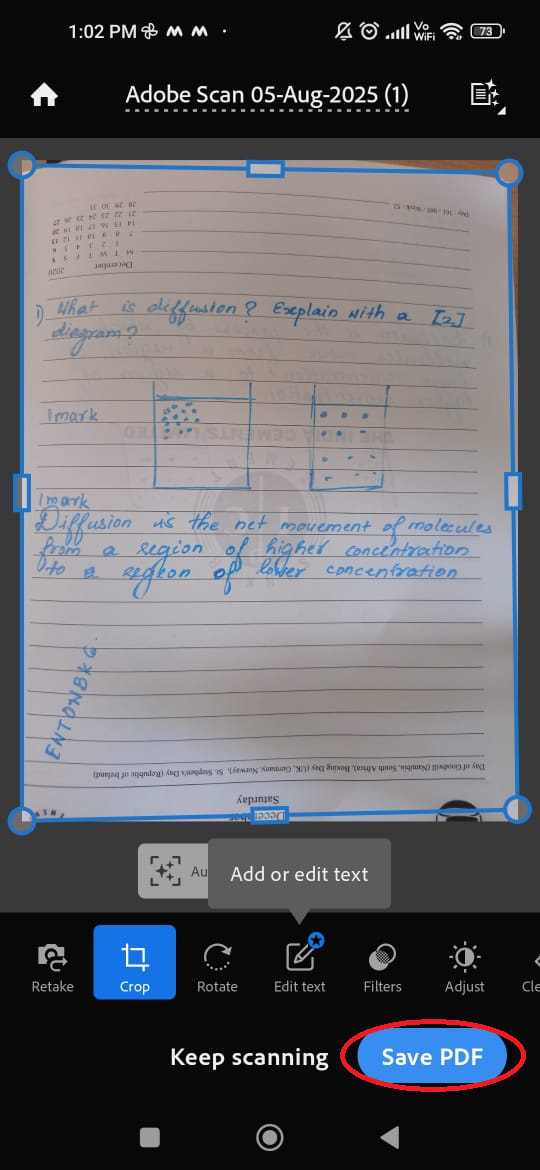
Review & Adjust
Review scanned pages, adjust crop if needed, and ensure text is clear and readable. Once satisfied, tap "Save PDF".
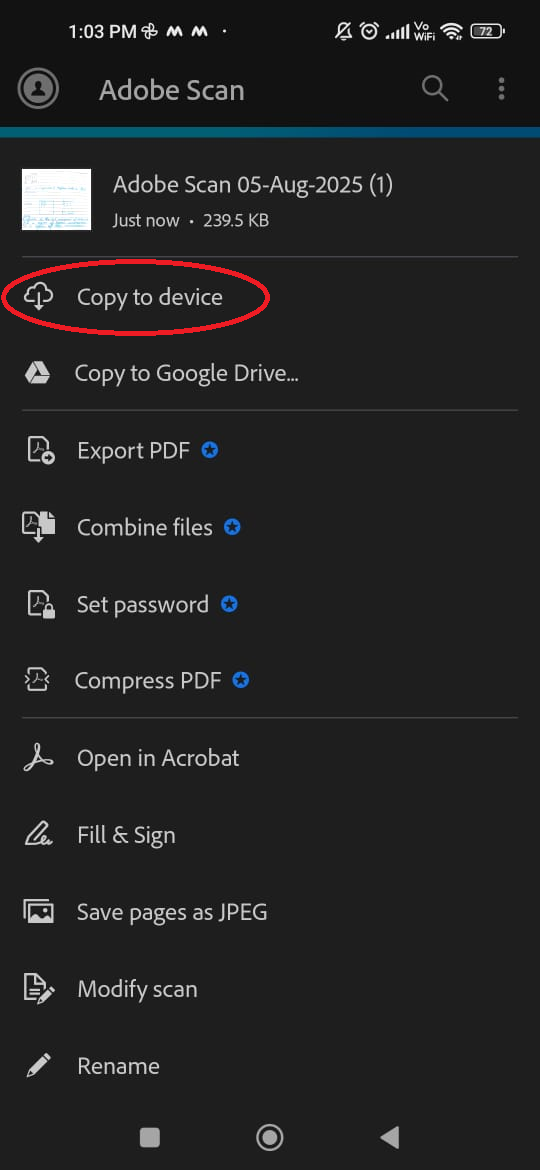
Find More Options
After saving the PDF, you will see a list of your scans. Tap the 'More' (three vertical dots) button next to your recent scan to see more options.

Save to Device
In the menu that appears, select "Copy to device" to save the PDF file to your phone's local storage.
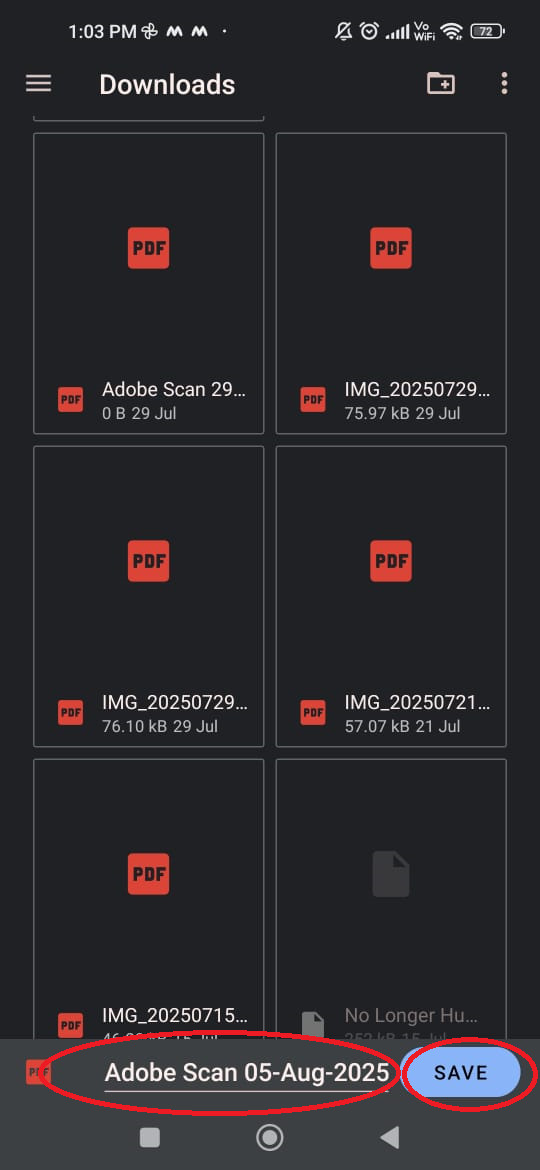
Confirm Save Location
Choose the folder to save the PDF and tap the "SAVE" button to complete the process. The file will now be on your device and ready to upload to RedInk.